Under-cabinet lighting is usually the last thing anyone thinks about and one of the first things that has to be decided. By the time the cabinets are being built, most of the choices are already fixed: where the supply runs, whether there is a channel routed into the cabinet bottom, where the driver will live, and how the whole run is switched.
Done properly it is the most useful light in a kitchen. It puts light on the worktop where you actually chop, read and work, instead of on the back of your own head. Done badly it produces glare, a row of visible dots reflected in a polished backsplash, a strip that dies in year two behind a permanently sealed panel, or a shadow along the front edge of the counter.
This guide covers the planning: placement, colour, control, the electrical coordination, and what has to be settled before cabinetry is finalised. It goes considerably deeper than the general lighting note in the complete guide to custom cabinets and built-in storage, which covers integrated lighting across all cabinetry rather than this one application.
What the light is actually for
Two jobs get confused, and they want different things.
Task light exists so you can see the worktop. It needs to be bright, even along the run, and positioned so your own body does not block it. This is the one that matters, and it is the reason under-cabinet lighting exists at all: ceiling fixtures sit behind you when you stand at the counter, so you work in your own shadow.
Accent light is about how the kitchen looks in the evening. Lower output, often warmer, sometimes used to graze a textured backsplash or to give a low glow when the main lights are off.
Most kitchens want both, which is an argument for dimming rather than for two separate systems. One well-specified run at full output is task light; the same run at twenty per cent is accent light. Where the two genuinely conflict is in colour, and that is covered further down.
Placement: the detail that decides everything
Where the strip sits front-to-back under the cabinet is the single most consequential decision here, and it is the one most often left to whoever is installing on the day.
Mount it at the back, against the wall, and the light travels down the backsplash rather than onto the counter. You get a pleasant wash on the tile and a work surface lit mostly by whatever spills forward. Worse, when you lean in to work, your hands and upper body block what light does reach the counter, so you are back to working in your own shadow.
Mount it hard against the front edge and two problems appear. The cabinet’s own front lip casts a line of shadow along the front of the counter, which looks like a defect and is surprisingly noticeable. And because the emitter is at the edge of the cabinet, it is in your sightline when you stand back: you see the light source itself rather than the lit surface.
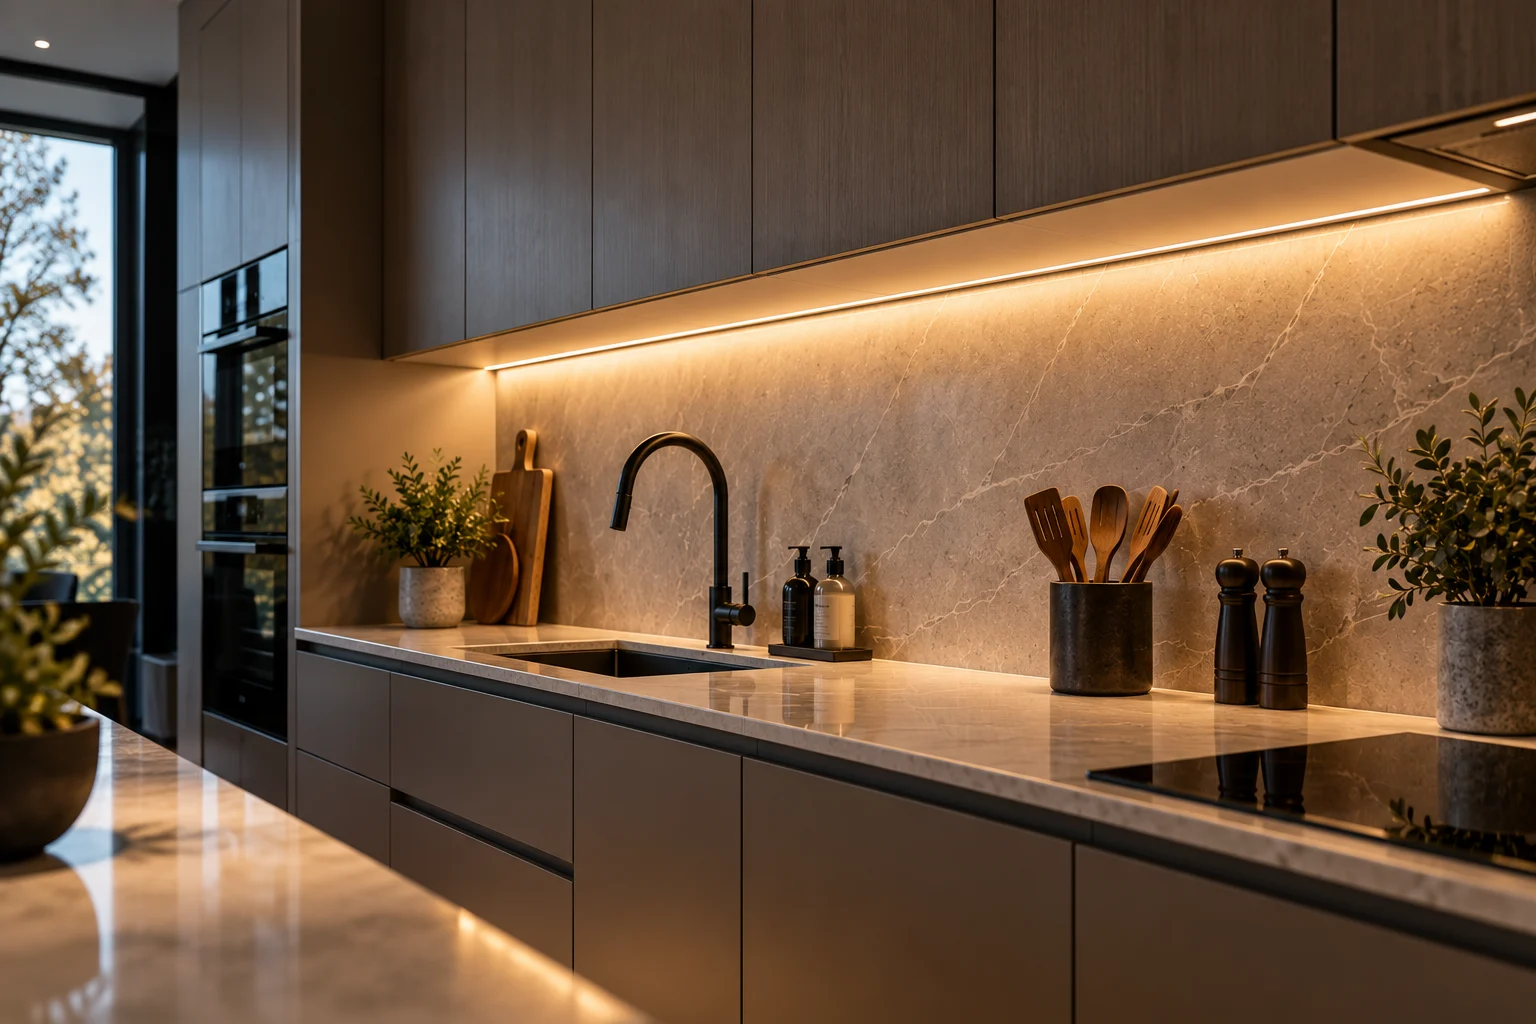
The workable position sits a short distance back from the front edge. Guidance from lighting suppliers commonly lands around one to two inches, or roughly fifty to sixty millimetres, in from the front. That is far enough back that the lip does not throw a shadow and the emitter stays out of direct view, and far enough forward that the light reaches the front of the counter before your body can block it. Aim the emitters straight down rather than angled at the wall.
Treat those figures as a starting point rather than a rule. The right setback depends on how deep the cabinet is, how far the doors and any lip project, and how high the cabinet sits above the counter. A deeper cabinet or a heavier door profile shifts it. The reliable method is to check it on the actual cabinet before the channel is routed.
Coverage along the run
A strip that stops short of the cabinet ends leaves dark patches at the joins, which reads as a series of pools rather than a lit worktop. Run the lighting as close to the full width of each cabinet as the construction allows, and keep the gaps between adjacent runs small.
Continuous lighting across the whole elevation looks calmer and works better for task light. Segmented runs, one per cabinet, are easier to wire and easier to replace, but the gaps show on a reflective counter. If the kitchen has a polished stone or quartz worktop, favour continuity: every interruption in the strip appears twice, once in the light and once in the reflection.
Strip, profile and diffuser
Bare LED tape stuck to the underside of a cabinet is the cheap version, and it shows. Two problems — you see individual diodes as a row of dots, and the tape has nowhere to shed heat, which shortens its life.
An aluminium profile with a diffuser lens solves both. The lens blends the diodes into a continuous line, and the metal carries heat away from the strip, which is the main factor in how many years it lasts before it dims or fails. This is not an upgrade so much as the baseline for work that is meant to last.
Profiles come in two arrangements, and the choice belongs with the cabinet drawing rather than with the electrician. A surface-mounted profile screws to the underside of the cabinet and projects a few millimetres. Simple, retrofittable, and visible if you crouch. A recessed profile sits in a groove machined into the cabinet bottom so the lens finishes flush. Cleaner, invisible in use, and it has to be specified before the cabinets are made because the groove is a shop operation.
Where cabinets sit on a light rail or have a front lip deep enough to conceal a surface profile, the two options look much the same from standing height. Where they do not, the recessed version is the one that disappears.
One point on density: strips are sold at different numbers of diodes per metre, and a higher density gives a smoother line behind a diffuser, particularly in a shallow profile where the lens sits close to the emitters. If the profile is shallow, ask about density before ordering.
How much light, and how to judge it
Brightness is the question people ask first and the hardest one to answer from a catalogue, because the number on a strip specification describes output per metre in laboratory conditions rather than what lands on your counter.
Four things sit between the strip and the worktop, and each takes some of it. The diffuser lens, which trades a little output for an even line and is almost always worth it. The distance from the cabinet underside to the counter, which varies more between kitchens than people assume. The colour of the worktop, since a pale quartz bounces light back into the room while a dark honed granite absorbs most of it. And the colour of the cabinets and backsplash, for the same reason.
Two kitchens with identical strips can therefore end up looking quite different. A dark scheme generally needs more output than a pale one to reach the same working brightness, which is worth saying at specification stage rather than after the counter goes in.
The practical approach is to specify slightly more output than you think you need and put it on a dimmer. Over-bright and dimmable is a solved problem. Under-bright is not fixable without replacing the strip, which in a recessed profile means taking the lighting out of a finished kitchen.
Where a supplier or showroom can demonstrate a sample at the actual distance above a sample of your chosen worktop, that tells you more than any specification sheet. It is a reasonable thing to ask for on a kitchen of any size.
Colour: the decision people regret
Two separate properties get muddled here, and only one of them is about warmth.
Colour rendering
Colour rendering describes how faithfully a light source shows colour. Under a kitchen wall cabinet it has a practical consequence: this is the light you judge food by. Raw chicken, a browning sauce, whether the greens are still good. A poor source flattens those distinctions and makes everything look slightly grey.
Specify a high colour rendering index, ninety or above. The cost difference at the strip is modest and it is the property you will notice most, every day, for as long as the kitchen lasts.
Colour temperature
Temperature sets whether the light reads warm or cool. Very warm sources push everything yellow, which is flattering in a sitting room and unhelpful over a chopping board. Very cool sources read clinical in a room people also eat in.
Most kitchens land in the neutral middle. The more useful discipline is consistency: whatever temperature you choose, every fitting visible in the same sightline should match it. A neutral under-cabinet strip beside warm ceiling downlights is one of the most common and most jarring mistakes in a finished kitchen, and it is completely avoidable by writing one temperature into the specification for every fitting in the room.
Tunable strips, which shift temperature on demand, exist and solve the task-versus-evening conflict elegantly. They cost more, need compatible control gear, and are worth it mainly in a kitchen that genuinely doubles as an evening room.
Drivers: the part nobody plans for
Every low-voltage run needs a driver converting mains supply to the strip’s voltage. It is a physical object roughly the size of a small book — it generates some warmth, and it is the component most likely to fail first.
Three questions settle it, and all three belong on the cabinet drawing.
Where does it live? Inside a wall cabinet, in the void above them, in a base unit, or in a nearby service space. Wherever it goes, it needs ventilation and it needs to be reachable without dismantling joinery. A driver sealed into a permanent void turns a twenty-minute swap into carpentry, and this happens often enough that it is worth making a condition of sign-off.
One driver or several? A single driver for the whole kitchen is tidy but makes one failure dark everywhere. Separate drivers per run cost a little more and localise the problem. In a long kitchen, separate drivers also help with the next question.
How long is the run? Low-voltage strips lose voltage over distance, and the far end of a long run goes visibly dimmer than the near end. The usual remedy is to choose the higher of the two common strip voltages, feed the run from both ends, or split it across more than one driver. As a working guide, a twelve-volt strip is comfortable on shorter runs, while a twenty-four-volt strip carries roughly half the current for the same output and holds up over roughly twice the distance from a single feed. Twenty-four volt also gives more freedom in where the driver sits, since the feed cable to the start of the strip can be longer.
Match the strip and the driver voltage exactly. Mismatched, the strip either will not light or will be damaged.
Switching and dimming
Put the under-cabinet lighting on its own switch. It is the light you want on by itself while making coffee at six in the morning, and tying it to the ceiling circuit removes that entirely. Where the kitchen has an island or a separate prep area, a second switch for that zone is usually worth the additional wiring.
Switch position wants a moment’s thought too. The useful place is where you enter the working area or at the end of the run you use most, not grouped with every other switch by the door because that was tidiest on the drawing.
Dimming has to be chosen alongside the strip and the driver, not afterwards. Compatibility between a given dimmer and a given driver is not automatic, and mismatches produce flicker, an audible buzz, a range that will not go low, or lights that drop out entirely near the bottom of the dial. Manufacturers publish compatibility information for exactly this reason, and checking it before ordering costs nothing.
Motion or door sensors are common in cabinetry but less useful here than people expect. Under-cabinet light is task light, and you want it on while you stand still and chop — precisely when a motion sensor decides you have left.
How this lands on the cabinet order
Several of these decisions are shop operations, which is why under-cabinet lighting cannot be a finishing-stage choice.
- A recessed profile needs a groove machined into the cabinet bottom, at the agreed setback from the front edge.
- Cable has to pass between cabinets, which means holes drilled in the right places rather than improvised on site.
- A light rail or a deeper front lip, if you want one to conceal a surface-mounted profile, is part of the cabinet design.
- The driver location has to be a real place in a real cabinet, with access.
- A supply has to arrive at that location, which means it is roughed in before the walls close.
Retrofitting into finished cabinets is possible and it is a compromise. You can surface-mount a profile and run cable in trunking, and it will work, but the flush detail and the concealed cabling are gone. For where this decision sits among the other milestones in a renovation, what to choose before a renovation starts sets out the sequence.
Backsplash, counter and how the light behaves
The surfaces around the light change what it does, and this is worth thinking about while both are still being chosen.
A polished stone or quartz worktop reflects. Any interruption in the strip, any visible diode, any mismatch between adjacent runs appears again in the reflection, at eye level. This is the strongest argument for a diffused, continuous run rather than individual pucks or segmented strips.
A gloss or mirrored backsplash does the same thing vertically, and can bounce the emitter straight back at you. A honed or matt surface absorbs more and is far more forgiving.
Textured surfaces work the other way. Stone, brick, fluted tile and anything with relief look considerably better when lit from close above at a shallow angle, because the grazing light picks out the texture. If the backsplash is textured and you want that effect, it argues for a position slightly further back than pure task lighting would suggest, and the compromise is worth naming out loud rather than discovering after installation.
One dimension worth confirming early: the distance between the worktop and the underside of the wall cabinets. It sets how far the light has to travel, how the beam spreads across the counter depth, and whether the emitter is in your eyeline when seated at an adjacent island.
The gaps: sink, hood and open shelving
Under-cabinet lighting only exists where there are cabinets above, and most kitchens have at least two stretches of worktop with nothing overhead. Those gaps are where the lighting plan usually falls apart.
Over the sink there is frequently a window, or simply a break in the run. It is also one of the two places you most need light, since washing up and prepping both happen there. The answer is normally a dedicated ceiling fitting positioned slightly forward of the sink rather than directly overhead, so you are not standing in your own shadow. That is a ceiling decision, made at the same time as the under-cabinet plan and matched to it in colour temperature.
Over the hob, the extraction hood usually carries its own light. Two things are worth checking. Whether its colour temperature matches the rest of the kitchen, because hood lighting is often supplied at whatever the manufacturer chose and can be noticeably cooler or warmer than everything around it. And whether it is bright enough to cook by, since some are closer to a night light.
Open shelving in place of wall cabinets removes the under-cabinet option entirely for that stretch. If the design has open shelves above a working counter, the light has to come from the ceiling or from the shelves themselves, and a strip on the underside of a floating shelf needs the shelf detailed to conceal it. That is a joinery decision, not a lighting one, and it has to be raised while the shelf is being designed.
The same logic applies to an island or a peninsula, which almost never has anything above it. Pendants or downlights cover it, and they should share the kitchen’s colour temperature and ideally its dimming circuit, so the room reads as one space in the evening rather than as three lighting schemes meeting.
Mapping the counter and marking every stretch that has no cabinet above it takes about five minutes and catches most of these before they become obvious on site.
Electrical coordination
Under-cabinet lighting sits across two trades, which is why it falls through the gap so often. The cabinetmaker owns the groove, the cable routes and the driver housing. The electrician owns the supply, the switching, the dimmer and the connection. Neither owns the coordination between them by default.
Settle these before the walls close: where the supply terminates, which switch controls what, where the dimmer goes, where the driver sits and how it is reached, and how cable passes between cabinets. A kitchen is also a wet area with its own requirements for circuits and protection near sinks and appliances, which is a matter for the licensed trade rather than a design preference.
ZaRRuS is not an electrical contractor. Electrical work is carried out by qualified independent licensed and insured trades, engaged and coordinated as part of the project, and their requirements are established at design stage because they frequently determine what a lighting idea allows. For how electrical contracting is licensed and inspected in Ontario, and what to verify before hiring, see how to choose an electrician for your renovation.
The lighting next to it
Once a driver and a switched circuit exist under the wall cabinets, three related pieces of lighting become cheap to add, and each is far easier now than later.
Inside glass-fronted cabinets. A short strip in the top of a glazed unit turns it from a dark box into something worth putting glass on. It can usually run from the same driver, though it wants its own switch, since display lighting and task lighting are rarely wanted together.
Inside deep or dark cabinets. A pantry or corner unit you cannot see into benefits from an interior strip on a door switch or sensor. A sensor genuinely suits this job, because the light is only wanted while the door is open, which is the opposite of the task-lighting case.
Plinth lighting. A strip in the recess under the base units lifts the run visually and gives a low, pleasant light in the evening, as well as making the kitchen navigable at night without turning anything else on. Two cautions: it sits at floor level where dust and water collect, so specify accordingly, and it looks best on its own dimmer rather than tied to the counter lighting.
None of these is essential. All three cost noticeably less to include while the supply and driver are being planned than to retrofit into a finished kitchen, so each is worth a decision now even if the answer is no.
Installation details that show up later
A few practical points separate an installation that still looks right in five years from one that does not.
How the profile is fixed. Mechanically fixed with screws or clips is the durable answer. Adhesive-backed tape alone, particularly in the warm air that rises off a hob or a dishwasher, tends to let go eventually, and a strip hanging off the underside of a cabinet is both ugly and awkward to re-fix without marking the finish.
How joins are made. Soldered connections are more reliable than push-fit connectors, which can work loose or corrode in a kitchen atmosphere over time. Where connectors are used, they should sit somewhere reachable rather than buried behind a fixed panel.
Cleaning. The underside of a wall cabinet above a hob collects grease, and so does anything mounted there. A diffuser lens can be wiped; bare tape and exposed diodes are much harder to clean and gradually dim as a film builds up. This is a small argument for a profile that you will appreciate about eighteen months in.
Replacement. LED strip has a long life but it is not permanent, and it dims gradually rather than failing outright. Ask at specification stage how a strip would be replaced later. In a recessed profile with a removable lens, it is straightforward. Where the strip has been adhered into a groove and the cable routed through sealed cabinetry, it is considerably less so.
Who does what. Establish before the work starts whether the cabinetmaker or the electrician is supplying the strip, the profile and the driver, and who is responsible if a component fails inside the warranty period. This is the single most common source of argument on an otherwise finished kitchen, and it is resolved in one conversation at the beginning.
Where under-cabinet lighting goes wrong
- Deciding it after the cabinets are ordered, when the groove, the cable routes and the driver location were all shop decisions.
- Mounting at the back, so the backsplash is lit and the counter is not.
- Mounting hard at the front, so the cabinet lip draws a shadow line along the counter edge.
- Bare tape with no profile or diffuser, giving visible dots and a short life.
- A driver sealed somewhere unreachable.
- One long low-voltage run fed from a single end, dimmer at the far side.
- A colour temperature that does not match the ceiling fittings in the same room.
- Low colour rendering, so food never quite looks right.
- A dimmer chosen after the driver, then flickering.
- No dedicated switch, so the task light only works when the whole ceiling is on.
- Segmented runs with visible gaps above a polished counter.
- Motion sensors on task lighting.
Kitchens across Toronto and the GTA
Two regional conditions change the brief more than people expect.
Daylight is the first. Between late autumn and early spring, a great many GTA kitchens are being used in the dark at both ends of the day, and a north-facing kitchen may never get useful working daylight at all. Under-cabinet lighting stops being a refinement in that context and becomes the primary work light for months at a time, which justifies spending on colour rendering and on getting the placement right rather than treating it as trim.
Older housing in Toronto brings the second. Kitchens in semis and row houses are frequently narrow, with wall cabinets close to where people stand, so a badly placed emitter is directly in the eyeline rather than tucked away above a deep counter. Retrofits are also common here, and in a kitchen where the cabinets are staying, the honest conversation is about what a surface-mounted profile can and cannot achieve compared with a flush detail that needed a groove.
Newer builds in Vaughan, Richmond Hill and Markham present the opposite problem. Long cabinet runs make voltage drop a genuine design question rather than a theoretical one, and the same runs make any inconsistency between segments obvious across a wide elevation. These kitchens also tend to open onto living and dining areas, so the under-cabinet light is visible from the sofa in the evening. That raises the value of dimming and makes a mismatch in colour temperature between the kitchen and the adjoining space far more noticeable than it would be in a closed room.
You can see the areas covered under service areas, including Toronto, Vaughan, Richmond Hill and Markham.
Settle these before the cabinets are finalised
- Surface-mounted or recessed profile, since a recessed one needs a machined groove.
- The setback from the front edge, checked against the actual cabinet and door profile.
- Continuous or segmented, and how small the gaps between runs will be.
- Strip voltage, chosen against the longest run in the kitchen.
- Colour rendering index and colour temperature, written into the specification for every fitting in the room.
- Driver location, with ventilation and access confirmed.
- One driver or several.
- Dedicated switching, and where the switches physically go.
- Dimming, with dimmer and driver confirmed compatible.
- Cable routes between cabinets and back to the driver.
- The worktop and backsplash finishes, since reflectivity changes what the light does.
- Who supplies the components, and what the warranty position is on the strip and the driver.
How ZaRRuS handles it
Under-cabinet lighting is treated as part of the cabinet design rather than as an electrical extra. The profile type, the setback and the cable routes are decided on the drawing, the driver is given a real location with access, and the switching and dimming are agreed before anything is roughed in.
Colour temperature and colour rendering are specified once and applied to every fitting visible in the same space, since the most common complaint about kitchen lighting is not brightness but mismatch. Where a run is long enough for voltage drop to matter, it is split or fed accordingly rather than left to reveal itself after installation.
Where specialised licensed work is required, it is completed by qualified independent licensed and insured trades, engaged and coordinated as part of the project. This work sits under kitchen renovation. You can see the standard of finish across completed work under selected work and experience, and our process sets out how a project runs.
Frequently asked questions
Where should under-cabinet lights be positioned?
A short distance back from the front edge of the cabinet, with the emitters aimed straight down. Lighting suppliers commonly suggest around one to two inches, roughly fifty to sixty millimetres. Mounted at the back, the light washes the backsplash and your body shadows the counter. Mounted hard at the front, the cabinet lip draws a shadow line along the counter edge and the emitter sits in your sightline. The right setback varies with cabinet depth and door profile, so check it against the actual cabinet before any groove is machined.
Why does my counter have a shadow along the front edge?
Almost always because the lighting is mounted too far forward and the cabinet’s own front lip is blocking part of the beam. Moving the strip back an inch or so usually removes it. It is much easier to avoid at design stage than to correct afterwards, particularly with a recessed profile, where the groove position is fixed once the cabinet is made.
Do I need an aluminium profile and diffuser?
For anything meant to last, yes. Bare tape shows individual diodes as a row of dots and has nowhere to shed heat, and heat is the main factor in how long a strip lasts before it dims or fails. The profile carries heat away and the diffuser lens blends the diodes into a continuous line. Choose between surface-mounted and recessed early, because a recessed profile needs a groove machined into the cabinet bottom in the shop.
Should the lighting be continuous or one fitting per cabinet?
Continuous looks calmer and works better as task light, because segmented runs leave dark patches at the joins and the counter reads as a series of pools. The case for continuity gets stronger with a polished stone or quartz worktop, where every interruption appears twice, once directly and once in the reflection. Segmented runs are easier to wire and to replace, which is a legitimate trade in a kitchen with a matt counter.
What colour temperature works best under kitchen cabinets?
Most kitchens sit in the neutral middle: warm enough not to feel clinical in a room people eat in, cool enough that a chopping board is not tinted yellow. The more important discipline is consistency. Every fitting visible in the same sightline should share one temperature, because a neutral under-cabinet strip beside warm ceiling downlights is among the most jarring and most avoidable errors in a finished kitchen. Tunable strips solve the day-versus-evening conflict but cost more and need compatible control gear.
Does colour rendering actually matter here?
More than anywhere else in the house, because this is the light you judge food by. A poor source flattens the distinctions between raw and cooked, fresh and past it, and makes everything look slightly grey. Specify a colour rendering index of ninety or above. The cost difference at the strip is modest and it is the property you notice daily.
Where should the driver go?
Somewhere ventilated and reachable without dismantling joinery: inside a wall cabinet, in the void above them, in a base unit, or in a nearby service space. It is a physical object about the size of a small book, it produces some warmth, and it is the component most likely to fail first. Sealing it into a permanent void turns a twenty-minute swap into carpentry, so make access a condition of sign-off rather than an assumption.
Why is one end of my run dimmer than the other?
Voltage drop. Low-voltage strips lose voltage over distance, so the far end of a long run fed from a single point goes visibly dimmer. Remedies are to feed the run from both ends, split it across more than one driver, or use the higher of the two common strip voltages. A twenty-four-volt strip draws roughly half the current of a twelve-volt strip for the same output and holds up over roughly twice the distance from one feed, which also gives more freedom in where the driver sits.
Can under-cabinet lighting be dimmed?
Yes, and it is worth doing, because it lets one well-specified run serve as both task light at full output and evening light at low output. The dimmer has to be chosen alongside the strip and driver rather than afterwards: compatibility is not automatic, and mismatches produce flicker, an audible buzz, a range that will not go low, or dropout near the bottom of the dial. Manufacturers publish compatibility information, and checking it before ordering costs nothing.
Should it be on its own switch?
Yes. It is the light you want on by itself early in the morning or late at night, and tying it to the ceiling circuit removes that option. Where there is an island or a separate prep area, a second switch for that zone usually earns the extra wiring. Put the switch where you enter the working area or at the end of the run you use most, rather than grouping it with everything else by the door. Motion sensors are best avoided on task lighting, since you want the light on while standing still.
Can it be added to a kitchen that already exists?
Yes, with compromises. A surface-mounted profile can be fitted to the underside of existing cabinets and cable run in trunking, and it will light the counter properly if the setback is right. What is lost is the flush detail of a recessed profile, which needs a groove machined before the cabinet is built, and fully concealed cabling. The driver still needs a ventilated, accessible home, which in an existing kitchen usually means giving up a corner of a cabinet.
In short
Set the strip back an inch or two from the cabinet’s front edge, aimed straight down, and check that distance against the real cabinet rather than a drawing. Use an aluminium profile with a diffuser. Specify high colour rendering, pick one colour temperature and apply it to every fitting in the room, and give the run its own switch and a dimmer chosen to suit the driver.
Then deal with the parts that are easy to forget: a real, ventilated, reachable home for the driver, a strip voltage chosen against the longest run, and cable routes drawn rather than improvised. Nearly all of it has to be settled before the cabinets are made, which is the single most useful thing to know about under-cabinet lighting.
Planning a kitchen in Toronto or the GTA? Request a consultation and we will work through the lighting plan with you. Our renovation FAQ covers how projects are planned and run.