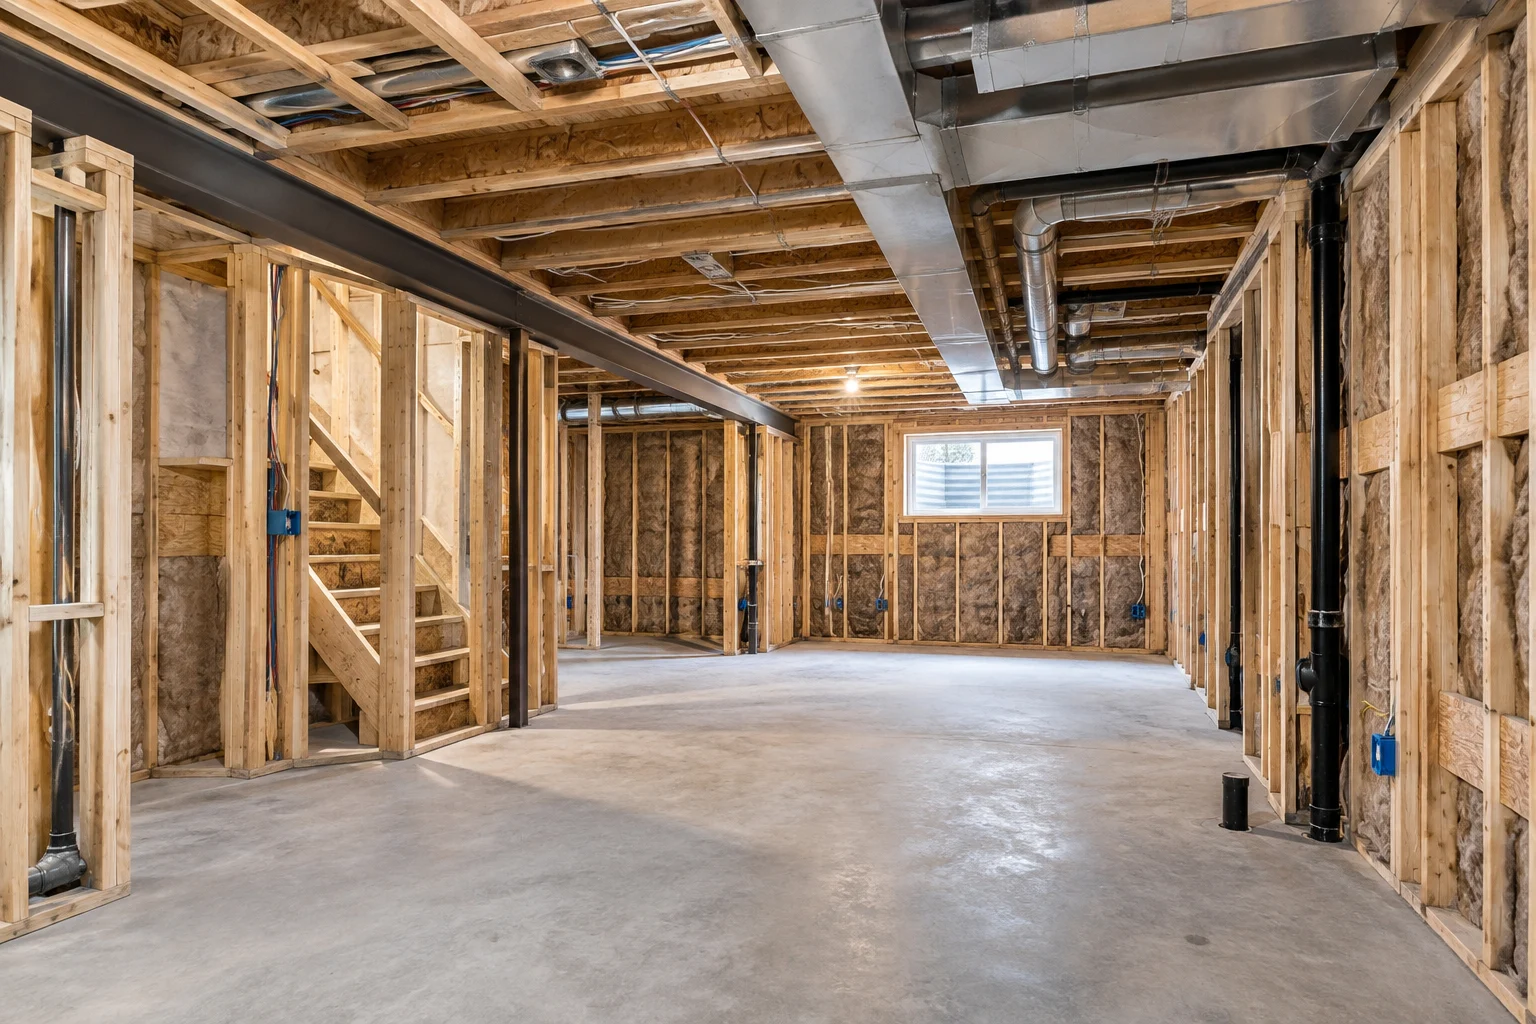
There is a short window in a basement project when everything is still cheap to change — the framing is up, the services are in, and you can see exactly where every wire, pipe and duct runs. It usually lasts a few days.
Once the drywall goes on, the price of every one of those decisions changes by an order of magnitude. Moving an outlet stops being a five-minute job and becomes cutting, patching, priming and repainting a wall. Adding backing for a television mount stops being a scrap of lumber and becomes a hole in a finished room.
This is the list of what has to be settled, installed and checked inside that window. It is not about how the walls are built, which is covered in basement finishing in Toronto, and it is not about whether the basement can be finished at all, which is covered in what to settle first about basement renovations. It is about the day the walls are still open and somebody has to walk the room with a list.
What “before drywall” really means
It is a deadline set by other trades rather than a date on a calendar, and it arrives earlier than people expect.
Rough-in inspections have to pass before insulation goes in, and insulation goes in before boarding. That means the real cut-off for decisions is not the day the drywall arrives. It is a week or two earlier, when the electrician and plumber finish their rough-in and book the inspection. Anything not decided by then is either rushed or missed.
For the equivalent map across an entire renovation, what to choose before a renovation starts sets out which selections are due at which milestone. This article narrows to a basement and to this single moment in it.
Electrical: positions, quantities and what they will carry
Who is allowed to do this work, and how to choose them, is a separate subject covered in our guide to choosing an electrician in Ontario. What follows is the part the homeowner has to decide, because the electrician cannot guess it.
Outlets, and where they actually need to be
Standard spacing produces a code-compliant room and an inconvenient one. The way to get this right is to place the furniture on the plan first, then put outlets where things will actually plug in.
- Behind where the sofa will sit, at the ends rather than the centre, so lamps and chargers reach.
- At the television position, set into the wall so nothing protrudes behind a flush-mounted screen.
- Inside any cabinet that will hold equipment, with a way for heat to escape.
- At a desk or work position, above the surface rather than behind it.
- Where a dehumidifier will live, near its drain.
- By the sump and any pump, on the circuits those need.
- At the bottom of the stairs, and near the door, so the room can be used without crossing it in the dark.
Mark them on the wall in marker and stand in the room. It takes twenty minutes and catches more mistakes than a drawing does.
Switching and control
Lighting layout is wiring, and wiring closes now. A basement usually wants more separately controlled zones than a room upstairs, because it gets used in different ways at different times: a bright general setting, a low evening setting for watching something, and task light where people read or work.
Decide which fittings are on which switch, where the switches are, and which are dimmed. Dimming is not something bolted on afterwards. The fitting and the dimmer have to be matched to each other, and mismatches show up as flicker, buzz or a dial that will not go properly low. Three-way switching at the top and bottom of the stairs is obvious and still gets forgotten.
Circuits, and what the room is really for
A basement that will hold a wet bar, a dehumidifier, a sump pump, a home office, exercise equipment or a future electric fireplace needs those loads accounted for now, not after the panel is full.
Two questions worth asking explicitly: does the existing panel have capacity and physical space for what this basement adds, and is anything here dedicated rather than shared. Finding out the panel is full after the walls are closed is a genuinely expensive discovery.
Data, and the conduit worth insisting on
Wired network runs to a television position, a desk and any wireless access point are cheap now. More useful than any specific cable is empty conduit between the equipment location and the screen position, and from the basement up to wherever the service enters the house.
Conduit is the difference between changing a cable in ten minutes in five years’ time and cutting into a finished wall. It is the single cheapest piece of future-proofing available at this stage, and it is almost never on a standard scope unless somebody asks.
Plumbing, and the parts that happen only once
Some of this is not pre-drywall at all. It is pre-concrete, which is an earlier and harder deadline.
Anything below the slab
Drainage for a basement bathroom, a wet bar or a laundry runs under the floor. If the slab has to be opened, that work is planned, cut, laid, inspected and poured back before framing starts in that area. Deciding you want a bathroom after the slab is closed means opening it again.
This is the single most important reason to settle the basement’s programme early. Not the finishes, not the layout of the seating, but the answer to one question: is there a bathroom, and roughly where.
When fixtures sit below the sewer line
Basement fixtures are often below the elevation of the building drain, so gravity cannot carry waste to the main line. The answer is a sewage ejector: a sealed basin set into the floor with a pump that lifts waste up to the drain.
Three things follow, and all three are pre-concrete decisions. The basin position, which wants to be close to the toilet so the drop into it is short. Vent routing, since the basin has to be vented. And access, because a lid that has to come off for maintenance cannot end up under a fixed cabinet or a tiled floor with no way in.
Flood protection, while the floor is open
If a backwater valve, a sump pit or weeping-tile work is going to be done, this is the moment, because all of it involves the floor.
The City of Toronto runs a basement flooding protection subsidy covering backwater valves, sump pumps and weeping tile severance for eligible properties. It has conditions attached: a licensed plumbing contractor, a permit obtained before work starts, and inspection of the rough-in before anything is covered back over. Subsidy amounts and eligibility change, so confirm the current terms with the City rather than relying on a figure quoted anywhere else. Other municipalities in the region run their own programmes on their own terms.
Even where no subsidy applies, the sequencing point holds. A backwater valve installed during the basement project is a modest item. The same valve installed after a finished floor is down is a considerably larger one.
Air: supply, return and the drain nobody plans
Ductwork is bulky, it is fixed in place early, and it is the service most likely to dictate where a bulkhead ends up.
Supply registers are usually added. Return air is usually forgotten, and a room with supply but no return is stuffy and never balances properly. Ask specifically whether return is being added and where.
A bathroom needs an exhaust fan ducted to the outside rather than into the joist space, which means the route and the exterior termination are decided now. Where the house has a heat recovery ventilator, whether the basement is connected to it is a question worth asking rather than assuming.
Then the item that gets missed almost every time: a dehumidifier will run in this room for months of the year, and it produces water continuously. A condensate drain to a floor drain, a sump or a pumped line, decided now, is the difference between a machine that runs unattended and a bucket somebody has to remember to empty. It needs a drain and an outlet in the same place.
Blocking: the cheapest thing you will ever regret
Blocking is scrap lumber fixed between studs so that something can later be screwed to the wall and actually hold. It costs almost nothing and takes minutes — retrofitting it means opening a finished wall.
Walk the room and think about anything that will ever hang on a wall or sit against one.
- Television mount, at the height it will actually sit, not an assumed one.
- Floating shelves, and wall-hung cabinetry of any kind.
- Base and wall cabinets at a wet bar, and any vanity.
- Grab bars and towel rails in a bathroom, whether or not anyone needs them yet.
- A handrail at the stairs.
- Heavy mirrors, artwork or a pull-up bar.
- Curtain or blind fixings at any window.
- A wall-mounted desk, folding table or murphy bed.
Two cautions. Put blocking where the thing will really go, which means knowing the actual product and its fixing centres rather than guessing. And do not let enthusiastic blocking fill cavities so completely that insulation cannot reach the corners, which trades one problem for another.
When in doubt, add it. The marginal cost of blocking you never use is a few dollars.
Fire safety and separation
Some of this is required and some is simply sensible, and the open-wall stage is when both are cheap.
Alarms. Ontario requires smoke alarms on every storey, including the basement, and carbon monoxide alarms on every storey in homes with a fuel-burning appliance, a fireplace or an attached garage, as well as adjacent to sleeping areas. A basement containing a furnace or water heater is exactly the case the CO requirement exists for. Interconnection, so that one alarm sounding sets off all of them, is required in new construction and is worth doing here regardless, because an alarm in an empty basement that nobody upstairs can hear is not much use. Interconnection is wiring, which makes it a pre-drywall item. Requirements have changed recently and continue to, so confirm the current rule rather than relying on what was true for an earlier project.
Fire blocking. Concealed spaces in framing need to be blocked at specified intervals and at junctions so that a fire cannot run unimpeded through the cavities. It is inspected, and it is the kind of detail that gets skipped in owner-built work and caught at inspection.
Separation around mechanical equipment. Where the furnace, water heater or other equipment sits in the finished area, there are requirements about enclosure, clearance and combustion air. That is a question for the permit rather than a design preference.
Framing, checked before anything covers it
Drywall follows framing exactly. Anything out of true now is out of true permanently, and it shows most at the details.
Run a level over the walls and a straightedge along them. Check that door openings are plumb and correctly sized for the doors actually ordered, that corners are square where they need to be, and that the ceiling framing is flat rather than following a joist that has a bow in it. Where a bulkhead is being built, look at where it starts and stops and whether it aligns with anything, because a bulkhead that dies halfway across a wall for no visible reason is a permanent feature.
Check heights against the real finished floor build-up rather than the bare slab. A door opening framed to the concrete is the wrong height once a subfloor and flooring are in.
Insulation: verify rather than assume
What the assembly should be, and why, is the subject of the basement finishing guide. At this stage the job is simply to confirm that what is on the wall matches what was agreed.
Look for three things. That the insulation against the foundation is continuous and its seams are sealed, with no gaps at the top, the bottom or around penetrations. That the rim joists have actually been done, since they are easy to leave until later and then forget. And that nothing absorbent is sitting directly against cold concrete.
This is the last time any of it is visible — ten minutes with a torch now is worth more than any warranty conversation later.
Sound, while the joists are open
A basement sits directly under the main floor, and sound travels both ways: a film downstairs is heard in the living room, and footsteps upstairs are heard in the basement.
Insulation in the joist space, resilient channel under the joists, and attention to sealing at the perimeter and around penetrations all reduce it, and all are straightforward while the ceiling is open and effectively impossible once it is closed. The decision is worth making deliberately rather than by omission, because omission is the default.
Interior walls matter too, particularly around a bathroom, a home office or a bedroom. Insulating an interior partition is a small cost at this stage and makes a noticeable difference.
Inspections, and what they gate
Inspections are the reason this stage cannot be compressed.
Rough-ins are inspected before insulation. Insulation is inspected before boarding. Each has to be booked, each happens when the inspector is available rather than when the site is ready, and work stops at each until it passes. Where below-slab plumbing is involved there is an earlier inspection again, before the concrete goes back.
Two practical consequences. The schedule has gaps in it that are not anybody’s fault and should be in the programme from the start, as set out in how to plan a home renovation in Toronto. And a failed inspection is a normal event rather than a disaster, provided it happens while the walls are open. The disaster version is discovering the problem afterwards.
Photograph everything
This is the highest-value ten minutes in the entire project and it costs nothing.
Before insulation goes in, and again before boarding, photograph every wall and the ceiling. A wide shot of each wall for context, then closer shots of anything with wiring, pipe, duct, blocking or a structural member in it. Include a tape measure or a recognisable reference in frame where position matters.
What you are producing is an X-ray of the room. In three years, when somebody wants to hang something heavy, add a circuit, chase a leak or work out why a wall sounds hollow in one spot, those photographs answer the question in a minute. Without them it is guesswork with a stud finder.
Store them somewhere that still exists in a decade, and label them by room and wall rather than leaving them in a camera roll.
Cheap hedges against a future you cannot predict
Some provisions cost very little now and buy options later, and they are worth making even when nobody is certain they will be used. The test is simple: would adding this afterwards mean opening a wall or a floor? If so, and it is inexpensive now, put it in.
- A capped water and drain stub where a bar sink, second fridge or future bathroom might go. Running it while the floor and walls are open is a fraction of doing it later.
- A spare circuit or two run to a junction box and left capped, for a future electric fireplace, sauna, workshop bench or exercise equipment.
- Conduit from the basement to the attic or service entry, which makes any future cabling a pull rather than a demolition.
- Blocking on walls where nothing is planned yet, particularly any wall long enough to take shelving or a screen one day.
- An extra ceiling access panel near anything mechanical, even if it looks reachable today.
None of this is speculative spending on a grand scale. It is a handful of items that each cost very little at this exact moment and become disproportionate afterwards, which is the same logic that runs through everything else on the list.
Where it stops being worthwhile is anything requiring real equipment or structural change on the chance it might be wanted. A capped stub is a hedge; a second staircase is a decision.
How to actually do the walkthrough
Booking it is the part that gets skipped. A pre-drywall walkthrough is a specific appointment with whoever is running the job, not a glance on the way past.
- Arrange it deliberately, after rough-ins are complete and before insulation is booked.
- Bring the drawings, the furniture plan and a list of every appliance and fitting that has been chosen.
- Walk each room and physically point at every outlet, switch, light, register and rough-in.
- Mark changes on the framing in marker, not on a notepad. The person doing the work reads the wall.
- Go through the blocking list in front of the walls.
- Check framing, door openings and heights against the finished floor build-up.
- Confirm the insulation and rim joists.
- Photograph everything.
- Write up what changed and send it, so there is a record both sides agreed to.
Bring somebody who will actually use the room. The person who watches television in the basement notices the socket in the wrong place faster than the person who commissioned the project.
What each change costs once the walls close
Not in money, which varies, but in what the work becomes. The jump is the point.
- Move an outlet. Before: minutes. After: cut, rewire, patch, sand, prime, paint, and a visible repair if the wall has any texture.
- Add blocking. Before: a scrap of lumber. After: open the wall.
- Add a lighting circuit or change switching. Before: cable in an open cavity. After: fishing wire through insulated walls, often with no clear route.
- Add return air. Before: duct in an open ceiling. After: opening the ceiling along the run.
- Add sound insulation. Before: batts between joists. After: effectively a new ceiling.
- Add a bathroom. Before the slab closes: planned drainage. After: breaking concrete in a finished room.
- Fix missing insulation. Before: install it. After: remove drywall to reach it.
Every line follows the same shape, which is the argument for treating this stage as a real gate rather than a formality.
What changes across the GTA
The checklist is the same everywhere. What differs is which items on it are likely to bite.
In older Toronto houses the pre-concrete decisions dominate, because adding a basement bathroom usually means opening a slab rather than using an existing rough-in. Flood protection is also more likely to be in scope, and the City’s subsidy programme makes the open-floor moment the sensible time to deal with it. Older electrical panels are the other recurring constraint, and whether the panel can carry a finished basement is a question to answer before the rough-in rather than during it.
Post-war housing in North York brings ducting installed with no expectation of a finished ceiling, so bulkhead positions and whether any of the run can be modified are worth settling at the walkthrough rather than accepting as found.
Newer houses in Vaughan, Richmond Hill and Markham often arrive with a bathroom rough-in already in the slab, which removes the hardest deadline. The trap there is assuming the rough-in is where you want the bathroom. Its position was set by the builder for their own reasons, and moving it is the same slab work you were hoping to avoid, so check it against the intended layout early rather than late.
Anywhere in the region, a basement intended as a second suite adds requirements for fire separation, egress, sound and services that go well beyond this checklist and change what has to be in place before drywall. Establish which project you are doing at the outset.
Common mistakes
- Treating the walkthrough as optional, or doing it after insulation is already in.
- Placing outlets to standard spacing without a furniture plan.
- Deciding on a bathroom after the slab is closed.
- Leaving flood protection until after the floor is finished.
- No blocking for the television, and none for shelves or a handrail.
- Blocking placed at a guessed height rather than the real one.
- Loose cable instead of conduit between the equipment and the screen.
- Supply air with no return.
- A dehumidifier with nowhere to drain.
- A bathroom fan ducted into the joist space rather than outside.
- Assuming the panel has capacity.
- Skipping sound treatment because it is invisible.
- Alarms left unconnected, or missing on a storey.
- Door openings framed to the slab rather than the finished floor.
- An ejector basin lid buried under fixed cabinetry.
- No photographs of the open walls.
Questions worth asking
- When exactly is the pre-drywall walkthrough, and who will be there?
- What is the last date I can change an outlet or switch position at no cost?
- Is any work below the slab still outstanding?
- Does the panel have capacity and space for everything this basement adds?
- Which circuits are dedicated, and to what?
- Is return air being added, and where?
- Where does the dehumidifier drain to, and is there power there?
- Where is the bathroom fan ducted to?
- What blocking is going in, and at what heights?
- Is conduit being run between the equipment location and the screen?
- What sound treatment is included between the basement and the floor above?
- Are the alarms interconnected, and on which storeys?
- Which inspections apply, when are they booked, and what do they hold up?
- Can I see the rim joists and the insulation before they are covered?
- How are changes at this stage priced and recorded?
Frequently asked questions
What has to be decided before drywall goes up in a basement?
Everything that lives inside a wall or ceiling. Outlet and switch positions, the lighting layout and what is dimmed, circuits and whether the panel can carry them, data and conduit routes, plumbing rough-ins, duct positions including return air, the dehumidifier drain, bathroom exhaust routing, blocking for anything that will ever hang on a wall, alarm positions and interconnection, sound treatment, and fire blocking. The real deadline is earlier than the drywall delivery, because rough-in inspections have to pass before insulation, and insulation goes in before boarding.
What is blocking, and where do I need it?
Blocking is lumber fixed between the studs so something can later be screwed to the wall and actually hold. It costs almost nothing while the wall is open and requires opening a finished wall afterwards. Put it behind a television mount at the height the screen will really sit, behind floating shelves and any wall-hung cabinetry, at a wet bar and any vanity, at grab bars and towel rails, at a stair handrail, behind heavy mirrors or artwork, at curtain fixings, and anywhere a wall-mounted desk or folding table might go. Use the actual product’s fixing centres rather than guessing, and do not pack cavities so full that insulation cannot reach the corners.
When is it too late to add a basement bathroom?
Once the slab is closed. Drainage for a basement bathroom, wet bar or laundry runs below the floor, so if the concrete has to be opened, that work is cut, laid, inspected and poured back before framing starts in that area. Deciding afterwards means breaking concrete in a room that is already built. This makes one question the most important early decision in a basement project: is there a bathroom, and roughly where. Newer houses often have a builder’s rough-in already in the slab, but check its position against your intended layout, because moving it is the same slab work.
Do I need a sewage ejector pump?
You do if the basement fixtures sit below the level of the building drain, which is common, because gravity then cannot carry waste to the main line. It is a sealed basin set into the floor with a pump that lifts waste up to the drain. Three decisions go with it and all are pre-concrete: the basin position, which wants to be close to the toilet so the drop is short; the vent routing, since the basin has to be vented; and access, because the lid has to come off for maintenance and cannot end up under fixed cabinetry or a tiled floor.
Should I install a backwater valve during a basement renovation?
If it is being considered at all, this is the moment, because it involves the floor. The City of Toronto runs a basement flooding protection subsidy covering backwater valves, sump pumps and weeping tile severance for eligible properties, with conditions attached: a licensed plumbing contractor, a permit before work starts, and inspection of the rough-in before anything is covered back. Amounts and eligibility change, so confirm current terms with the City directly, and note that other municipalities run their own programmes. Even without a subsidy, installing during the project is far less disruptive than after a finished floor is down.
Where should outlets go in a finished basement?
Put the furniture on the plan first, then put outlets where things will actually plug in, rather than accepting standard spacing. That usually means behind the sofa at the ends rather than the centre, an outlet set into the wall at the television position so nothing protrudes behind a flush screen, power inside any cabinet holding equipment with a way for heat to escape, above a desk surface rather than behind it, beside where the dehumidifier will sit near its drain, at the sump and any pump, and near the door and the bottom of the stairs. Mark them on the framing and stand in the room before signing off.
Do I need a carbon monoxide alarm in the basement?
In Ontario, carbon monoxide alarms are required on every storey in homes with a fuel-burning appliance, a fireplace or an attached garage, as well as adjacent to sleeping areas, and a basement containing a furnace or water heater is precisely the situation the requirement addresses. Smoke alarms are required on every storey including the basement. Interconnection, so one alarm triggers all of them, is required in new construction and is worth doing regardless, since an alarm sounding in an empty basement is of limited use. Interconnection is wiring, which makes it a pre-drywall decision. Requirements have changed recently, so confirm the current rule.
Why does my basement need return air as well as supply?
Because air has to get back to the system for the room to condition properly. Supply registers get added as a matter of course; return is routinely forgotten, and the result is a room that feels stuffy, never balances, and often runs at a different temperature from the rest of the house. Ask specifically whether return is being added and where it is going. While the ceiling is open this is duct in an open cavity; afterwards it means opening the ceiling along the run.
What inspections happen before drywall, and what do they hold up?
Typically the rough-ins are inspected before insulation, and the insulation is inspected before boarding, with an earlier inspection again where below-slab plumbing is involved, before the concrete goes back. Each has to be booked and each happens when the inspector is available rather than when the site is ready, so there are gaps in the programme that are nobody’s fault and belong in the schedule from the start. A failed inspection at this stage is a normal event and easy to put right while the walls are open; the expensive version is finding the problem after they close.
Is it worth photographing the walls before drywall?
It is the highest-value ten minutes in the project and it costs nothing. Photograph every wall and the ceiling before insulation and again before boarding: a wide shot of each wall for context, then closer shots of anything carrying wiring, pipe, duct, blocking or a structural member, with a tape measure in frame where position matters. The result is an X-ray of the room. When somebody later wants to hang something heavy, add a circuit or trace a leak, those photographs answer the question in a minute instead of by guesswork. Label them by room and wall and store them somewhere that will still exist in ten years.
Can I add sound insulation to the basement ceiling later?
Only by taking the ceiling down, which is why it belongs on this list. Sound travels both ways between a basement and the floor above, and the measures that reduce it are insulation in the joist space, resilient channel under the joists, and careful sealing at the perimeter and around penetrations. All of them are straightforward while the ceiling is open and essentially a new ceiling afterwards. Interior partitions are worth insulating too, particularly around a bathroom, office or bedroom, and the cost at this stage is small.
What should I check about the framing before it is covered?
Drywall follows framing exactly, so anything out of true now is permanent. Run a level over the walls and a straightedge along them, check that door openings are plumb and sized for the doors actually ordered, that corners are square where they need to be, and that ceiling framing is flat rather than following a bowed joist. Look at where any bulkhead starts and stops and whether it aligns with anything, since a bulkhead ending halfway across a wall for no visible reason is a permanent feature. Check heights against the finished floor build-up rather than the bare slab.
In short
Book the walkthrough, and book it before insulation rather than before drywall, because the rough-in inspection is the real deadline. Bring the furniture plan and the actual product list, and mark changes on the framing where the trades will read them.
Settle anything below the slab first, since that deadline has already passed by the time the walls are up. Put outlets where furniture will be, add return air, give the dehumidifier a drain, run conduit, and put in more blocking than you think you need. Check the insulation and the rim joists while you can still see them. Deal with sound now or accept it permanently.
Then photograph every wall. In a few years it will be the most useful thing anyone did on the project.
Planning a basement in Toronto or the GTA? Our basement renovation page covers how this work is run, and a consultation is the simplest way to get the rough-in decisions on paper before the trades need them. You can also read how we run a project and see completed work.