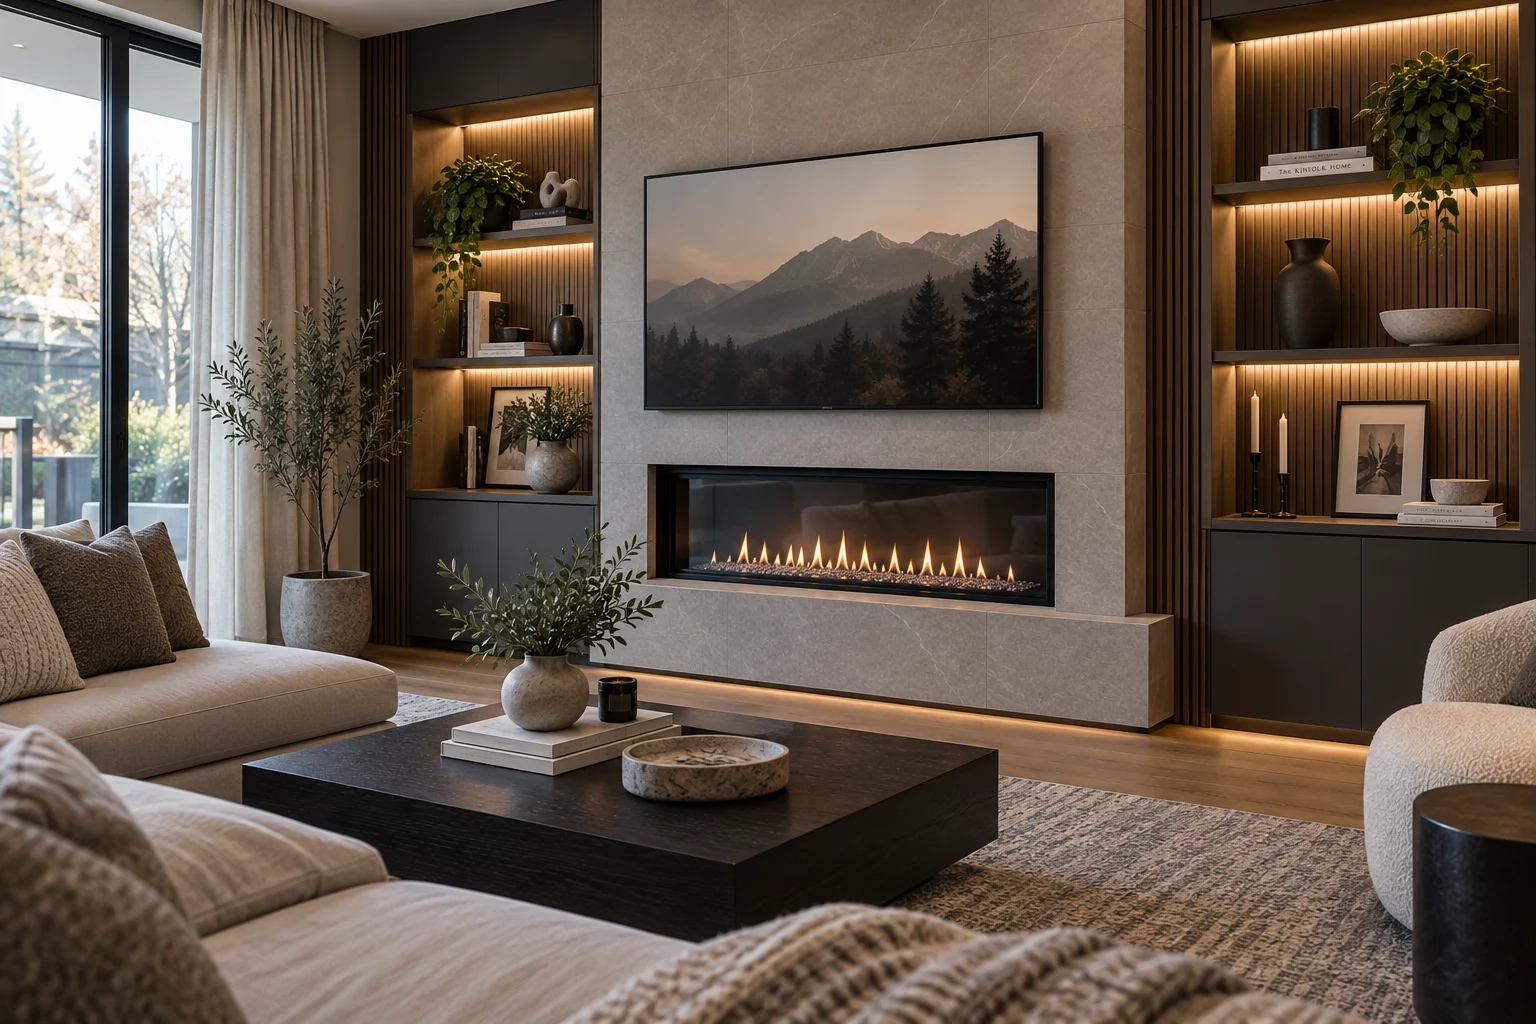
A fireplace media wall looks like a design project and behaves like a construction one. The part people plan first, how it will look, is the part that can change latest. The parts that actually fix the design are decided long before anything is visible: which appliance, where its vent runs, how the structure behind it is framed, and how much of the wall around the opening has to be non-combustible.
All of that comes from one document — and it is not the architect’s drawing. It is the installation manual for the specific appliance you have chosen. Until that manual exists, a media wall cannot be drawn accurately, and any elevation produced before it is a sketch with a good chance of being wrong.
This guide covers the design and integration: choosing the appliance, what each type demands of the wall, how clearances actually work, venting, framing the chase, the services buried inside, where the built-ins fit, and who in Ontario is legally allowed to do which part. Composing the cabinetry itself is a separate subject, covered in living room built-ins around a fireplace, TV and windows. Surround materials are their own subject and are not covered here.
The appliance designs the wall
This is the single most useful thing to understand before starting, and it inverts how most people approach it.
A media wall is usually imagined as a finished picture: a long low firebox, stone to the ceiling, cabinetry either side, a screen above. Working back from that picture rarely survives contact with the appliance, because the appliance brings a fixed rough opening, a fixed vent route, a fixed set of clearances and a fixed service-access requirement. Those constraints are not negotiable in the way a cabinet dimension is.
Choose the appliance first, get its manual, and design the wall around what the manual says. It is a less romantic sequence — and it produces far fewer expensive surprises at framing.
Four appliance types, and what each asks of the wall
The choice is not mainly about heat output. It is about what the appliance forces the building to do.
Direct-vent gas
The common choice in new media walls, and the one with the most demanding integration. It is a sealed unit: a coaxial vent takes combustion air in through an outer pipe and exhaust out through an inner one, so the firebox never draws air from the room. That sealed arrangement is what allows a large glass front and a clean modern installation.
What it asks for: a vent route to an exterior wall or through the roof, a framed chase built to the manufacturer’s rough opening, a gas supply, an electrical connection for ignition and any fan, and a real path for a technician to reach the controls afterwards. It also produces genuine radiant heat at the glass, which is what governs what can sit above it.
Electric
The simplest to integrate by a wide margin, because there is no combustion. No vent, no chase to the outside, no gas line, no flue penetration through a roof. It needs a framed recess and a dedicated circuit, and it can go on an interior wall, in a basement, or in a condo where venting would be impossible.
What it still asks for: its own clearances, which are smaller but not zero, and attention to where its heater discharges. Many units blow warm air out of a grille at the top, and covering that grille with a mantel or a tight reveal is a real mistake rather than a cosmetic one. If the unit is being used purely for effect, some models allow the heater to be switched off independently, which is worth confirming before specifying.
Electric is the type most often dismissed early and then chosen in the end, particularly on interior walls and in condominiums where a vent penetration is not available.
Wood-burning
The most demanding structurally and the least compatible with a tightly integrated millwork wall. It needs a full chimney rather than a vent, substantial clearances, a hearth extension in front of the opening, and a supply of air. It also produces by far the most heat above the opening, which effectively settles the question of what can be mounted there.
Where it is already present in an older house, keeping it is often the right answer. Adding one to a new media wall is a much larger project than the other three and belongs in the structural conversation, not the finishes conversation.
An existing masonry fireplace
Very common in older Toronto housing, and a different project again. The chimney breast is already there, usually projecting into the room, often with alcoves either side. The realistic options are to leave the opening as it is and build the wall around it, to fit a gas or electric insert into the existing masonry opening, or to remove the breast entirely, which is structural work and rarely as simple as it looks.
An insert changes the clearance picture completely, because the insert is then the listed appliance and its instructions govern, not the original masonry construction. A condition assessment of the existing chimney comes before any of these decisions rather than after.
The installation manual is the first drawing
Every listed appliance ships with instructions that are not advisory. They specify the rough opening, the framing dimensions, the header height, the permitted vent configurations and lengths, the clearances to combustible material in every direction, the standoff requirements, the finish-material limits at the face, and the service access needed afterwards. In Ontario the installation has to comply with those certified instructions as well as the gas code.
Two things follow, and they change how the project runs.
- The appliance has to be selected by exact model before framing. Not by type, not by size category. Two units of the same nominal width from the same manufacturer can have different rough openings and different clearance requirements.
- Nothing in a general article overrides that manual, including this one. The figures below explain how the rules work so you can have an informed conversation. The numbers that apply to your wall come from your appliance’s documentation and from what is required locally.
Getting the manual early costs nothing. Supplier and manufacturer sites publish them, and a dealer will send one on request before purchase.
How clearances actually work
The principle behind the numbers is worth understanding, because it explains why a design decision as small as a projecting shelf changes what is permitted.
Clearance to combustible material is governed by how far the material projects from the wall face. A flush or barely projecting element can sit relatively close above the opening. The further something sticks out, the further above the opening it has to be, because a projection traps rising heat against itself. The general form of the rule as commonly published is a minimum separation for material projecting very slightly, increasing progressively with projection, until at a sufficient height the restriction no longer applies. A deep mantel is therefore treated very differently from a flat band of trim at the same height.
Non-combustible material behaves differently. Stone, tile, metal, concrete and non-combustible board are not subject to the same projection restriction. That exemption, rather than fashion, is what puts hard mineral finishes tight to almost every firebox opening and keeps timber and MDF back from it.
Three qualifications matter more than the numbers themselves. A listed appliance’s own instructions govern and can be more restrictive than the general rule. A masonry fireplace and a manufactured appliance are not held to the same requirements. And any electronics near the opening carry operating-temperature limits set by whoever made them. Satisfying the appliance’s clearances does not satisfy those limits; they are tested against different things and have to be checked on their own.
The non-combustible zone, and where millwork can start
Once the clearances are known, they draw a boundary on the elevation. Inside it, the wall is non-combustible substrate and non-combustible finish. Outside it, timber, MDF, painted joinery and trim become available.
Drawing that boundary on the elevation early is one of the most useful things a designer can do, because it converts a safety requirement into a line on a drawing that everyone can work to. The cabinetmaker knows where the joinery can begin. The tiler or stone fitter knows the extent of their work. The framer knows where the substrate changes.
It also tends to improve the design. A clearly expressed non-combustible field around the firebox, whether a panel, a band or a full-height slab, reads as a deliberate architectural element rather than as an awkward transition where two finishes happen to meet.
One detail that catches people: the substrate behind a finish matters as much as the finish. Stone or tile fixed to standard board is still sitting on a combustible backing. What is required behind the finish in the hot zone is specified by the appliance instructions, and it is a framing-stage decision, not a finishing-stage one.
Venting shapes more than the wall
For anything that burns, the vent route is the constraint most likely to change the design, and it is routinely left until after the elevation has been agreed.
A direct-vent appliance can generally run horizontally out through an exterior wall or vertically up and out through the roof, and each manufacturer publishes the permitted configurations: maximum total length, maximum horizontal run, how many elbows are allowed, and how vertical and horizontal sections may be combined. Those limits are specific to the model. A vent route that works for one unit is not automatically available for another.
Horizontal is simpler and is the default where the fireplace sits on an exterior wall. The catch is outside rather than inside: the termination cap has required clearances to windows, doors, soffits, corners, grade, decks and anything else nearby, and those clearances are a real siting constraint on a tight lot. A cap also becomes a visible object on the elevation of the house, usually at eye level, which is worth looking at before it appears.
Vertical is what you need when the fireplace is on an interior wall. The consequence is that the vent has to travel up through whatever is above, which in a two-storey house means a chase passing through a bedroom, a closet or a bathroom on the floor above. That chase takes real floor area and has to be designed into the room above rather than discovered during framing. It is the single most common reason an interior-wall fireplace turns out to be a bigger project than expected, and the most common reason an electric unit ends up being the sensible answer.
Two practical notes. The framed opening the vent passes through is not to be packed with insulation or anything else, because the clearance around the pipe is part of the design. And a vent route should be confirmed by whoever will install it, on site, before the wall is drawn.
Framing the chase
The chase is the framed structure that holds the appliance and carries the vent. It is ordinary carpentry done to unusually specific dimensions.
What it has to get right: the rough opening exactly as specified, the header at the correct height, the correct depth so the unit’s face lands where the finish requires, the platform at the right level if the firebox is raised, and any standoffs or nailing flanges accommodated as drawn. Most manufactured appliances have flanges that fix to the framing and set the relationship between the firebox face and the finished surface. Getting that relationship wrong by even a small amount shows permanently at the finish.
Two decisions belong here and are painful to revisit later. Whether the wall projects into the room or the appliance is recessed into the existing wall thickness, which is a spatial decision as much as a technical one. And whether the wall runs full height to the ceiling or stops at a datum, because a full-height wall changes both the structure and the scale of the room.
Blocking is the cheap item everyone forgets. Anything that will later be fixed to this wall needs solid backing behind the board — a television mount, a floating shelf, a mantel, heavy stone, cabinetry, a picture light. All of it is trivial while the wall is open and disproportionately awkward afterwards.
Firebox height and the hearth
Where the opening sits vertically affects the room more than almost any other single dimension, and it is set at framing.
A firebox close to the floor reads traditionally and puts the flame in the eyeline of someone seated. Raised, it becomes a horizontal band in the wall, reads more contemporary, and suits a linear unit. Raising it also frees the wall beneath, which can take a hearth shelf, a log store, or nothing at all. Against that, raising the opening pushes everything above it higher, including anything mounted there, and that is where a raised firebox and a television start to compete.
Hearths divide into two questions. A wood-burning appliance requires a non-combustible hearth extension in front of the opening, sized by the requirements that apply to it. Gas and electric units generally do not require one, so a hearth in front of them is a design choice rather than an obligation. A flush hearth, level with the floor, gives the cleanest result and has to be coordinated with the floor build-up early, because it is a floor decision as much as a fireplace one. A raised hearth gives a seat and a strong horizontal, and takes floor space.
If the television is going above
Whether it should is a separate question, weighed properly in the living room built-ins guide. This is what to build if the answer is yes.
Heat rises against the wall face, so the screen’s problem is the column of warm air coming off the glass, not the firebox itself. A shallow mantel does very little about it, because the air simply wraps around the edge and carries on up. What works is either genuine distance, a mantel or hood with enough projection to actually deflect, or recessing the screen into an alcove so the rising air passes in front of it rather than across it.
The recessed alcove is the detail worth knowing about, because it solves two problems at once. It moves the screen out of the direct heat path, and it lets the screen sit flush with the wall instead of standing proud of it. It has to be framed at the same time as the chase, sized to the actual television plus its mount and its cables, and ventilated at the top so it does not become a warm box of its own.
Three things go in the wall while it is open: a recessed outlet inside the alcove so the plug does not hold the screen off the wall, conduit from the alcove down to wherever the equipment lives so cables can be changed later without opening anything, and solid blocking for the mount. Conduit rather than loose cable is the detail people skip and regret, because it is the difference between swapping a cable in ten minutes and cutting into a finished wall.
The honest constraint remains height. A raised firebox with a mantel above it can put a screen well above comfortable seated eye level, and no amount of good construction fixes a viewing angle. Check the height against where people will actually sit before framing, not after.
Services inside the wall
A media wall usually ends up carrying more services than any other wall in the room, and every one of them closes at rough-in.
- Gas supply to the appliance, with a shut-off that stays accessible.
- Power to the appliance for ignition, controls and any fan.
- A dedicated circuit for an electric unit, sized to it.
- Power and data for the screen, at the screen, not at the skirting.
- Conduit between the screen position and the equipment location.
- Power inside any cabinet that will hold equipment, plus a ventilation path for it.
- Supply and switching for integrated lighting, including any dimming.
- Control wiring for a wall switch or thermostat, if the appliance uses one.
Service access deserves its own sentence, because it is the requirement most often designed out by accident. Gas appliances have valves, controls and components that have to be reachable for maintenance, and the location of that access is specified by the appliance. A panel that can be removed without dismantling joinery has to be designed in from the start. Sealing the access behind fixed cabinetry or bonded stone converts a routine service call into demolition.
Where the built-ins fit
Joinery is the last thing built and should be among the last things finalised, because it is the element with the most tolerance in it. How cabinets themselves are constructed and specified is covered in the complete guide to custom cabinets and built-in storage.
Sequence matters here. The appliance sets the rough opening, the vent sets what the structure has to do, the clearances set the non-combustible boundary, and the cabinetry works within whatever is left. Designing the cabinetry first and then trying to make the fireplace fit produces the two failures that recur: joinery that has to be cut back on site because it encroaches on a clearance, and a fireplace pushed off the position it wanted in order to preserve a symmetry that nobody would have missed.
Depth is the other conflict. The fireplace wall usually wants to be deeper than cabinetry does, particularly where the unit is recessed into a built-out chase. That difference can be resolved by running the joinery at its own shallower depth and letting the fireplace element project, or by bringing everything forward to one plane and accepting the lost floor area. Neither is universally right, and the choice belongs to the room rather than to a rule. How to compose that elevation, and how to handle a fireplace that is not centred, is the subject of the living room built-ins guide rather than this one.
One coordination point is easy to miss. Where the joinery abuts the non-combustible field, somebody has to own the junction: a shadow gap, a metal reveal, a scribed edge. Left undecided, it gets resolved on site by whoever arrives last, and it shows.
Lighting a media wall
A fireplace wall is the one surface in a living room that is looked at directly, and it is usually lit badly by a ceiling grid designed for the whole room.
Grazing light down a textured surface from close to the wall shows the texture; a downlight further out flattens it. Both are legitimate, but they are different intentions and they need deciding before the ceiling is closed. Light inside niches and behind floating shelves is wiring that closes at rough-in as well.
Dimming is the point worth insisting on. A wall with a live flame in it is used at very low light levels in the evening, and a media wall lit at full output with a fire going looks wrong. The dimmer and the fittings have to be chosen together rather than separately.
Ontario: who is allowed to do what
This part is not discretionary, and it is worth knowing before hiring anyone.
Gas work in Ontario is regulated under the Technical Standards and Safety Act and administered by the Technical Standards and Safety Authority. Installing, altering or servicing a gas appliance and its piping is work for a certified gas technician holding the appropriate certification, working for a TSSA-registered fuels safety contractor. The installation has to comply with the appliance’s certified instructions and with the gas installation code, CSA B149.1. This is not a formality that can be handled by a general contractor or a homeowner, and it is not something to take on trust: registration can be confirmed before work starts.
Electrical work is separate and is carried out by a licensed electrical contractor, with the notification and inspection that applies to it. Selecting that trade is covered in our guide to choosing an electrician for your renovation in Ontario.
ZaRRuS is not a gas contractor and not an electrical contractor. Regulated work of both kinds is completed by qualified independent licensed and insured trades, and coordinated as part of the project rather than performed in-house. That coordination is most of the value on a wall like this, because the failures happen at the joins between trades rather than inside anyone’s own work.
For a wood-burning appliance or an existing chimney, an inspection by a technician certified for solid-fuel appliances is the normal starting point, and insurers commonly ask for that documentation. Confirm what your own insurer requires before the work rather than at renewal.
Permits and inspections
Two separate approval tracks apply, and confusing them is common.
The gas side is handled through the technical safety framework, and the certified contractor deals with the paperwork attached to the appliance installation. From a homeowner’s point of view it arrives bundled with the installation rather than as a separate application.
The building side is municipal and depends on what is actually being built. Straightforward replacement of an existing appliance reusing the existing venting, gas line and opening commonly does not trigger a building permit. Once the work involves new framing, a new chase, a new penetration through an exterior wall or roof, alterations to a chimney, or anything structural such as removing a masonry breast, a municipal permit is usually in play. Requirements differ between municipalities across the GTA, so the question is answered by the municipality the house is in, not by a general rule.
The practical consequence for the schedule is that inspections gate the finish. Framing and rough-ins have to be seen before anything is closed up, which means the wall cannot be boarded, stoned or fitted out on a convenient day. Build that into the programme rather than meeting it as a delay, the same way the rest of a renovation sequence works in the renovation planning guide.
The order the wall actually gets built
Very little of this sequence is optional, and knowing it makes the whole project easier to follow.
- Choose the exact appliance model and obtain its installation manual.
- Confirm a vent route on site with the trade who will install it.
- Design the wall to the rough opening, clearances and vent route, and draw the non-combustible boundary on the elevation.
- Settle the television question, the equipment location and the lighting intention, because all three are wiring.
- Confirm permits with the municipality where the work requires them.
- Frame the chase and any alcove, to the manufacturer’s dimensions.
- Set the appliance and run the venting.
- Rough in gas, electrical, data, conduit and control wiring, and install all blocking.
- Inspections, before anything is covered.
- Substrate, with the correct board in the hot zone.
- Non-combustible finish around the opening.
- Millwork installed and scribed to what was actually built.
- Appliance commissioned by the certified trade, and service access confirmed to be reachable.
- Trim, paint, lighting trim-out and final adjustment.
Steps one and two carry most of the risk. Almost every serious problem on a media wall traces back to the appliance being chosen late or the vent route being assumed rather than verified. Which decisions have to land at which milestone across a whole project is set out in what to choose before a renovation starts.
Working with a chimney breast that already exists
In older housing the wall is rarely empty, and the existing breast is usually the thing everything else has to accommodate.
Start with its condition and its status. Whether the flue is sound, whether it is still in use, whether it serves anything else in the house, and whether the structure above depends on it are all questions that come before any design work. A breast that carries load is not something to remove on a whim, and removal generally means providing support above, which brings in structural design and a permit.
Keeping it is often the better answer. The alcoves either side of a breast are already recessed and already framed, and they take fitted joinery well. A gas or electric insert fitted into the existing opening modernises the appliance without touching the structure, and it resets the clearance question around the insert’s own instructions. The masonry face can then be left, plastered, or clad within whatever the insert permits.
Expect the wall to be out of plumb and the breast to be out of square. That is normal in a house of that age and it is a joinery problem rather than a fireplace problem, handled by scribing rather than by forcing a standard unit into a non-standard opening.
Media walls across Toronto and the GTA
The constraints move with the housing stock, and they change which appliance is realistic more often than they change the design.
In older Toronto houses the existing masonry breast dominates, so the project is usually a retrofit rather than a new wall, and the real decision is insert, leave, or remove. Semi-detached and narrow-lot houses add a second constraint that surprises people: there may be very little exterior wall available for a horizontal vent termination once windows, doors and the neighbouring property are taken into account, which pushes the answer towards vertical venting or towards electric.
Newer housing in Vaughan and Richmond Hill brings the opposite problem. Great rooms with double-height walls make proportion the main difficulty, because an appliance sized for a normal room disappears on a two-storey elevation. Interior-wall fireplaces are also more common in these layouts, and that is where the vertical chase through the floor above becomes a genuine design question rather than a detail.
In Markham, open-plan family rooms mean the fireplace wall is usually seen from the kitchen and the dining area as well as from the sofa. It is on show from three directions, which raises the standard for the returns and the edges, and makes a wall that only resolves from the front look unfinished from the side.
Condominium units anywhere in the region are their own case. A vent penetration through the building envelope is usually not available, which makes electric the practical answer, and the building’s own approval process applies before anything starts.
Common mistakes
- Designing the elevation before choosing the appliance.
- Specifying by type or size rather than by exact model, then framing to the wrong rough opening.
- Assuming a vent route instead of having it verified on site.
- Forgetting that a vertical vent needs a chase through the room above.
- Overlooking the termination clearances outside, then finding the cap cannot legally go where the wall wants it.
- Detailing timber or MDF inside the non-combustible zone.
- Treating a deep mantel as equivalent to a flush band at the same height.
- Fixing a non-combustible finish to a combustible substrate in the hot zone.
- Sealing the appliance’s service access behind fixed joinery or bonded stone.
- Covering the discharge grille of an electric unit with a mantel or a tight reveal.
- Deciding on a television after the wall is closed, so there is no alcove, no conduit and no blocking.
- Relying on a shallow mantel to protect a screen from rising heat.
- Raising the firebox and then discovering the screen above it is too high to watch.
- Running cable loose in the wall instead of conduit.
- Leaving the junction between joinery and the non-combustible field undrawn.
- Removing a masonry breast without establishing what it supports.
Questions worth asking
- Which exact appliance model is specified, and can I see its installation manual?
- What is the rough opening, and who is responsible for framing to it?
- What is the vent route, has it been verified on site, and where does it terminate?
- If it vents vertically, which room does the chase pass through, and how much space does it take?
- Where exactly does the non-combustible zone end on the elevation?
- What substrate is going in behind the finish around the opening?
- Who is the TSSA-registered contractor, and can I see the registration?
- Does this work need a municipal building permit, and who applies for it?
- Where is the appliance’s service access, and how is it reached once the wall is finished?
- What blocking, conduit and outlets are going in before the wall closes?
- If a screen is going above, is it recessed, and has the finished height been checked from the seating?
- Who owns the junction between the millwork and the surround?
- What is excluded from the price: appliance supply, gas, electrical, permits, finishes, painting?
Frequently asked questions
What has to be decided before a fireplace media wall can be designed?
The exact appliance model, and its vent route. Everything structural follows from those two. The manual supplies the rough opening, the framing dimensions, the clearances to combustible material and the service access, and the vent route determines whether the work stays inside this room or involves a chase through the floor above and a termination on the outside of the house. An elevation drawn before both are settled is provisional, and redrawing it after framing is the expensive way to find out.
Can I put wood or painted MDF around the fireplace opening?
Outside the clearance zone, yes. Inside it, no. Clearance to combustible material depends on how far the material projects from the wall face: something almost flush can sit relatively close above the opening, and the required separation increases the further an element projects, because a projection traps rising heat against itself. Non-combustible materials carry no such restriction, so the band closest to the opening is normally stone, tile, metal or non-combustible board. The figures that apply come from your appliance’s own instructions, which govern and can be stricter than the general rule.
Do I need a permit for a fireplace in Ontario?
Two things run in parallel. The gas installation is regulated under the Technical Standards and Safety Act, and the certified contractor handles that paperwork as part of the installation. A municipal building permit is a separate question and depends on the construction: a like-for-like appliance swap reusing the existing vent and opening often does not need one, while new framing, a new chase, a new penetration through the wall or roof, chimney alterations or removing a masonry breast usually do. Requirements vary between municipalities, so confirm with the one the house is in.
Who is allowed to install a gas fireplace in Ontario?
A certified gas technician with the appropriate certification, working for a contractor registered with the Technical Standards and Safety Authority. The installation must comply with the appliance’s certified instructions and with CSA B149.1, the gas installation code. It is not work a general contractor or a homeowner can carry out, and registration can be verified before anyone starts. Electrical work is separate again and belongs to a licensed electrical contractor.
Can a fireplace go on an interior wall?
Yes, but for anything that burns it changes the project. Without an exterior wall to vent through horizontally, the vent runs vertically, which means a chase travelling up through whatever sits above, commonly a bedroom, closet or bathroom on the next floor. That chase takes real floor area and has to be designed into the room above rather than discovered during framing. An electric unit avoids the problem entirely, since it needs no vent at all, and that is why electric is so often the sensible answer on an interior wall or in a condominium.
How do I mount a television above a fireplace without cooking it?
Deal with the rising column of warm air coming off the glass rather than with the firebox. A shallow mantel achieves very little, because the air wraps around its edge and keeps going. What works is genuine distance, a mantel or hood with enough projection to actually deflect, or recessing the screen into a framed alcove so the warm air passes in front of it. The alcove also lets the screen sit flush. It has to be framed with the chase, sized to the actual television, mount and cables, and vented at the top. Check the screen’s own operating-temperature limits with whoever made it; meeting the appliance’s clearances does not answer that.
Is an electric fireplace a compromise?
Not in the situations it suits. It removes the vent, the chase, the gas line and the flue penetration, which makes it the only realistic option on many interior walls, in basements and in condominiums. It still has clearances, it still needs a dedicated circuit, and its heater usually discharges through a grille that must not be covered by a mantel or a tight reveal. Where a real flame matters, it is not a substitute. Where the wall is about the architecture and the effect, it often produces a better result because it imposes so little on the structure.
Should the fireplace wall run all the way to the ceiling?
It depends on the height of the room and what else is on the wall. Full height gives the strongest architectural statement and suits tall or double-height rooms, where stopping partway tends to leave the wall looking unfinished. In a normal-height room, stopping at a datum that relates to a window head, a door head or the joinery can read better and costs less in finish material. What matters more than the choice is deciding it before framing, since it affects both the structure and the extent of the substrate.
Can I put an insert into my existing masonry fireplace?
Usually, and it is often the most sensible option in older housing. A gas or electric insert modernises the appliance without touching the structure, and once fitted it becomes the listed appliance, so its instructions govern the clearances rather than the original masonry construction. Start with the condition of the existing chimney and flue, and establish whether the breast carries load before considering removal. Expect the opening to be out of square, which is a scribing job for the joiner rather than a reason to force a standard unit into it.
What gets built into the wall before it is closed up?
Gas supply with an accessible shut-off, power to the appliance, a dedicated circuit for an electric unit, power and data at the screen position, conduit between the screen and the equipment cabinet, power and ventilation inside any cabinet holding equipment, lighting supply and switching, control wiring for a switch or thermostat, and solid blocking anywhere something will later be fixed. Also the appliance’s service access, which has to be reachable without dismantling joinery. Every one of these closes at rough-in, and all of them are cheap now and disproportionately expensive later.
In short
Choose the appliance before anything is drawn, and get its manual. That document sets the rough opening, the clearances, the service access and the vent options, and it is the real basis for the design. Verify the vent route on site, because it decides whether this is a project confined to one wall or one that reaches into the room above and onto the outside of the house.
Draw the non-combustible boundary on the elevation and let the joinery begin outside it. Settle the screen, the equipment and the lighting before rough-in, since all three are wiring. Put in the blocking and the conduit while the wall is open, and keep the service access reachable.
Then let the cabinetry follow. It is the most adjustable part of the wall and the last thing built, which is exactly why it should not be the first thing designed.
Planning a fireplace or media wall in Toronto or the GTA? Fireplaces and media walls sets out how we approach this work, and you can request a consultation to go through the appliance and the wall together. Our process page explains how projects are run, and selected work shows completed projects.