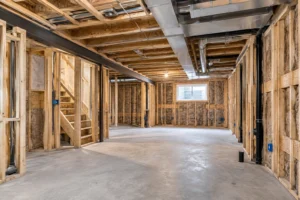

A finished basement is judged almost entirely on things nobody can see. Whether it smells right in August. Whether the floor is cold in February. Whether the drywall in the corner behind the sofa is still sound in ten years. All of that is decided by the assemblies — the layers of material between the concrete and the room, and the order they go in.
It is also the part that gets the least attention, because none of it survives into the photographs. By the time a basement looks like a room, every consequential decision has been covered up.
This guide covers how a basement should actually be built below grade in this climate: moisture control, the wall assembly, vapour behaviour, what the Ontario Building Code asks for, the rim joist, the floor build-up, the ceiling, and where your headroom goes. Whether your basement can be finished at all, which depends on height, water and egress, is a separate question answered in what to settle first about basement renovations in Toronto. This article assumes that answer is yes.
Moisture comes before everything
Every basement failure that matters traces back to water, and every one of them is cheaper to solve before framing than after.
Three different water problems
They get talked about as one thing and they are not, which is why the wrong fix gets applied so often.
- Bulk water. Liquid water entering through a crack, a failed joint, a window well or a blocked drain. It is obvious when it happens and it is the one people act on.
- Capillary moisture. Water drawn up through concrete from the soil, continuously and invisibly. Concrete is porous, and a slab or foundation wall in contact with damp ground is permanently damp on the inside face even when nothing is leaking.
- Water vapour and condensation. Warm humid indoor air meeting a cold surface. This is a summer problem more than a winter one, and it is the reason a basement can smell musty in July with no leak anywhere.
A sump pump addresses the first and does nothing for the other two. Most of what follows in this guide is about the second and third, because they are the ones that quietly determine whether a finished basement stays sound.
What has to be resolved before a single stud goes up
Run the basement through a wet season first if the timeline allows it, and deal with anything the wall is telling you. Efflorescence, the white mineral bloom on concrete, means water is moving through it. Staining at the base of a wall means water has arrived there. A damp patch that returns after drying is not going to stop because a stud wall is in front of it.
Exterior grading and downspouts are the cheapest intervention available and are fixed first, because a large share of basement water problems are surface water arriving at the foundation rather than groundwater rising. Cracks get evaluated and repaired. Window wells get drainage. Where there is a genuine hydrostatic problem, that is drainage work rather than finishing work, and it belongs before the interior project rather than inside it.
Nothing in an interior assembly is a substitute for stopping water getting in. Insulation and membranes manage vapour and control condensation. They do not hold back a wet wall.
The wall assembly
This is the decision that separates a basement that performs from one that is merely finished, and it is the one most often made by default.
Why a stud wall straight against concrete fails
The traditional approach, still seen regularly, is a 2×4 wall built tight to the foundation, filled with fibreglass batts, wrapped in polyethylene and drywalled. It is fast and it is cheap and it creates exactly the conditions mould wants.
The foundation wall is cold and slightly damp. Fibreglass is permeable and absorbs moisture readily, so batts in contact with concrete sit wet. Warm indoor air reaches that cold surface and condenses. The poly on the room side then prevents the assembly drying inwards, which is the only direction it could dry. Everything the assembly needs to get rid of is trapped in the one place nobody can inspect.
The failure is slow and silent — it shows up years later as a smell, or when something is opened up for an unrelated reason.
The thermal break is the whole idea
What makes a basement wall work is a layer of impermeable insulation in direct contact with the concrete, so that the concrete’s surface is never cold enough for indoor air to condense on it, and so that no absorbent material ever touches the foundation.
Get that layer right and the rest of the assembly is straightforward. Get it wrong and nothing downstream compensates.
Rigid foam board
Boards fixed directly to the foundation, seams taped, with a stud wall built in front and drywall over it. Predictable, inspectable, and the option that most easily gives a continuous layer with no framing interrupting it.
The detail that decides whether it works is the seams. An untaped joint is a path for humid air to reach cold concrete, and one gap undoes a wall’s worth of careful work. The same applies where the foam meets the floor, the ceiling and every penetration.
Closed-cell spray foam
Sprayed directly onto the concrete, it conforms to an irregular surface and seals itself as it goes, which is a real advantage on old rubblestone or fieldstone foundations where no board will ever sit flat. At sufficient thickness it acts as its own air and vapour control layer, which simplifies the assembly considerably.
It costs more, it is not a material you can inspect behind afterwards, and it depends heavily on the installer working within the product’s conditions. A poorly installed application is difficult to remediate, which is a reason to ask about the applicator rather than only the product.
Where batt insulation still belongs
Not against the concrete. In the stud cavity in front of a continuous foam layer, batts are perfectly reasonable and are how most assemblies reach their required performance without using foam for the whole thickness. The foam handles the temperature and the vapour; the batts add resistance in the cavity. Order matters more than material here.
Insulating from outside, where it is an option
Almost every basement in this region is insulated from the inside, for the obvious reason that the alternative means excavating around the house. It is worth knowing that the alternative exists, because occasionally the excavation is happening anyway.
Where a foundation is being waterproofed from outside, or drainage is being replaced, or the grade is being rebuilt, insulation can be applied to the exterior face at the same time. That puts the concrete inside the thermal envelope rather than outside it, which is the better building-science outcome: the foundation stays warm, condensation on its inner face stops being a concern, and the interior gains no build-up at all, so no headroom is lost and the full wall thickness stays available.
The reasons it is rare are practical rather than technical. Excavation is expensive and disruptive, it is constrained by property lines and by what is planted or paved above, and the insulation has to be protected where it emerges above grade. On a narrow city lot with a neighbouring wall a few feet away, it is often simply not available.
The point at which to ask the question is when exterior work is already planned for another reason. Doing it then costs a fraction of doing it for its own sake, and the opportunity does not come round often.
Vapour control, and the double-barrier mistake
The most common serious error in a finished Ontario basement is adding polyethylene where the assembly already has a vapour control layer.
Rigid foam at normal thicknesses, and closed-cell spray foam at the thicknesses used on foundation walls, are themselves low-permeability layers. Putting poly on the warm side of them creates two barriers with insulation and framing sandwiched between. Any moisture that gets in, from a small leak, from construction moisture in the concrete, from a plumbing drip, now has no direction in which to dry. The assembly becomes a sealed container.
Poly is normal practice in above-grade walls in this climate, which is why it gets applied below grade out of habit. Below grade, with a foam layer already present, it usually should not be there. This is worth raising explicitly with whoever is building the wall, because it is a detail that gets done the way it has always been done.
The principle to hold onto: an assembly should be able to dry in at least one direction. Two impermeable layers with something absorbent between them cannot.
What the Ontario Building Code asks for
Requirements are set out in the Code’s supplementary standard for energy efficiency, and for a finished basement the headline figure is R-20 for foundation walls forming part of the building envelope, applied over the full height of the wall rather than only the portion above grade.
Two points matter more than the number.
Effective R-value is not the same as the number on the packaging. The Code accounts for thermal bridging, and a stud wall filled with batts performs below its nominal rating because every stud is a conductive path through the insulation. A 2×4 cavity filled to a nominal value delivers meaningfully less than that in practice. Continuous insulation, meaning a layer uninterrupted by framing, is what closes that gap, which is a second and quite separate argument for the foam-then-frame approach.
Compliance packages exist. The standard sets out combinations rather than a single mandatory build-up, so more than one assembly can satisfy it. That is a question for whoever is taking out the permit, and it is a reasonable thing to ask a contractor to state in writing: which package are we building to, and what is the assembly.
Editions of the Code change and local building departments read them differently. Take the figure that applies to your project from the department issuing your permit, not from an article, this one included.
Framing in front of the assembly
Once the insulation layer is continuous, the stud wall’s job is to carry drywall, services and fixings rather than to insulate on its own.
Two details are worth specifying. The bottom plate sits on concrete that will always carry some moisture, so it is either pressure-treated or separated from the slab by a capillary break. And the wall is normally held a small distance off the foundation rather than pressed against it, which keeps the framing out of contact with cold concrete and gives room for the insulation to be continuous behind it.
Old foundations are rarely straight. A wall framed parallel to a bowed foundation follows the bow; a wall framed straight leaves a varying gap behind it, which is usually the better outcome because the finished room is square. That gap is a decision, not an error, and it is worth agreeing which way it is being done.
The rim joist, which leaks more than anything else
At the top of the foundation wall, where the floor structure sits on it, there is a band of framing that is effectively an uninsulated exterior wall running around the entire perimeter of the house. In most older houses it is stuffed with a fibreglass batt or nothing at all.
It is the single largest air leakage path in a typical basement and it is fully accessible during a finishing project, which makes it the highest-value work in the whole job per hour spent. A batt does not solve it, because air passes straight through fibreglass and condenses on the cold wood behind.
Two workable approaches. Closed-cell spray foam applied into each bay seals and insulates in one operation and copes well with the wiring and pipes that usually run through the area. Rigid foam cut to fit each bay and sealed at the edges achieves the same result with more labour and works where spray foam is not being used elsewhere. Where rigid foam is left exposed, a thermal barrier is generally required over it, which is a detail to confirm rather than assume.
If budget is tight and something has to come out of the scope, this is not the thing — it is the cheapest comfort improvement in the whole job.
The floor
The slab is the surface people are least inclined to spend money on and the one that most affects how the room feels.
Why flooring does not go straight onto the slab
A slab in contact with soil passes moisture continuously, and it stays close to ground temperature year-round. Flooring laid directly on it is cold underfoot and sits in the path of that moisture. Laying a flat sheet of poly under the flooring makes it worse rather than better, because whatever moisture does arrive is then held against the underside of the floor with nowhere to go.
Dimpled membranes and panel subfloors
Both work on the same principle: a small air gap between the slab and the finished floor. The gap lets vapour pressure equalise and move rather than accumulate, and it provides a thermal separation so the floor surface is not held at slab temperature.
A dimpled polyethylene membrane is rolled out over the slab with plywood above it. Panel systems combine a membrane bonded to a board in one product, which is quicker to lay and sits at a known height. Either is a genuine improvement over flooring direct to concrete, and the difference between them is mostly build-up depth, labour and how flat the slab is to begin with.
What it costs in headroom
Every layer on the floor comes off the ceiling height, and in a basement that is the scarcest resource there is. A subfloor system plus a finished floor takes a real bite, and where headroom is already marginal that can be the difference between a room that feels normal and one that does not.
This is a genuine trade-off rather than a rule. A thinner build-up gives a colder, damper floor; a thicker one gives a warmer floor and a lower ceiling. Measure the existing height first and decide with the actual number in front of you, because the decision looks different at eight feet than at seven.
Insulating under the floor
Rigid foam between the slab and the subfloor adds warmth underfoot and is worth considering where headroom allows, particularly if the basement is intended as everyday living space rather than storage. Where it is planned alongside in-floor heating, the insulation stops the heat being driven straight down into the ground and is close to essential rather than optional.
Flooring that suits a basement
The environment is different from the rest of the house: more stable in temperature, higher in humidity, and with a small but real chance of water at some point.
Luxury vinyl plank and tile are the common answers because both tolerate moisture and a wetting event without being destroyed, and both go down over a subfloor system without difficulty. Engineered wood is possible over a properly detailed build-up and is a reasonable choice where the basement is dry and the look matters; solid hardwood below grade is generally not. Carpet is comfortable and forgiving underfoot and is the least tolerant of any water incident.
Worth asking before choosing: if fifteen millimetres of water crossed this floor once, what would it cost to put right. The answer varies enormously between these options and it is the most useful way to compare them below grade.
The ceiling
Two real options, and the choice is about access as much as appearance.
Drywall looks like the rest of the house and gains an inch or two of perceived height because it sits tight to the joists. What it costs is access. Everything above it becomes a cutting job: shut-off valves, cleanouts, junction boxes, the drain that will one day need attention.
A suspended ceiling gives complete access and has improved a great deal in appearance, but it hangs below the joists and takes height, which is exactly what a basement has least of.
The practical answer in most basements is a mix: drywall across the main area, with removable access panels or a section of suspended ceiling where the services that actually need reaching are concentrated. That requires knowing where those are before the ceiling closes, which means walking the basement with whoever knows the mechanical layout and marking them.
Sound is the third consideration and the most commonly regretted omission. A basement used as a media room, a teenager’s space or a home office sits directly under the main floor, and the transmission goes both ways. Insulation in the joist space, resilient channel, and attention to the perimeter all help, and all are trivial to install while the ceiling is open and impossible afterwards.
Bulkheads and the things that will not move
Every basement has ducts, beams, drain stacks and posts, and the design accommodates them rather than the reverse.
Some ducting can be rerouted or replaced with a lower-profile run, which buys headroom in the middle of a room and costs money. Some cannot move at all. Drain stacks fall at a fixed slope and their route is largely fixed by physics. Structural posts and beams are not negotiable without engineering.
What separates a good basement layout from an awkward one is usually that the bulkheads were treated as design elements early. A bulkhead that runs the full length of a room and aligns with something reads as deliberate. One that stops halfway across for no visible reason reads as an accident, even when both were equally unavoidable.
Comfort: heat, air and humidity
A finished basement is a new conditioned space, and the existing system was not sized for it.
Supply and return both matter. Adding supply registers without adding return air gives a room that is stuffy and never quite balanced. Basements also tend to run cooler than the floors above and are often on the same thermostat as the main floor, which is why a separate zone, electric in-floor heating in specific areas, or a ductless unit are worth considering rather than assuming the furnace will cope.
Humidity is the other half. Below grade humidity runs higher in summer, and a well-insulated basement with poor air movement can sit damp even when it is dry. A dedicated dehumidifier with a drain, planned in rather than plugged in later, is a small item that makes a large difference to how the space feels and smells.
Any electrical involved is done by qualified independent licensed and insured trades. ZaRRuS coordinates that work within the project rather than carrying it out. If you are selecting that trade yourself, our guide to choosing an electrician in Ontario covers licensing and the questions worth asking.
Where the headroom actually goes
Worth setting out plainly, because headroom is spent in small amounts by several different decisions and people are surprised by the total.
- The subfloor system, plus the finished flooring on top of it.
- Any rigid foam laid under the subfloor.
- The ceiling finish, which is close to nothing for drywall on the joists and considerably more for a suspended grid.
- Resilient channel, if sound isolation is being done properly.
- Bulkheads, locally, wherever the services run.
Measure from the underside of the joists to the existing slab before designing anything, then subtract honestly. It is much better to discover the finished height on paper than to stand in the room at the end and feel it.
The order the layers go on
Assemblies are built from the concrete outwards, and the sequence is not flexible.
- Water management outside and at the foundation, finished and proven.
- Concrete repairs, crack injection and anything the wall needs, on bare walls.
- Continuous insulation against the foundation, seams sealed, carried right down to the slab and up to the underside of the floor above.
- Rim joists sealed and insulated, before anything obscures them.
- Subfloor system over the slab.
- Stud walls framed in front of the insulation, on a treated or isolated bottom plate.
- Cavity insulation, where the assembly uses it.
- Ceiling insulation and sound treatment, while the joists are open.
- Drywall, then finishes.
Steps three and four carry most of the long-term risk, and both are covered up early. Look at them before they disappear, or ask for photographs. It is the only opportunity you will have.
Where this sits in the wider construction programme, including the inspection points that gate it, is set out in how to plan a home renovation in Toronto.
Making it stop feeling like a basement
Technically sound and pleasant to sit in are different achievements, and the second is mostly about light and proportion.
Basement windows are small and set high, and the wall opening around them is deep because the foundation is thick. Splaying the reveal, so the finished opening widens towards the room instead of running square through the wall, meaningfully increases the light that actually enters. Enlarging a window well and keeping it clear does the same from the outside. Both are cheap relative to their effect.
Artificial light then has to do more work than it does upstairs, and one grid of ceiling downlights is the usual mistake. A basement needs layers: general light, light at the perimeter to push the walls back, and task light where people actually read or work. Getting that wrong is the most common reason a well-built basement still feels like one.
Storage is the other half. Basements absorb the household’s overflow whether or not anyone plans for it, and built-in storage designed into the layout keeps that from taking over the room. The depth constraints and spatial trade-offs are covered in built-in storage for small rooms.
Basements across Toronto and the GTA
The assemblies are the same everywhere. What changes is the starting condition, and it changes a great deal.
Older Toronto housing is the demanding case. Foundations may be rubblestone or brick rather than poured concrete, which rules out board insulation sitting flat and pushes towards spray foam. Slabs are often thin, uneven, or laid without a vapour barrier beneath, which makes the subfloor decision more consequential. Ceiling height is frequently the binding constraint before anything else is considered. Older drainage and frequent past alterations mean the moisture investigation is genuinely worth doing rather than a formality.
Post-war housing in North York generally has poured concrete foundations and more regular slabs, so the assembly is more straightforward. The recurring issues there are ducting installed with no thought of a finished ceiling, and grading that has settled over decades and now runs towards the house.
Newer housing in Vaughan, Richmond Hill and Markham usually offers the best starting point: full height, sound concrete, often a rough-in for a bathroom and sometimes partial insulation already in place. The work there is about doing the assembly properly rather than overcoming the building, and the common trap is assuming that because the basement is new it is already correctly insulated. Partial insulation to the builder’s minimum is not the same as a finished-basement assembly, and what is already on the wall is worth checking rather than building over.
Across all of them, a second suite or rental unit adds requirements around fire separation, egress and services that go well beyond finishing. That is a different project with a different approval path, and it is worth establishing at the outset which one you are doing.
Common mistakes
- Framing before the water problem is actually solved.
- Fibreglass batts in direct contact with the foundation wall.
- Polyethylene over an assembly that already has a foam vapour control layer.
- Untaped seams in rigid foam, which undo the continuity the layer exists to provide.
- Insulating only the portion of the wall above grade.
- Leaving the rim joist as found, or stuffing it with a batt.
- A bottom plate sitting directly on the slab with no treatment or capillary break.
- Flooring laid straight onto concrete, or onto a flat sheet of poly.
- Choosing the floor build-up without measuring the headroom it costs.
- Drywalling the ceiling over valves, cleanouts and junction boxes with no access.
- Skipping sound treatment while the joists are open.
- Adding supply air with no return.
- No plan for summer humidity.
- Solid hardwood below grade.
- Assuming a builder-finished basement is already insulated to a finished-space standard.
Questions worth asking
- What exactly is the wall assembly, layer by layer, from concrete to drywall?
- Is there a vapour barrier in it, and if so, why is it where it is?
- Which Code compliance package are we building to, and what effective R-value does it achieve?
- Is the insulation continuous behind the framing, or only in the stud cavities?
- How are the rim joists being insulated and sealed?
- What is going on the slab before the flooring, and how much height does the whole build-up take?
- What will the finished ceiling height be, measured rather than estimated?
- Where are the access points to valves, cleanouts and junction boxes?
- What sound treatment is going in between the basement and the floor above?
- How is this space being heated, and is return air being added?
- What is the plan for summer humidity, and does the dehumidifier have a drain?
- Does this work need a permit, and who applies for it?
- Can I see the insulation and the rim joists before they are covered?
Frequently asked questions
What is the right way to insulate a basement wall in Ontario?
Put a layer of impermeable insulation in direct contact with the concrete, so nothing absorbent ever touches the foundation and the concrete surface never gets cold enough for indoor air to condense on it. That is either rigid foam board fixed to the wall with the seams taped, or closed-cell spray foam applied directly to it. A stud wall is then framed in front, and cavity insulation can be added inside it to reach the required performance. The order is what matters: continuous insulation first, framing second.
Do I need a vapour barrier in a finished basement?
Usually not an additional one, and adding poly is the most common serious mistake below grade. Rigid foam at normal thicknesses and closed-cell spray foam at foundation-wall thicknesses are already low-permeability layers. Putting polyethylene on the warm side of them creates two barriers with insulation and framing trapped between, so any moisture that gets in cannot dry in either direction. Poly is standard practice above grade, which is why it gets applied below grade out of habit. Raise it explicitly with whoever is building the wall.
What R-value does the Ontario Building Code require for a basement?
For foundation walls forming part of the building envelope in a finished basement, the headline requirement in the Code’s energy-efficiency supplementary standard is R-20, applied over the full height of the wall rather than only above grade. Two things matter more than the number: the Code works in effective R-value, which accounts for heat conducted through the studs, so a cavity filled to a nominal rating performs below it; and the standard sets out compliance packages rather than one mandatory build-up. Confirm the current requirement with the municipality issuing your permit.
Why can’t I just put fibreglass batts against the foundation?
Because fibreglass is permeable and absorbent, and the foundation wall is cold and carries moisture. Batts in contact with concrete sit damp, warm indoor air reaches the cold surface and condenses, and if there is poly on the room side the assembly cannot dry inwards either. The result is a wet, enclosed cavity that nobody can inspect. The failure is slow and silent, usually noticed years later as a smell. Batts are fine in the stud cavity in front of a continuous foam layer; they are not fine against concrete.
Can flooring go directly on the basement slab?
It can, and it usually should not. A slab in contact with soil passes moisture continuously and stays near ground temperature all year, so flooring laid straight onto it is cold and sits in the path of that moisture. Laying a flat sheet of poly underneath makes matters worse by holding whatever arrives against the floor. A dimpled membrane with plywood over it, or a panel subfloor system with the membrane bonded on, creates a small air gap that lets vapour move and separates the finished floor from the cold slab.
How much ceiling height will I lose?
It depends on the choices, which is why it should be totalled on paper before anything is designed. The subfloor system and finished flooring take a real bite, rigid foam under the subfloor takes more, the ceiling finish takes almost nothing for drywall fixed to the joists and considerably more for a suspended grid, resilient channel adds a little, and bulkheads take height locally wherever services run. Measure from the underside of the joists to the existing slab first, then subtract honestly. The right trade-off looks very different at eight feet than at seven.
What is the rim joist, and why does everyone mention it?
It is the band of framing at the top of the foundation wall where the floor structure sits, and it runs around the whole perimeter of the house. In most older houses it is effectively an uninsulated exterior wall, which makes it the largest single air leakage path in a typical basement. It is also fully accessible during a finishing project, so it is the highest-value work in the job per hour spent. A fibreglass batt does not fix it, because air passes through and condenses on the cold wood behind. Closed-cell spray foam or cut-and-sealed rigid foam both work.
Drywall ceiling or drop ceiling?
Drywall looks like the rest of the house and preserves height because it sits tight to the joists, but it removes access to everything above it. A suspended ceiling gives complete access and has improved in appearance, but it hangs below the joists and costs the height a basement can least spare. Most basements are best served by a mix: drywall across the main area with removable access panels, or a section of suspended ceiling, where the valves, cleanouts and junction boxes are concentrated. That requires identifying them before the ceiling closes.
What flooring works best in a basement?
Luxury vinyl plank and tile are the usual answers, because both tolerate humidity and survive a wetting event, and both lay easily over a subfloor system. Engineered wood works over a properly detailed build-up in a dry basement; solid hardwood below grade generally does not. Carpet is comfortable and the least tolerant of any water. A useful way to compare them is to ask what it would cost to put the floor right if fifteen millimetres of water crossed it once. The answers differ enormously, and that difference matters more below grade than the appearance does.
My basement smells musty but there is no leak. Why?
Most likely humidity and condensation rather than liquid water. Below-grade air runs more humid in summer, and warm humid air meeting cool concrete or a cold slab condenses on it. Capillary moisture rising through porous concrete adds to the load without ever appearing as a leak. The remedies are the ones in this guide: a continuous thermal break so surfaces are not cold enough to condense on, a subfloor that lets the slab breathe rather than trapping it, air movement including return air, and a dehumidifier with a proper drain rather than one somebody has to empty.
Is a builder-finished or partially insulated basement already done properly?
Not necessarily. Newer houses often arrive with partial insulation installed to the minimum required for an unfinished basement, which is not the same as the assembly a finished, conditioned space needs. What is already on the wall is worth checking rather than building over: how far down it runs, whether it is continuous, whether there is poly behind it, and whether the rim joists were treated. Finding out costs very little at the start and is effectively impossible once framing and drywall are in.
Do I need a permit to finish a basement?
Generally yes for the kind of work described here, since finishing a basement typically involves framing, insulation, electrical and often plumbing, and it may involve altering openings. What triggers a permit and how the rules are read is set locally, so treat your own municipality’s building department as the authority and ask them early. Settle who is applying at the same time. The practical consequence is scheduling: an inspector has to see the insulation and the services while they are still exposed, so the date the walls get closed is not yours to pick.
In short
Solve the water before anything else, and be honest about what the walls are telling you. Then build the assembly in the right order: continuous impermeable insulation against the concrete, framing in front of it, and no second vapour barrier trapping the middle.
Seal the rim joists while they are open, because nothing else in the basement returns as much for the effort. Give the slab an air gap rather than laying flooring straight onto it. Total the headroom on paper before committing to a floor build-up and a ceiling type, and keep access to the services you will one day need to reach.
Almost none of this is visible when the job is finished, which is exactly why it is worth specifying carefully and looking at before it is covered.
Thinking about a basement in Toronto or the GTA? Our basement renovation page covers this work, and the most useful first step is usually a site visit to measure the real headroom and look at what the walls are doing before any design starts. You can also see how we run a project and examples of completed work.