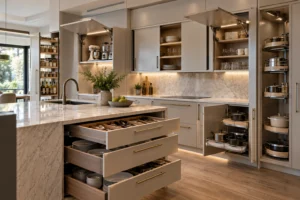
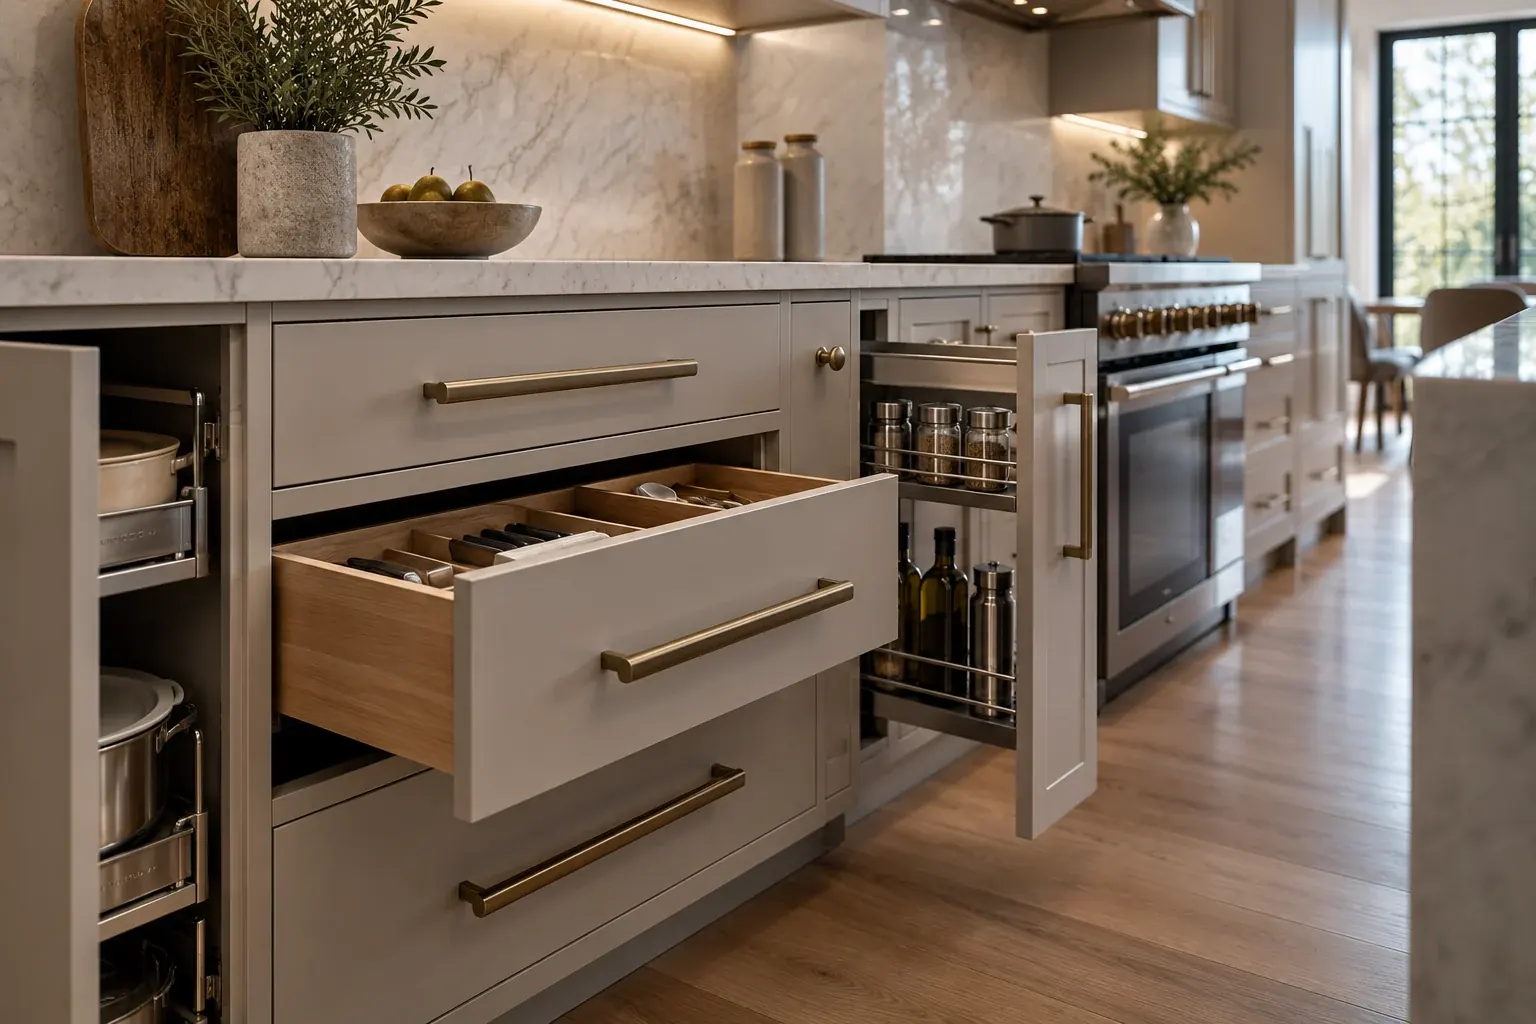
Cabinet hardware is usually treated as the last decision in a kitchen — a finish chosen from a board once everything important is settled. It is actually a specification exercise, and a good deal of it has to be settled before the cabinets are made, because holes are bored and mechanisms are fitted in the shop.
This guide is about making those decisions: which type to choose, what size, where it goes, which finish will still look right in five years, which mechanisms justify their cost, and what to put in writing before you approve a cabinet order. It assumes you already know roughly what a hinge or a drawer slide is — the complete guide to custom cabinets and built-in storage covers what the components are and how cabinets are built, and this article deliberately does not repeat it.
Two kinds of hardware, two kinds of decision
It helps to separate them, because they are chosen on completely different grounds.
- Decorative hardware — knobs, pulls, edge profiles. Visible, chosen largely on appearance and feel, replaceable later within limits. Its decisions are proportion, placement and finish.
- Functional hardware — hinges, slides, lift mechanisms, pull-outs, corner units. Mostly invisible, chosen on performance and duty, and effectively permanent because the cabinet is built around it. Its decisions are load, travel, duty cycle and whether the mechanism earns its place at all.
The practical consequence: get the functional side wrong and you live with it or rebuild. Get the decorative side wrong and you can usually change it, provided the replacement matches the hole spacing already drilled. That asymmetry should drive how much time you spend on each.
Knobs or pulls
This is a decision about how the kitchen gets used before it is a decision about how it looks.
A knob is gripped with the fingertips and pulled from a single point. It suits doors, where the load is light and the swing does the work. It reads as a series of small punctuation marks across an elevation, which suits traditional and shaker cabinetry where the door already has detail.
A pull is gripped with the whole hand and spreads the load along its length. It is significantly easier on a heavy drawer, and much easier for anyone with reduced grip strength. Visually it draws a line, which is why long pulls suit flat slab doors — the hardware supplies the horizontal or vertical emphasis the door does not have.
The common and sensible arrangement is knobs on doors, pulls on drawers: it matches each to its load, and it gives the elevation two related but distinct rhythms. Pulls throughout is the cleaner, more contemporary option and the better one for accessibility. Knobs throughout works in a traditional kitchen but makes heavy drawers harder to open than they need to be.
Two functional notes. A drawer loaded with crockery is genuinely heavy, and a single central knob concentrates all of that on a fingertip grip. And anything in a tight passage is better without hardware that projects — a pull with a shallow profile, or an integrated edge pull, avoids catching on clothing.
Sizing: proportion is the whole game
The most common hardware mistake is not a bad choice of handle. It is a good handle at the wrong size. Undersized hardware makes a run look mean; oversized hardware makes it look like a commercial kitchen.
The widely used convention among designers and hardware suppliers is the one-third rule: a pull’s overall length should be roughly a third of the width of the drawer face it sits on. A four-inch pull suits a twelve-inch drawer; a wide pan drawer wants something substantially longer than most people instinctively reach for. Where a drawer falls between two available sizes, the usual advice is to size up rather than down.
Knobs work to a much smaller ratio — commonly cited as somewhere between a twelfth and a tenth of the door or drawer width, because a knob is a point rather than a line and does not need to span anything.
Treat all of these as starting points rather than rules. They are proportional conventions, not standards, and a particular handle profile or a particularly tall drawer can justify departing from them. What matters is that the ratio stays consistent across the run.
Very wide drawers
Past a certain width a single pull looks lost and, more importantly, pulls unevenly — the drawer racks slightly in its runners every time it is opened from one point. The usual resolution is two pulls, positioned by dividing the drawer width into thirds and centring one on each line. It looks deliberate and it opens straight.
The alternative is one very long pull spanning most of the face, which suits a minimal slab kitchen but needs the drawer box and slides to be up to it.
Placement
Placement is bored in the shop, which makes it a decision taken on a drawing rather than on site. Getting it agreed in advance is the single most useful thing in this article.
On doors, hardware sits on the opening stile, opposite the hinges. The usual convention places the knob, or the end of a pull, somewhere in the region of two to three inches in from both edges on a slab door. On a shaker or framed door the rail and stile give you a natural reference instead — centring on the stile, or aligning to the inside edge of the frame, produces a more considered result than measuring from the outside edge.
Vertical position on a tall door matters more than people expect. Hardware placed at a comfortable height for an adult can be out of reach for a child and awkwardly low on a very tall door. On full-height pantry doors, consider a long vertical pull, which removes the question entirely by being reachable along its length.
On drawers, there are two coherent approaches and you should pick one and hold it. Either centre the hardware both ways on every drawer face, which looks calm and is the safer choice when drawer heights vary; or set it a consistent distance down from the top edge of every drawer, which creates a strong horizontal band across the run and gives slightly better leverage. Mixing the two — some centred, some near the top — is what produces a run that looks subtly wrong without anyone being able to say why.
Orientation. Pulls on drawers are almost always horizontal. On doors, vertical is the norm; horizontal pulls on doors can work in a deliberately contemporary scheme but need the whole kitchen designed around the idea. Whatever you choose, keep it consistent within a sightline.
Finishes, and how they age
The useful question is not which finish you like today. It is how this finish will look after five years of cooking, and whether you will be happy with that. Hardware is touched with wet, greasy and floury hands several times a day, and finishes respond to that very differently.
Brass, and the lacquer question
Brass comes two ways and the difference is fundamental. Lacquered brass carries a clear protective coat: it holds its colour, needs little care, and looks the same in year five as in year one. The risk is the lacquer itself, which can wear through at the points of heaviest contact, and a worn patch is more noticeable than uniform ageing.
Unlacquered brass is a living finish that patinas with handling. Many people want exactly that, and it is genuinely beautiful, but go in with clear expectations. It shows fingerprints, water spotting and cooking oils readily. Its ageing is uneven: hardware near the cooking zone darkens noticeably faster than hardware on upper cabinets across the room, so a kitchen specified in unlacquered brass will not age as one piece. And controlling the rate of patina means periodic polishing or oiling, which is a maintenance commitment rather than a one-off.
If uneven ageing would bother you, lacquered is the honest choice. If it appeals, unlacquered is the only way to get it.
Matt black
The most forgiving finish in daily use. The matt texture conceals fingerprints and wear, the colour is stable, there is no patina or tarnish to manage, and maintenance is minimal. Visually it does not catch light — it reads as a flat graphic shape against the door rather than a highlight, which is why it works so strongly against pale cabinetry and why it can disappear against dark cabinetry.
The thing to check is the coating quality, since the entire performance depends on it. On a heavily used drawer a poor finish wears at the grip point and the base metal shows.
Nickel, chrome and stainless
The dependable middle. Brushed and satin variants hide marks well because the texture breaks up reflections; polished versions show every fingerprint and every water spot, which is why they are a harder choice beside a sink. Colour is stable and maintenance is straightforward.
Stainless is the most robust of the group and sits naturally with stainless appliances. The point worth knowing is that “stainless-look” finishes on another base metal behave differently from solid stainless, so ask what the component actually is rather than what colour it is called.
Mixing finishes
Mixing works, and it stops a kitchen looking like a showroom set, but it needs a rule rather than a feeling. The reliable approach is to mix by function, not at random: one finish for all cabinet hardware, another for plumbing fittings, a third for lighting. Each category stays internally consistent and the mix reads as intentional.
What does not work is two cabinet-hardware finishes in the same sightline with no logic behind the division. And warm and cool metals need enough separation to look chosen — a warm brass and a cool nickel side by side on the same run reads as a mistake rather than a contrast.
Matching hardware to the cabinetry
Hardware either continues what the door is already saying or deliberately argues with it. Both work. Doing neither is what produces a kitchen that feels slightly unresolved.
Flat slab doors have no detail of their own, so the hardware supplies all of it. This is where long pulls, integrated edge pulls and continuous rails belong, and where hardware choice carries the most visual weight — a slab kitchen is substantially defined by what is on the fronts.
Shaker and framed doors already have a frame drawing lines across the elevation. Hardware here works best referenced to that frame rather than to the outside edge of the door, and it can afford to be quieter, because the door is doing its share of the work. Oversized contemporary pulls on a shaker door are a deliberate mixed signal — effective when the whole kitchen is built on that tension, jarring when it is the only contemporary note in the room.
Traditional and detailed doors carry period-appropriate shapes comfortably — cup pulls on drawers with knobs on doors is a long-established pairing that still works. The thing to check is practicality: a cup pull is a genuinely good grip but collects crumbs and needs wiping out, which is worth knowing before rather than after.
Three cross-cutting considerations. Finish against door colour — hardware close in tone to the door recedes and lets the cabinetry read as one surface, while a strong contrast turns each handle into a deliberate mark; both are valid, and the unconvincing option is a finish slightly off the door colour. Scale against the room — hardware that looks right on a sample door can look undersized across a long run seen from ten feet away, which is a particular risk in open-plan kitchens. And the appliances, which come with their own handles in their own finish and are usually the largest hardware in the room; a kitchen specified in warm brass with a wall of stainless appliances needs that relationship resolved deliberately rather than discovered on installation day.
Functional hardware: what to specify
The components themselves are covered in the cabinets guide. What follows is what to actually ask for, because this is where a quote is either specific or vague.
Hinges
Points to settle rather than assume: whether soft-close is included on every door or only some; the opening angle, which matters where a door opens against a wall or into a corner and where a drawer behind the door needs the door out of the way; how many hinges per door, since a tall or heavy door needs more than a standard one; and whether the hinges suit the door’s thickness and overlay.
Ask whether the same hinge is used throughout or whether the quote mixes specifications between the show areas and the rest. Both are legitimate; only one of them is what you assumed.
Drawer slides and drawer systems
Four things to specify, and they are the four that get left vague:
- Load rating per drawer, checked against what the drawer will actually carry. A pan drawer, a cutlery drawer and a drawer of crockery are three different duties, and the crockery drawer is heavier than it looks.
- Extension. Full extension on anything deep, because the back of a partially-opening deep drawer is storage you will stop using. On shallow or low-use drawers it matters much less.
- Closing action — soft-close, self-close, or push-to-open — specified per location rather than assumed to be uniform.
- Drawer box construction and depth, since the box and the runner are a system; a good runner under a weak box is money spent in the wrong place.
One thing worth asking that few people do: whether the drawers are removable without tools, and how. You will need to take one out eventually, and some systems make it trivial while others do not.
Where to concentrate the budget
The cabinets guide sets out the principle of specifying in tiers rather than uniformly. Applying it in a kitchen comes down to a single question per location: how many times a day will this be opened?
The cutlery drawer, the waste pull-out and the two or three drawers beside the hob are opened constantly — those are where smoothness and durability are felt, and where money is well spent. A corner cupboard holding appliances used twice a month is not. Counting openings rather than counting cabinets is what makes the difference between hardware that feels good everywhere it matters and hardware that is uniformly adequate.
Mechanisms, and whether each one earns its place
Every mechanism adds cost, complexity, and a part that can eventually need adjustment or replacement. That is not an argument against them — it is an argument for being able to state what problem each one solves in your kitchen before it goes in the order.
Waste and recycling pull-outs
The one mechanism that is almost always justified, because it is used more than any other cabinet in the kitchen and because loose bins take floor space and look poor.
What to decide: how many compartments, which follows from how your household actually separates waste rather than from how many the unit offers; whether they are sized for your bags and bins; whether the unit is door-mounted, so it comes out when the door opens, or a separate pull-out behind a door; and whether the liners lift out easily, since the whole point is carrying them away. Place it beside the sink or the main prep area — a waste unit at the far end of the kitchen gets bypassed.
Pantry pull-outs
Excellent in the right proportions and disappointing outside them. A tall narrow pull-out gives access from three sides and nothing is lost at the back — genuinely better than a deep shelved cupboard of the same volume.
The failure mode is scale. A very wide or very deep pull-out becomes heavy when loaded, needs substantial runners, and swings a large mass into the room every time it opens, which needs clear floor in front. Ask about the load rating for the size you are specifying, and check the clearance against the opposite run — in a galley kitchen this is frequently the binding constraint.
Corner mechanisms
Corners are genuinely awkward, and this is where mechanisms most often get specified without the alternatives being considered. The realistic options are a rotating carousel, a pull-out system that swings the contents clear of the opening, a simple deep cupboard accepting that the back is low-frequency storage, or designing the corner out altogether by finishing the run short and using the space from the other direction.
All four are valid. The mechanism is worth it when the corner will hold things used regularly; when it will hold the slow cooker and the preserving pan, a plain cupboard does the same job for considerably less. Ask what the mechanism actually costs as a line item before deciding — it is often a larger number than expected.
Lift-up, bi-fold and pocket doors
Upper doors that lift rather than swing, on gas struts or a mechanical stay. Their real advantage is that nothing projects into the room at head height, which matters above a work surface where a swinging door is something to walk into.
What to check: that the mechanism is matched to the actual door weight, which depends on the material and any glass; that the door in its open position is not itself an obstruction; and that the stay holds reliably in the open position rather than drifting. Bi-fold versions stack the door into a shallower projection. Pocket doors, which open and then slide back into the cabinet — are the most complex of the group and consume interior space to house the door, so they are justified where a door genuinely must disappear rather than merely open.
Appliance storage
An appliance garage — a cupboard at worktop level where the kettle, toaster and coffee machine live and stay plugged in — is one of the most useful things in a modern kitchen, because it removes the objects that otherwise permanently occupy the counter.
Three things decide whether it works. Power inside it, which has to be planned with the electrical work. An opening arrangement that stays out of the way while you use what is inside — a tambour that rolls up, a lift-up front, or pocket doors. And ventilation and heat, since a kettle or toaster in a closed compartment produces steam and warmth that need somewhere to go; using an appliance with the front closed is generally not the intention.
Inside the drawer
Drawer interiors are where a lot of hardware money goes, sometimes well.
- Cutlery inserts — almost always worth it, in the drawer opened most often. Removable trays beat fixed compartments, because they can be lifted out and cleaned and because a fixed layout is sized to today’s cutlery.
- Tray and plate dividers — vertical dividers for baking sheets, boards and trays turn an unusable stack into something you can take one item from. Adjustable ones adapt as what you own changes.
- Peg systems in deep drawers — a grid with movable pegs that hold crockery in place. Genuinely effective for plates stored flat in a drawer instead of an upper cupboard, which is a real accessibility gain.
- Inner drawers — a second shallow drawer behind a tall drawer front. Excellent for utensils in a run where the elevation wants large fronts, and a sensible way to gain a drawer without changing how the kitchen looks.
- Knife blocks and spice inserts — worth it where the drawer is beside the prep area and not otherwise.
The general caution is the same throughout: fixed inserts are sized to a moment in time, and removable or adjustable ones keep working when what you own changes.
Handleless kitchens: the real trade-off
Removing visible hardware is a strong look, and there are three routes to it, each with a different consequence.
Push-to-open catches remove hardware entirely. The trade is that you open cabinets by pressing the front, so fronts collect fingerprints exactly where you least want them — a significant consideration on a dark matt finish. Some systems also interact awkwardly with soft-close, so ask how the two work together on the specific system proposed. And a push catch is harder for someone with limited strength or dexterity than a pull is.
Integrated or routed edge pulls machine a grip into the door itself. No projection, nothing to catch on, no fingerprints on the face, and the door still opens by pulling. Usually the most practical handleless route.
A continuous rail or channel behind the top edge of the fronts gives a consistent grip across the whole run and a strong horizontal line. It works best in a kitchen designed around it from the start.
Whichever route, decide it early: all three change how the fronts are made, and none can be added afterwards.
Ergonomics and accessibility
Hardware is the part of a kitchen that hands actually touch, which makes it where accessibility is won or lost. This is worth thinking about even if it is not currently a consideration, because it costs nothing extra to choose well.
- Pulls over knobs wherever grip strength might be limited. A pull can be hooked with a hand or a forearm; a knob requires a pinch grip.
- D-shaped and bar pulls with real clearance behind them, so fingers fit comfortably. A pull set very close to the door is harder to use than it looks.
- Avoid push-to-open where dexterity is a concern; it requires a deliberate press and gives no purchase.
- Drawers instead of low cupboards. The single biggest ergonomic improvement available in a kitchen — a drawer brings its contents up and out instead of requiring you to crouch and reach into the dark.
- Full extension on deep drawers, so nothing requires reaching over the contents.
- Pull-down shelf mechanisms for upper cabinets where reach is limited, bringing the contents down to counter height.
- Avoid sharp edges and fine detail on anything gripped with wet hands.
What happens in the shop, and why it constrains you
Handle holes are drilled before the doors reach your house. That single fact is behind most hardware regret.
Boring is done to a jig or a machine setting, which is how a run of forty doors ends up with hardware in genuinely identical positions. Doing it on site after the fact is possible but rarely matches that consistency, and a mis-drilled hole in a finished door is not a small problem.
The consequence for changing your mind later: a replacement handle has to match the existing hole spacing, the centre-to-centre distance between the fixings. Within that constraint you can swap freely — a different profile or finish at the same spacing is a straightforward change. Outside it you are filling and re-drilling finished doors.
Two practical steps. Handle a sample before committing — weight, edge comfort and how the finish feels are not conveyable in a photograph, and this is a component you will touch thousands of times. And approve a drawing showing hardware positions, not just a hardware model, so that placement is agreed rather than assumed.
Where the kitchen forms part of a wider renovation, these decisions sit on the cabinet-order milestone along with door style and finish — see what to choose before a renovation starts for how that sequencing works.
Clarify these before approving a cabinet order
- Which hinge is being supplied, and is soft-close on every door or only some?
- What opening angle, and does any door open against a wall or into a corner?
- Which slide system, at what load rating, and full extension on which drawers?
- Is the specification uniform, or does it differ between show areas and the rest?
- Soft-close, self-close or push-to-open — specified where?
- Can drawers be removed without tools?
- Exact decorative hardware: model, finish, size per cabinet type, and hole spacing.
- A drawing showing hardware positions, approved before boring.
- Which mechanisms are included, and what does each cost as a line item?
- Waste unit: compartment count, sizes, door-mounted or not, liners removable?
- Clearance checks for every pull-out and lift mechanism against the opposite run.
- Power and ventilation for any appliance cupboard.
- Are drawer inserts fixed or removable?
- What is the warranty position on mechanisms, and who supplies replacements?
Point fourteen matters more than it sounds. Mechanisms are the components most likely to need attention years later, and knowing whose they are and how they are obtained is worth establishing while everyone is still in the room.
Common hardware mistakes
- Choosing hardware after the cabinets are ordered, when boring positions were already fixed.
- Pulls too small for the drawer, which is the most common sizing error by a wide margin.
- Inconsistent placement — some drawers centred, some near the top.
- Choosing a living finish without understanding it will age unevenly across the kitchen.
- Polished finishes beside a sink, where water spotting is constant.
- Spreading a hardware budget evenly instead of concentrating it where cabinets are opened daily.
- Specifying mechanisms without checking extension clearance against the opposite run.
- A waste unit placed away from the prep area, which then gets bypassed.
- An appliance cupboard with no power in it, or no path for steam and heat.
- Fixed drawer inserts sized to today’s possessions.
- Push-to-open on dark matt fronts, then being surprised by fingerprints.
- Never handling a sample before committing to a component touched thousands of times.
- Mixing metals without a rule, so the result reads as accidental.
Kitchens across Toronto and the GTA
Hardware decisions are much the same everywhere, but what surrounds them is not.
In Toronto, kitchens in older housing tend to be smaller and more constrained, which pushes the decisions toward clearance. In a galley kitchen in a semi or a row house, the distance between opposing runs is often the factor that rules out a wide pull-out or a lift-up door — the mechanism works perfectly in a showroom and not at all in a five-foot gap. Doors and drawers are also frequently within reach of a passage, which favours shallow-profile or integrated pulls over anything that projects.
In Vaughan, Markham and Richmond Hill, newer housing generally supplies large kitchens with long runs and generous clearances, which is where the decisions change character. With more cabinets, hardware count rises quickly and the difference between specifying uniformly and specifying by frequency of use becomes a substantial number rather than a rounding error. Long runs also make consistency of placement far more visible — a band of pulls across twenty drawer fronts shows any variation immediately. And where these kitchens open onto a family or dining area, the hardware is read as part of that larger room, so it has to work at a distance as well as in the hand.
Large islands in these homes raise one more question worth settling early: whether the island’s hardware matches the perimeter or deliberately differs, which is a legitimate place for a considered contrast rather than a mistake. You can see the areas covered under service areas, including Toronto, Vaughan, Markham and Richmond Hill.
How ZaRRuS approaches hardware
Hardware is specified alongside the cabinet order rather than chosen afterwards, because boring positions and mechanism provisions are shop operations. Functional hardware is set from duty — what each drawer will carry and how often each cabinet is opened — rather than applied uniformly, and mechanisms are proposed only where a specific problem can be pointed at.
Decorative hardware is sized proportionally and placed consistently across the run, with positions shown on a drawing for approval before anything is drilled. Samples are handled before selection, because weight, grip and finish do not come across in an image. Clearances for pull-outs and lift mechanisms are checked against the opposite run at design stage, not on installation day.
Where specialised licensed work is required — power to an appliance cupboard, for instance — it is completed by qualified independent licensed and insured trades, engaged and coordinated as part of the project. This work sits under kitchen renovation. You can see the standard of finish across completed work under selected work and experience, and our process sets out how a project runs.
Frequently asked questions
What size cabinet pulls should I use?
The widely used convention is the one-third rule: a pull’s overall length should be roughly a third of the width of the drawer face, so about a four-inch pull on a twelve-inch drawer, and something considerably longer on a wide pan drawer than most people instinctively choose. Where a drawer falls between sizes, size up. Knobs work to a much smaller ratio, commonly cited as a twelfth to a tenth of the width, because a knob is a point rather than a line. These are proportional conventions rather than standards; what matters most is keeping the ratio consistent across the run.
Knobs or pulls, which should I choose?
Decide on use before appearance. A knob is a fingertip grip suited to doors, where the load is light. A pull spreads the load along its length, which makes it considerably easier on a heavy drawer and much better for anyone with limited grip strength. Knobs on doors and pulls on drawers matches each to its load and is the most common arrangement. Pulls throughout is cleaner and the better accessibility choice. Knobs throughout suits a traditional kitchen but makes heavy drawers harder to open than they need to be.
Where should cabinet hardware be positioned?
On doors, on the opening stile opposite the hinges — conventionally around two to three inches in from both edges on a slab door, or referenced to the frame on a shaker door. On drawers, pick one approach and hold it: either centred both ways on every face, or a consistent distance down from the top edge of every face. Mixing the two is what makes a run look subtly wrong. Very wide drawers usually want two pulls, positioned by dividing the width into thirds. All of this is bored in the shop, so agree it on a drawing beforehand.
Is unlacquered brass a good idea in a kitchen?
Only if you actively want a living finish. Unlacquered brass patinas with handling, shows fingerprints, water spotting and cooking oils, and needs periodic polishing or oiling to control how fast it darkens. The point most people miss is that it ages unevenly — hardware near the cooking zone darkens noticeably faster than hardware on uppers across the room, so the kitchen will not age as one piece. If that appeals, nothing else gives it. If it would bother you, lacquered brass holds its colour, though the lacquer itself can wear through at heavy contact points.
Which hardware finish is easiest to live with?
Matt black is the most forgiving in daily use — the texture conceals fingerprints and wear, the colour is stable, and there is no patina to manage. Brushed and satin nickel or stainless are close behind, because the texture breaks up reflections. Polished finishes of any metal show every fingerprint and water spot, which makes them a harder choice beside a sink. With matt black, check the coating quality, since the whole performance depends on it and a poor one wears through at the grip point.
Can I mix hardware finishes in one kitchen?
Yes, with a rule rather than a feeling. The reliable approach is to mix by function: one finish for all cabinet hardware, another for plumbing fittings, a third for lighting, each category internally consistent. What does not work is two cabinet-hardware finishes in the same sightline with no logic behind the division, or a warm and a cool metal adjacent on the same run, which reads as an error rather than a contrast. A deliberate difference between an island and the perimeter is a legitimate exception.
Is premium hardware worth the extra cost?
In some places, decisively. The question to ask per location is how many times a day it will be opened. The cutlery drawer, the waste pull-out and the drawers beside the hob are used constantly, and that is where smoothness and durability are actually felt. A corner cupboard holding appliances used twice a month is not. Spreading the same budget evenly across every cabinet means most of it goes into doors nobody opens; concentrating it by frequency of use makes the whole kitchen feel better for the same money.
Are corner cabinet mechanisms worth it?
It depends entirely on what goes in the corner. A carousel or swing-out system is worth it when the corner holds things used regularly. When it holds the slow cooker and the preserving pan, a plain deep cupboard does the same job for considerably less, accepting that the back is low-frequency storage. A fourth option is designing the corner out — finishing the run short and using the space from the other direction. Ask what the mechanism costs as a line item before deciding; it is often more than expected.
What is the downside of a handleless kitchen?
It depends which route you take. Push-to-open catches remove hardware entirely, but you then open cabinets by pressing the front, so fronts collect fingerprints — a real consideration on dark matt finishes, and a push catch is harder for anyone with limited strength or dexterity. Integrated or routed edge pulls avoid both problems and are usually the most practical handleless option. A continuous rail behind the top edge of the fronts works well but suits a kitchen designed around it. All three change how the fronts are made, so none can be added later.
Can I change cabinet handles later?
Within one constraint: the replacement has to match the existing hole spacing, the centre-to-centre distance between fixings. Inside that, swapping profile or finish is straightforward. Outside it you are filling and re-drilling finished doors, which rarely looks as good as the original boring — that is done to a jig or machine setting in the shop, which is how a run of forty doors ends up genuinely identical. It is one reason to handle a sample and approve a positions drawing before anything is drilled.
What should I clarify before approving a cabinet order?
Which hinge and whether soft-close is on every door; the opening angle where doors meet walls or corners; the slide system, its load rating, and which drawers get full extension; whether the specification is uniform or differs between show areas and the rest; whether drawers come out without tools; the exact decorative hardware including size per cabinet type and hole spacing; a drawing showing hardware positions approved before boring; which mechanisms are included and what each costs as a line item; extension clearances checked against the opposite run; power and ventilation for any appliance cupboard; whether drawer inserts are fixed or removable; and the warranty position on mechanisms.
In short
Treat hardware as a specification, not a finishing touch. Settle the functional side from duty — load, extension and how often each cabinet is opened, and concentrate the budget where hands land daily rather than spreading it evenly. Justify every mechanism by naming the problem it solves, and check its clearance against the opposite run before it goes in the order.
On the visible side, size pulls proportionally, place them consistently, and choose a finish for how it will look after five years of cooking rather than how it looks on a sample board. Handle a sample first, approve a drawing showing positions, and remember that the holes are drilled in the shop, which is why almost all of this has to be decided before the cabinets are made.
Planning a kitchen in Toronto or the GTA? Request a consultation and we will work through the specification with you. Our renovation FAQ covers how projects are planned and run.