
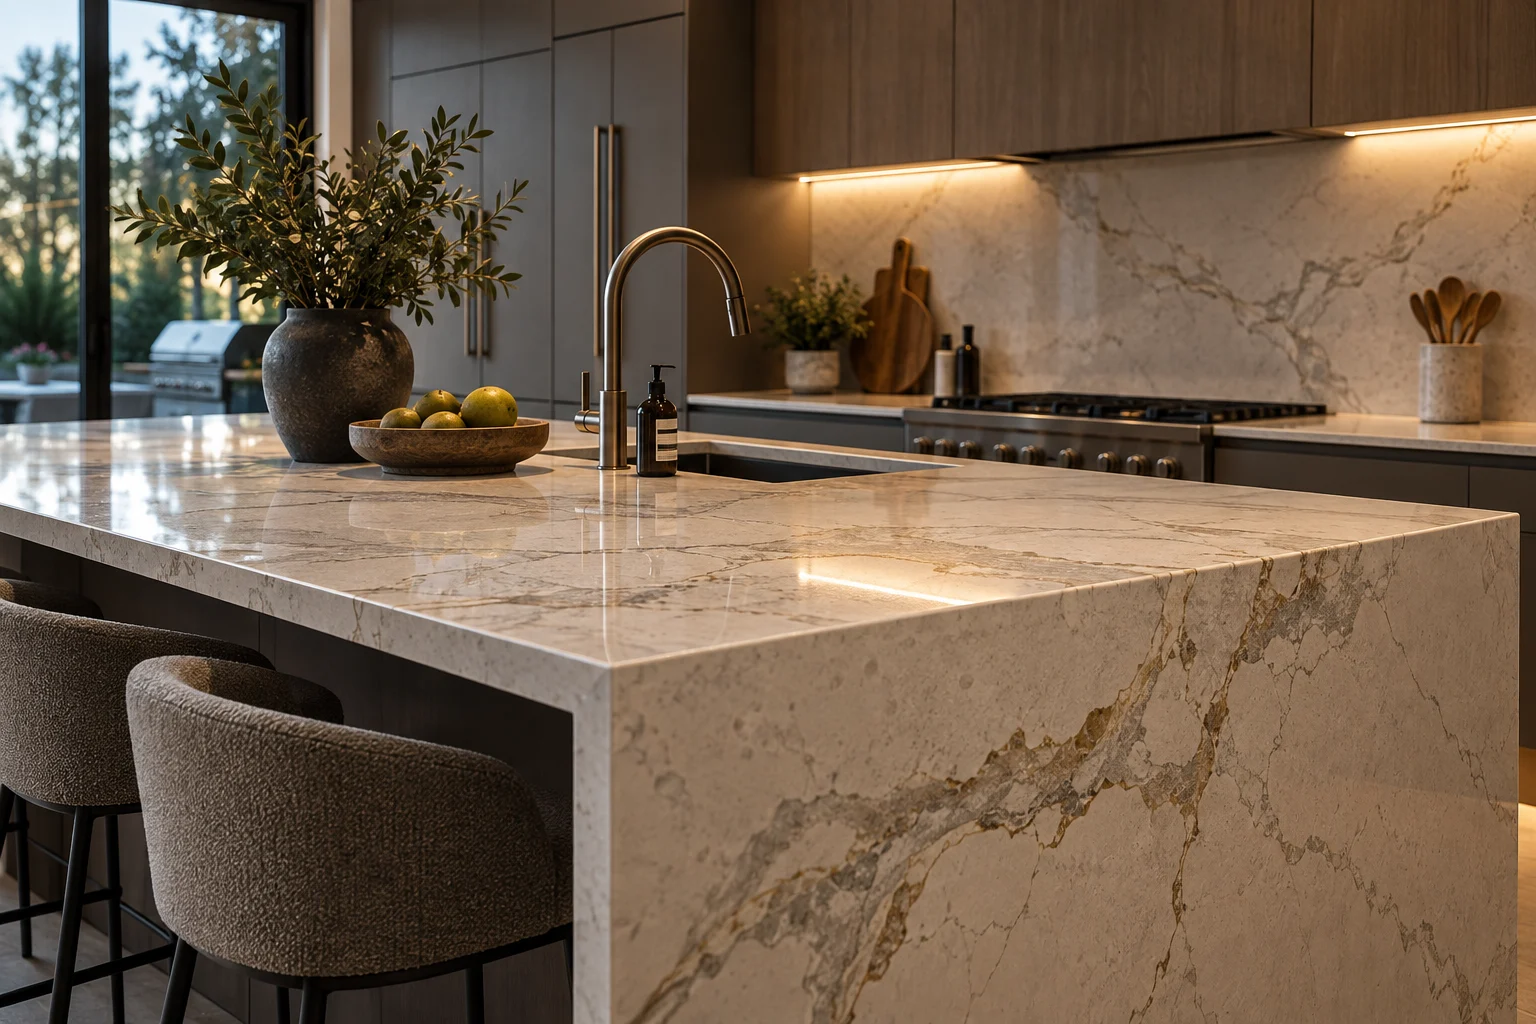
Most countertop conversations start with the material and stop there. Quartz or granite, porcelain or something natural, and once that is settled people assume the rest is ordering. In practice the material sets the boundaries and little else. What the counter looks like when it is in, and how it behaves for the next fifteen years, is decided by which slab you get, where the seams land, how thick the edge is, how the overhang is carried, and what condition the cabinets and walls were in when the fabricator measured.
Those decisions have a hard deadline. Once the slab is on the saw, every one of them is permanent — and permanent here means new material, not an adjustment. You can repaint a kitchen, change the handles, swap a light fitting. You cannot move a seam.
This guide compares the materials on how they behave rather than how they are sold, then works through the fabrication decisions that determine the outcome. The short countertop section in the complete guide to custom cabinets and built-in storage lists the main materials; this is the comparison and the specification behind it.
Four questions that decide the material
Comparison tables list properties without telling you which ones matter in your kitchen. These four questions sort the field faster, because each eliminates something.
- Do hot pans land on the counter? Not in theory: in the kitchen you actually run, does a pan come off the hob and go straight down beside it? If yes, that pushes against engineered quartz and towards natural stone or porcelain.
- Does acid get spilled and left? Lemon, wine, vinegar, tomato, most descaling cleaners. This decides whether marble is a reasonable choice or a slow disappointment.
- How much direct sunlight hits the surface? A counter under a south-facing window for several hours a day is a different environment from one against an interior wall.
- Do you want a surface that stays as delivered, or one that acquires a history? This is temperament, not performance, and it is the single best predictor of whether someone will be happy with natural stone.
Answer those before looking at a single sample and the shortlist writes itself.
Quartz: engineered stone
Engineered quartz is crushed quartz aggregate, typically well over ninety per cent of the material by weight, bound with a polymer resin and pigment, then pressed and cured into a slab. Everything good and everything limiting about it follows from that resin.
Because the resin fills the voids, the slab is non-porous. No sealing, no absorbed oil or wine, genuinely low-maintenance in a way natural stone is not. It is also consistent: the sample you approve is close to the slab you receive, which matters when you are specifying from a showroom rather than a slab yard, or when several slabs have to read as one surface.
The resin is also the weakness, in two specific ways worth knowing before you choose rather than after.
Heat. The quartz aggregate does not care about a hot pan. The polymer holding it together does, and it degrades well below the temperature of a pan coming off a burner. The damage shows as a dull mark, a discoloured patch, or a crack where heat lands unevenly on a narrow section. Every major manufacturer instructs owners to use trivets, and heat damage is excluded from essentially all of their warranties. That exclusion is the clearest statement of the material’s actual limit.
Ultraviolet light. The same resin yellows under sustained UV exposure, which is why manufacturers do not warrant outdoor installation and why a few products are sold for exterior use with a different resin chemistry. Indoors it is rarely an issue. A pale counter sitting in direct sun for hours a day is the case where it can become one.
Neither of these makes quartz a bad choice. They make it a choice with a known operating envelope. If trivets are already a habit and the kitchen is not a sun trap, quartz is the lowest-effort surface available and the reason it dominates new kitchens.
Granite and the natural stones that behave like it
Granite is quarried and cut, not manufactured, which changes what you get and how you buy it. Two slabs from the same quarry block are similar; two from different blocks of nominally the same stone can look like different materials. Choosing granite from a four-inch sample is choosing a name, not an appearance.
It handles heat well, which is its practical advantage over engineered quartz and why it persists in kitchens where people cook seriously. Porosity varies a great deal between stones, so it is sealed on installation and resealed periodically, on a schedule set by the specific stone rather than a universal rule. Leaving water on an offcut for a few minutes to see whether it darkens tells you more than any general figure.
Sealing is widely misunderstood. A sealer reduces absorption and so slows staining. It is not armour, it wears, and it does nothing about the chemical reaction discussed next.
Marble, quartzite, and the difference between staining and etching
This distinction causes more disappointment than any other in countertop selection, and it is simple once stated.
Staining is absorption. Something coloured soaks into the stone. A sealer sits in the pores below the surface and slows this down, which is why sealing helps.
Etching is a chemical reaction. Marble and limestone are calcium carbonate, and acid dissolves calcium carbonate. Lemon juice on a polished marble counter leaves a dull spot because the acid has reacted with the surface itself and taken the polish off. The sealer is below where the reaction happens, so sealing does not prevent etching. Nothing prevents etching on marble except not putting acid on it.
People who love marble kitchens accept this and usually choose a honed finish, where the dulling is far less visible because the surface was never polished. People who expect marble to stay pristine are unhappy within a year. Both outcomes are predictable from the outset, which is why the fourth question at the top of this guide matters.
Quartzite is the material most often proposed as the answer. It is metamorphosed sandstone, silica-based rather than carbonate-based, so ordinary kitchen acids do not react with it. It looks like marble and does not etch like marble, which is exactly what a lot of people want.
There is a catch the trade discusses openly and slab yards do not always volunteer: stones sold as quartzite are not always quartzite. Dolomitic marbles and softer stones are regularly labelled that way in the market, and they etch. Porosity also varies enormously across genuine quartzites, so sealing is answered stone by stone rather than by category. Ask for an acid test and a water test on an offcut of the actual slab before committing. No fabricator will find the request unusual.
Porcelain and sintered slabs
The newest of the mainstream options and the least understood. Mineral powders are pressed at very high pressure and fired, producing a dense slab with no resin in it. Removing the resin removes both limits that constrain engineered quartz: it tolerates heat and does not yellow in sunlight. It resists scratching well and is non-porous, so it never needs sealing.
On paper that makes it the strongest performer in the group. The complication is fabrication rather than performance.
Porcelain slabs are supplied thin. The thinnest formats are meant to be fully supported by a substrate rather than to span anything; around twelve millimetres covers most kitchen work with a normal undermount sink; twenty millimetres exists for spanning and for edge mass. Thin slabs mean the thickness you see at the edge is almost always built up by mitring two pieces together, and porcelain is brittle at the fine tip of a forty-five degree cut. Chipping during profiling is the characteristic failure, and it comes from feed rates, blade selection and water pressure rather than bad luck.
The pattern in most porcelain is also printed onto the surface layer rather than running through the body. A deep chip at a sink or an edge can therefore expose a differently coloured core. Some products carry the pattern further into the body specifically to address this, and it is worth asking which you are being quoted.
All of which makes porcelain a material where the fabricator matters more than the slab. It needs the right equipment and, more to the point, a shop that has cut a lot of it. Ask to see finished porcelain work at close range, specifically the mitred edges and the sink cut-out.
Laminate, and when it is the right answer
Laminate deserves a straight assessment rather than dismissal. It is a decorative surface layer bonded to a particleboard or MDF substrate, and the substrate is where the whole discussion lives. The laminate is reasonably tough and modern printing has improved the appearance considerably. The board underneath swells irreversibly when it gets wet.
That failure has two reliable locations: a seam, and the perimeter of the sink cut-out. Water finds the edge of the board, the board expands, the laminate lifts, and none of it sands out. Keep seams as far from the sink and dishwasher as the layout allows, and seal every cut edge around a sink opening rather than leaving it raw.
Two edge treatments are common. A postformed top rolls the laminate over the front edge in one continuous piece, often with an integral upstand at the back, removing the vulnerable front seam entirely. A square-edge top with an applied strip looks more contemporary and carries a visible joint along the front, more exposed to spills and wear.
Undermount sinks in laminate are possible but conditional. The exposed board edge must be sealed by a system designed for it, and the sink itself usually has to be one specified for laminate undermounting. A standard undermount sink and a standard laminate top is the combination that fails. A top-mount sink, whose rim covers and protects the cut edge, remains the straightforward answer.
Where laminate makes real sense: a laundry room, a secondary or basement kitchen, a rental unit, a workshop bench, or a main kitchen that is a deliberate interim step. Choosing it knowingly for one of those reasons is sound. Choosing it to save money on a kitchen you intend to keep for fifteen years usually is not, because the surface is the part of a kitchen that gets touched most.
The other surfaces, briefly
Four more appear often enough to be worth a line each.
- Solid surface is an acrylic or polyester composite, distinguished by being repairable: joints can be made invisible, sinks integrated with no rim at all, damage sanded out. It scratches and dislikes heat.
- Timber and butcher block is warm, sandable and needs ongoing oiling. Poor immediately around a sink, good on an island or a secondary run.
- Stainless steel is hygienic, heat-proof and effectively permanent. It develops a fine scratch patina, which is either the look you want or the reason you rejected it.
- Concrete is genuinely bespoke and genuinely variable. Porous, needs sealing, and hairline cracking is normal behaviour rather than a defect.
Thickness, and why the edge is a separate decision
In stone, two thicknesses matter: two centimetres and three. Three is the usual kitchen specification because it spans further without support and takes a deeper edge profile. Two is lighter and cheaper in material but needs more help, meaning more support beneath it, a shorter unsupported overhang, and often a build-up strip at the edge so it does not read as flimsy.
What you see at the front is not necessarily the slab. A mitred edge joins two pieces at forty-five degrees so a thin slab presents a thick face, and the visible depth becomes whatever you specify. That is how a twelve-millimetre porcelain counter ends up with a two-inch edge, and how a monolithic look is achieved without the weight or cost of solid stone.
Mitres are also where fabrication skill becomes visible. A well-executed mitre on a veined stone continues the vein around the corner and the joint reads as a shadow line. A poor one shows a dark seam, a slight step, or a vein that stops and restarts. Look at this specifically when you look at a fabricator’s work.
Edge profile is a smaller decision than it is usually made to seem. A square or lightly eased edge suits most current kitchens and is easiest to keep clean; heavily moulded profiles date, collect debris and cost more to machine. Where it earns attention is at a busy end of a run or an island corner, because a sharp arris chips more readily than an eased one, and a corner chip is the repair most people end up wanting.
Choosing the actual slab
For natural stone, and for heavily patterned engineered products, this step determines whether you are pleased with the result. It is also the one most often skipped.
Go to the yard and look at the slabs you are buying, not a sample of the same name, and stand back from them. Veining that looks elegant at arm’s length can read as a heavy diagonal across a finished island, and the only way to judge that is at distance, in daylight.
Several things are worth settling while you are standing in front of them.
- How many slabs the job needs, and whether they are from the same block. Consecutive slabs off one block match. Slabs from different blocks of the same stone often do not, and the difference lands on a seam where it is most visible.
- Whether the slabs are large enough for the pieces you want. Slab size is a physical limit. An island longer than the available slab will have a seam, regardless of budget.
- Where the strongest feature of the stone will sit. On a dramatic stone this is a real design decision. It usually wants to land on the island or the visible run rather than behind the kettle.
- Whether the slabs can be tagged and held. Stone moves through a yard. Reserving the specific slabs in writing, with their numbers recorded, is how you get the ones you chose.
- Whether you can see the layout before cutting. Fabricators can overlay the cut pieces onto a photograph or scan of the actual slab and show you where every piece and every seam falls. Ask to approve that drawing. It is the last point at which the result is still changeable.
Bookmatching, where two consecutive slabs open like a book so the veining mirrors across a joint, is frequently requested and frequently impossible. It needs the right consecutive slabs, the right joint position and more material than a conventional layout. A yard decision, not a finish applied later.
Seams: where they go, and why it is partly your decision
Seams are not a defect and not always avoidable. Slab size, room geometry and how the material gets through your house all impose them. What is negotiable is where they sit, and that conversation belongs before fabrication rather than on installation day.
Industry workmanship guidance is consistent on the structural rules, and a good fabricator applies them unasked. A seam should not sit over a dishwasher opening, because no continuous cabinet carries the joint there. Seams near a sink are avoided where possible and otherwise kept clear of the cut-out with support on both sides. Narrow sections, particularly the strips in front of and behind a sink, are commonly reinforced with a steel rod set into a routed groove and bonded with epoxy, a process called rodding, standard on thin or unsupported spans.
On visual quality, commonly published workmanship tolerances put a seam at around a sixteenth of an inch with minimal height difference between the two sides. Those figures are guidance rather than law, which is a reason to ask your fabricator what standard they work to and to have it stated in the quotation rather than assumed.
Appearance follows two patterns. A seam in busy veined stone disappears far more readily than one in a uniform pale stone, where the eye has nothing else to look at. And a seam in a corner, or where a run changes direction, is much less noticeable than one halfway along an open straight length. If the layout has a seam, the useful question is not whether it can be removed but whether it can be moved.
The sink cut-out
The sink is cut into the counter, which makes it a countertop decision as much as a plumbing one, and it has to be resolved before fabrication rather than during it.
An undermount sink hangs below the surface, so the stone edge around the opening is exposed and polished with no rim to catch debris. That is the default in stone and the reason stone counters wipe clean at the sink. How the cut-out relates to the bowl is itself a choice: cut slightly inside the bowl line, flush with it, or slightly outside, each giving a different look and a different amount of ledge to clean. A small detail — completely fixed once cut — and worth stating rather than leaving to the shop.
Weight is the part that gets missed. A heavy cast-iron or fireclay sink should be carried by structure inside the cabinet rather than by adhesive and clips under the stone. That structure is carpentry and has to exist before installation day. On an apron-front sink it usually also means cutting the cabinet face and building a platform to set the sink at exactly the right height. Discovered late, it delays everything.
Tap holes belong to the same decision. The number, spacing and diameter come from the actual tap, and a tap with a separate spray or filtered-water outlet changes the drilling. This is one of the reasons the real fixtures need to be present at templating rather than described.
The cooktop cut-out and appliance coordination
A cooktop opening is cut to the appliance manufacturer’s specification, and that specification is not generic. Two induction hobs of the same nominal width can need different cut-out dimensions, corner radii and clearances. The appliance has to be selected by exact model, and its installation document has to be in the fabricator’s hands.
Those clearances exist for heat reasons. They govern distance from the cut-out to combustible material, depth available below for the appliance body, and often a minimum distance to a side wall or tall unit. A cut-out made to the wrong figure is not meaningfully adjustable afterwards.
Downdraft extraction affects cabinet, counter and services at once: a large opening, the cabinet below consumed, and ducting that has to go somewhere. A layout decision made early, not an appliance chosen late.
Appliance selection sits alongside cabinetry in the ordering sequence for exactly this reason. What to choose before a home renovation starts sets out where each of these decisions falls against the construction milestones, and this article deliberately does not repeat that sequence.
Overhangs, islands and support
Stone is strong in compression and weak in tension, which is why an unsupported overhang has a limit and why people sit on islands.
Widely published industry guidance puts the unsupported cantilever at around ten inches for three-centimetre stone and around six for two-centimetre, with a further rule that the unsupported portion should not exceed roughly a third of the total depth. Denser stones tolerate more and softer ones less, so these are starting figures to confirm with the fabricator for the specific material.
Beyond those limits the overhang needs carrying. The options are visible or invisible, and the choice is architectural.
- Corbels or brackets under the stone. Honest, traditional, and they intrude into the knee space that the overhang exists to create.
- Concealed steel set into the cabinet top and extending out beneath the stone. Invisible once installed, but it has to be built into the island carcass, which means deciding before the cabinets are made.
- A supporting panel or a return leg at the end, which turns the overhang into a structure of its own and changes how the island reads.
Which makes it a cabinet decision as much as a stone one: an island designed for seating, with panelled ends and no visible brackets, needs its support built in at the shop. Discovering at template that the overhang needs steel is an expensive conversation.
Seating depth is a separate question from structural limit. An overhang that satisfies the cantilever rule can still be too shallow to sit at, and the constraint there is knees rather than stone. Sit at a mock-up rather than deciding on a plan.
Waterfall ends
A waterfall takes the counter over the end of an island and down to the floor. A strong detail, and a demanding one.
The top corner is normally mitred, so the two faces meet without an exposed edge and the material appears to fold. Whether the veining continues around that fold separates a waterfall that looks deliberate from one that looks assembled, and continuing it means cutting the vertical piece from the position immediately adjacent on the slab. That consumes material, which is why a waterfall costs more than its area suggests.
Two practical points. The vertical panel meets the floor, so the floor needs to be level at that point and the flooring finished or accounted for. And the detail is entirely permanent: a waterfall cannot be added later without recutting the top, and it cannot be removed later without leaving a raw end.
Backsplash coordination
Three approaches, and they are decided at the same time as the counter because they change what the fabricator cuts.
A full-height slab backsplash in the same material gives a continuous surface with no grout, and it is the option with the most coordination attached: it needs additional material from the same slabs, the wall behind it has to be flat and true, and outlet and switch positions have to be known in advance so they can be cut. Those positions come from the electrical plan, which closes long before the counter is templated.
A short upstand, typically around four inches of the same stone, is the traditional solution. It hides the junction with the wall, it forgives a wall that is not flat, and it is cheap because it comes out of offcuts.
A tiled backsplash separates the two decisions and goes on after the counter, because it sits on it. That is why a backsplash can be selected later than most tile, and why a delay at the countertop stage pushes the tiler too.
Counter finish and wall finish interact under light. A polished surface below a textured splash lit by under-cabinet lighting reflects that texture back, where a honed surface does not. Worth knowing when the lighting and the stone get chosen on different days.
Templating: the day the design stops being a drawing
Templating measures what has actually been built. Not the plan, not the cabinet drawing, but the real cabinets standing in the real room with their real deviations. Most shops now do it digitally, recording the geometry with a laser or photographic system rather than making a physical pattern.
What it records is the room’s imperfection: walls that are not parallel, corners that are not square, a run a few millimetres longer at one end. That is why the counter cannot be ordered from the drawing, and why the gap between cabinet installation and finished counters exists. How to plan a home renovation in Toronto covers where that gap sits in the programme.
What has to be physically present on template day is the part people underestimate. Not selected, not ordered: present.
- The sink, so the cut-out is taken from the actual bowl rather than a published dimension.
- The tap and any secondary outlet, so the hole positions and diameters are right.
- The cooktop, or at minimum its installation document with the exact model on it.
- Base cabinets installed, fixed, levelled and shimmed, with any appliance housings in place.
- Any support built into an island for an overhang, since it has to be measured around.
- Clear counters and clear access, which sounds trivial and costs a return visit when it is not done.
Several decisions are confirmed on the day: final seam positions against real dimensions, the exact overhang, the edge profile on each piece, the sink reveal. Being there for that conversation, or having somebody there who knows what was agreed, is worth more than specification written weeks earlier.
Cabinet readiness and wall conditions
Everything the countertop does depends on what it is sitting on, and two conditions matter — level, and flat.
Base cabinets have to be levelled and shimmed as a set before templating, not adjusted afterwards. Stone does not bend to follow a dip, and a counter laid across an uneven run either rocks or gets packed with shims that show at the edge. On an older floor that can mean a visible difference between the toe kick at one end of a run and the other, which is normal and far better resolved in the cabinet installation than at the counter.
Walls are the other half. A back edge meeting an out-of-plumb or bowed wall has to be scribed, a shaped cut following the wall’s actual line. There is a limit to what that absorbs, and beyond it the choice is to correct the wall or accept a visible gap. A short upstand hides a great deal of this. A full-height slab splash hides none of it, because the slab sits flat against the same wall.
Wall finish matters too. Where a slab backsplash is going on, the wall wants to be finished and true before templating. Where tile follows, the wall behind the counter can be left, because the tile covers the junction.
Installation, and what is still changeable afterwards
Installation is quick relative to everything leading to it. Pieces are carried in, dry-fitted, adjusted, seamed and bonded, the sink fitted and sealed, the perimeter siliconed. A normal kitchen is usually a day.
Access is the variable nobody plans for. A three-centimetre piece long enough for an island is heavy and rigid, and it has to get from the street to the room. Narrow hallways, tight stair turns, low basement headroom and elevator dimensions all cap the maximum piece size, which occasionally means an extra seam that has nothing to do with the slab and everything to do with the house. Raise it at quotation rather than meeting it on installation day.
Once the counter is in, here is the honest division between what can still be changed and what cannot.
Still changeable: the backsplash, if it is tiled. Paint. The tap, provided the replacement uses the same hole pattern. Cabinet handles and interior fittings, which are covered in the guide to kitchen cabinet hardware. Sealing regime and cleaning products. A top-mount sink, which can usually be swapped for another of the same footprint.
Fixed from the moment the slab is cut: the material, the colour, the specific slab, the thickness and edge profile, every seam position, the sink type and its cut-out shape, the tap hole positions, the cooktop opening, the overhang depth, and whether there is a waterfall. Changing any of those means new material and new fabrication, which is to say a new countertop.
That list is the reason the slab-layout approval matters so much. It is the last moment at which the expensive half of this project is still a drawing.
Maintenance, damage and repair
Day-to-day care is much the same across the hard surfaces: warm water, a neutral cleaner, a dry wipe. What differs is what happens when something goes wrong.
Abrasive creams and powders dull a polished finish on any of them. Bleach and strongly alkaline cleaners are best kept off engineered quartz. Acidic and descaling products are the specific enemy of marble and limestone, and they strip sealer from natural stone generally. The product under most kitchen sinks that does the most countertop damage is a limescale remover.
Repairability varies more than durability does, and it is worth weighing when choosing.
- Natural stone chips can be filled and polished, and a skilled stone restorer can re-hone or re-polish an area or a whole surface. Etch marks on marble can be polished out. This is the material that recovers best.
- Engineered quartz chips can be filled with colour-matched resin, which is usually acceptable rather than invisible. Heat damage generally cannot be repaired, because the resin has changed.
- Porcelain chips are the hardest to disguise, since a deep one can expose a core of a different colour. Prevention at the edges is the whole strategy.
- Solid surface is the outlier: almost all damage sands out, including deep scratches.
- Laminate is not meaningfully repairable. Swelling and delamination mean replacement of the affected length.
The two most common damage events are a chip at a corner or sink edge from something dropped, and a heat mark on quartz. Both are edge-of-use problems rather than wear, which is to say the material matters less than where the counter is vulnerable.
Who coordinates what
A countertop touches more trades than almost anything else in a kitchen, and the failures are nearly always at the handovers rather than inside anyone’s own work.
The cabinetmaker has to have built any island support, left the right housings and installed level. The appliance supplier has to have delivered, or at minimum specified by model, before templating. The plumber disconnects the old sink and returns after installation to connect the new one, which is two visits and needs booking as such. Where electrical work is involved, in outlet positions behind a slab splash or power inside an island, it is completed by qualified independent licensed and insured trades; ZaRRuS coordinates that work as part of the project rather than performing it, and our guide to choosing an electrician covers selecting one. The tiler follows the counter where the backsplash is tiled. The fabricator sits in the middle and can only work to what is there on the day.
Most of the delay in this stage comes from one of three things: cabinets not finished or not level at template, the sink or tap not on site, or an appliance specified by category rather than by model. None of them are difficult. All of them are somebody’s job to have chased.
How the stone is cut, and a fair question to ask
This belongs in a countertop guide even though it is not a homeowner product-safety issue, because it is a real and current occupational health matter in the trade.
Cutting and grinding stone releases respirable crystalline silica, and prolonged exposure causes silicosis, an irreversible lung disease. Engineered quartz is the material of most concern because its silica content is very high, cited by the Ontario government at up to ninety-five per cent, against considerably lower figures for most natural stones and lower again for marble. Ontario has issued a specific alert on silica exposure in countertop manufacturing and installation, and workers are covered by the designated substances regulation in industrial settings and by the regulation on exposure to chemical agents on construction projects. Internationally the concern has been serious enough that Australia prohibited the manufacture, supply and installation of engineered stone benchtops from July 2024.
To be clear about what this does and does not mean: a finished, installed countertop in a home is not a source of exposure. The hazard is dust generated by cutting, and the people at risk are the ones doing the cutting. The Ontario alert addresses manufacturing, finishing and installation, not living with the material.
Two things follow for a homeowner. One is a fair question to ask a fabricator: whether they cut wet, and what dust control and respiratory protection the shop has. A well-run shop answers readily. The other is practical: any cutting or grinding done on site, which happens occasionally for a late adjustment, should be done outdoors and wet rather than in your kitchen.
What changes across the GTA
The material comparison is the same everywhere. The fabrication constraints are not, and they vary with housing stock in ways worth knowing before you settle a layout.
In older Toronto houses the template does most of the work. Settled floors, walls that are neither plumb nor parallel, and kitchens altered more than once produce runs where the back edge is scribed differently along its length. Access is the second constraint: narrow semi-detached hallways, tight stair turns and low basement headroom all cap the piece size that can be carried in, which sometimes adds a seam the drawing did not predict.
In North York, bungalows and side-splits frequently have kitchens that were opened up in an earlier renovation. Where new framing meets original, wall conditions change partway along a single run, which is exactly the situation a full-height slab backsplash handles badly and a short upstand handles without comment.
Newer housing in Vaughan tends towards large open kitchens with long islands, where the binding constraint is slab size rather than the room. An island longer than the available slab has a seam by physics, and the questions become where it sits and whether both pieces come off the same block. Long seating overhangs there are also the commonest case for concealed steel, decided while the island is still a cabinet drawing.
In Oakville, large glazed elevations and kitchens opening onto garden rooms make the sunlight question real rather than technical. A pale engineered quartz counter in sustained direct sun is the case where the resin’s UV behaviour stops being academic, and a sensible reason to look at porcelain or natural stone for that room.
The kitchen renovation pages set out how these projects are scoped, and the service areas pages cover where ZaRRuS works.
Common mistakes
- Choosing natural stone from a sample chip instead of viewing the slabs.
- Assuming sealing prevents etching. It does not, and marble is the material where that matters.
- Accepting a stone labelled quartzite without an acid test, then finding it etches.
- Treating engineered quartz as heat-proof because it is stone-like. The resin is the limit.
- Putting quartz where the sun sits on it all afternoon.
- Never asking where the seams will fall, then discovering one across the middle of the island.
- Designing a seating overhang past the unsupported limit with no support built into the island.
- Specifying a cooktop by category rather than by model, so the cut-out is taken from the wrong figure.
- Not having the sink and tap on site at template, which delays fabrication or produces wrong holes.
- Hanging a heavy cast-iron or apron sink from the counter with no structural support in the cabinet.
- Templating over cabinets that have not been levelled properly.
- Ordering a full-height slab backsplash for a wall that is nowhere near flat.
- Choosing laminate for a heavily used kitchen sink run and expecting the substrate to cope.
- Expecting a waterfall to be added later. It cannot be, without recutting the top.
- Skipping the slab layout approval, which is the last point at which anything is still changeable.
Questions worth asking before you order
- Which specific slabs are allocated to my job, and can they be tagged and held in writing?
- Are they from the same block?
- Will I see and approve a layout drawing showing every piece and every seam before cutting?
- Where exactly are the seams, and can any of them be moved?
- What seam and workmanship standard do you work to, and is it stated in the quotation?
- What thickness is the slab, and is the visible edge solid or mitred?
- What is the unsupported overhang limit for this specific stone at this thickness?
- Who is providing the island support, and is it in the cabinet scope or yours?
- What has to be on site on template day, and who confirms it is there?
- What sink reveal will you cut, and is that a choice I can make?
- Does this stone need sealing, how often, and what does it need on installation?
- What is excluded from the price: removal of the old counter, plumbing disconnection and reconnection, splash, sealing, delivery access?
- What does the warranty cover, and what voids it?
- Can I see finished work in this material at close range, particularly a mitre and a sink cut-out?
- Do you cut wet, and what dust control is in the shop?
How those answers are given tells you as much as their content. Somebody who volunteers their seam positions, names their thickness and states their exclusions is describing a process they control.
Frequently asked questions
Quartz or granite: which is actually better?
Neither, and the honest answer depends on two habits. Quartz is non-porous, needs no sealing and arrives looking exactly like the sample, which makes it the lower-maintenance surface and the safer specification when you cannot view slabs. Granite tolerates heat, which quartz does not, and every slab is individual, which is either the appeal or the problem. If hot pans regularly land on the counter, that points to granite. If you want a surface that stays uniform and asks nothing of you, that points to quartz.
Can you put a hot pan on a quartz countertop?
No. The quartz aggregate is unaffected, but the polymer resin binding it begins to degrade well below the temperature of a pan coming off a burner, and the result is a dull or discoloured mark, or a crack where heat lands on a narrow section. Manufacturers uniformly instruct owners to use trivets, and heat damage is excluded from essentially all quartz warranties, which is the clearest indication of where the real limit sits.
Does sealing stop marble from staining and etching?
It helps with staining and does nothing for etching, and the difference matters. Staining is absorption, so a sealer sitting in the pores slows it. Etching is a chemical reaction between acid and the calcium carbonate at the surface, and the sealer is below where that reaction happens. Lemon juice will dull a polished marble surface whether it is sealed or not. A honed finish makes the effect far less visible, which is how most marble kitchens are handled.
Is porcelain a good countertop material?
Technically it is the strongest performer in the group: no resin, so it handles heat and does not yellow in sunlight, non-porous, no sealing, and good scratch resistance. The complication is fabrication rather than performance. It is supplied thin, so edges are usually built up by mitring, and it chips at the fine tip of that cut if it is not machined correctly. The pattern in many products sits in a surface layer, so a deep chip can expose a different colour underneath. It is a material where the fabricator’s experience matters more than the slab.
Can countertop seams be avoided completely?
Only where every piece fits within a single slab and can physically be carried into the room. Slab size is a hard limit, so a long island or a large L-shaped run will usually have at least one seam. Access imposes its own limit: a narrow hallway, a tight stair turn or a low basement ceiling can cap the piece size regardless of the slab. The productive question is not whether a seam can be removed but where it can be placed. Seams read far less in busy veined stone than in a uniform pale one, and far less in a corner than halfway along an open run.
How far can a countertop overhang without support?
Widely published industry guidance puts the unsupported cantilever at roughly ten inches for three-centimetre stone and roughly six for two-centimetre, with the further condition that the unsupported part should not exceed about a third of the total depth of the piece. Those are starting figures rather than a rule for every material, so confirm them with the fabricator for the specific stone. Past that limit the overhang needs corbels, brackets, concealed steel or a supporting panel, and concealed steel in particular has to be built into the island carcass while it is still a cabinet drawing.
What needs to be on site for countertop templating?
The sink and the tap physically present, not just selected, because cut-outs and hole positions are taken from the actual fixtures. The cooktop, or at minimum the installation document for the exact model. Base cabinets installed, fixed and levelled, with appliance housings in place and any island overhang support already built. Clear counters and clear access. Anything missing on the day either delays fabrication or gets guessed, and a guessed cut-out is not adjustable afterwards.
Why can’t the countertop be made before the cabinets are installed?
Because it is cut to a measurement of what has actually been built rather than to the drawing. Templating records the real geometry: walls that are not parallel, corners that are not square, a run that is a few millimetres longer at one end. In older housing those deviations are substantial. The material, edge, sink and cut-outs are all chosen early, but fabrication cannot begin until the measurement exists, so a gap between cabinet installation and finished counters is a normal part of the sequence rather than a sign of poor planning.
Can a waterfall end be added later?
Not without recutting the countertop. The top corner is normally mitred so the two faces fold into each other, which means the horizontal piece has to be cut for it from the start. Continuing the veining around that fold, which is what separates a convincing waterfall from an assembled one, also requires the vertical panel to be cut from the position immediately adjacent on the slab. Both are slab-layout decisions, and both are gone once the top has been cut conventionally.
Are quartz countertops dangerous to have in the house?
An installed, finished countertop is not a source of exposure. The recognised hazard is respirable crystalline silica in the dust produced by cutting and grinding, and it is an occupational risk to fabricators and installers rather than to occupants. Ontario has issued a specific alert covering countertop manufacturing, finishing and installation, and workers are protected under the designated substances regulation and the regulation on exposure to chemical agents on construction projects. Two things follow for a homeowner: it is fair to ask a fabricator whether they cut wet and what dust control they have, and any cutting needed on site should be done outdoors and wet rather than indoors.
Is laminate ever the right choice?
Yes, when it is chosen deliberately. A laundry room, a basement or secondary kitchen, a rental unit, or a main kitchen that is a known interim step before a fuller renovation are all sound reasons. What limits it is the particleboard substrate, which swells irreversibly when water reaches a cut edge, so seams and the sink perimeter are the failure points and the damage cannot be repaired invisibly. A postformed top with a rolled front edge and a top-mount sink removes most of the exposure. A standard undermount sink in a standard laminate top is the combination to avoid.
In short
Pick the material from how you actually cook rather than from a table. Hot pans push away from engineered quartz. Acid pushes away from marble unless you accept a honed finish and a surface that records its own use. Strong daylight pushes away from quartz resin. The rest is preference, and every mainstream option performs well inside its own envelope.
Then spend the attention where it pays. View the slabs. Approve the layout drawing, with every seam marked. Settle thickness and edge, decide how any overhang is carried before the island is built, and have the sink, tap and cooktop on site for templating. Make sure the cabinets are level and the walls are understood before anyone measures.
Get those right and the material takes care of itself. Get them wrong and the best stone in the yard still has a seam in the wrong place, which is the one thing maintenance never fixes.
Planning a kitchen in Toronto or the GTA? Request a consultation and we will work through the countertop specification alongside the cabinetry. Our process page explains how projects are run, and selected work shows completed projects.