Most comparisons of custom wardrobes and built-in closets end up arguing about appearance. The real difference is structural, and everything else follows from it: a wardrobe is furniture; a built-in is part of the building.
That single distinction determines how much storage you get, how the unit meets walls that are not straight, what happens when you redecorate, what happens when you move, and how the work has to be sequenced on site. This guide compares the two on each of those points and ends with a decision framework, so you can tell which one your room is actually asking for.
What each one actually is
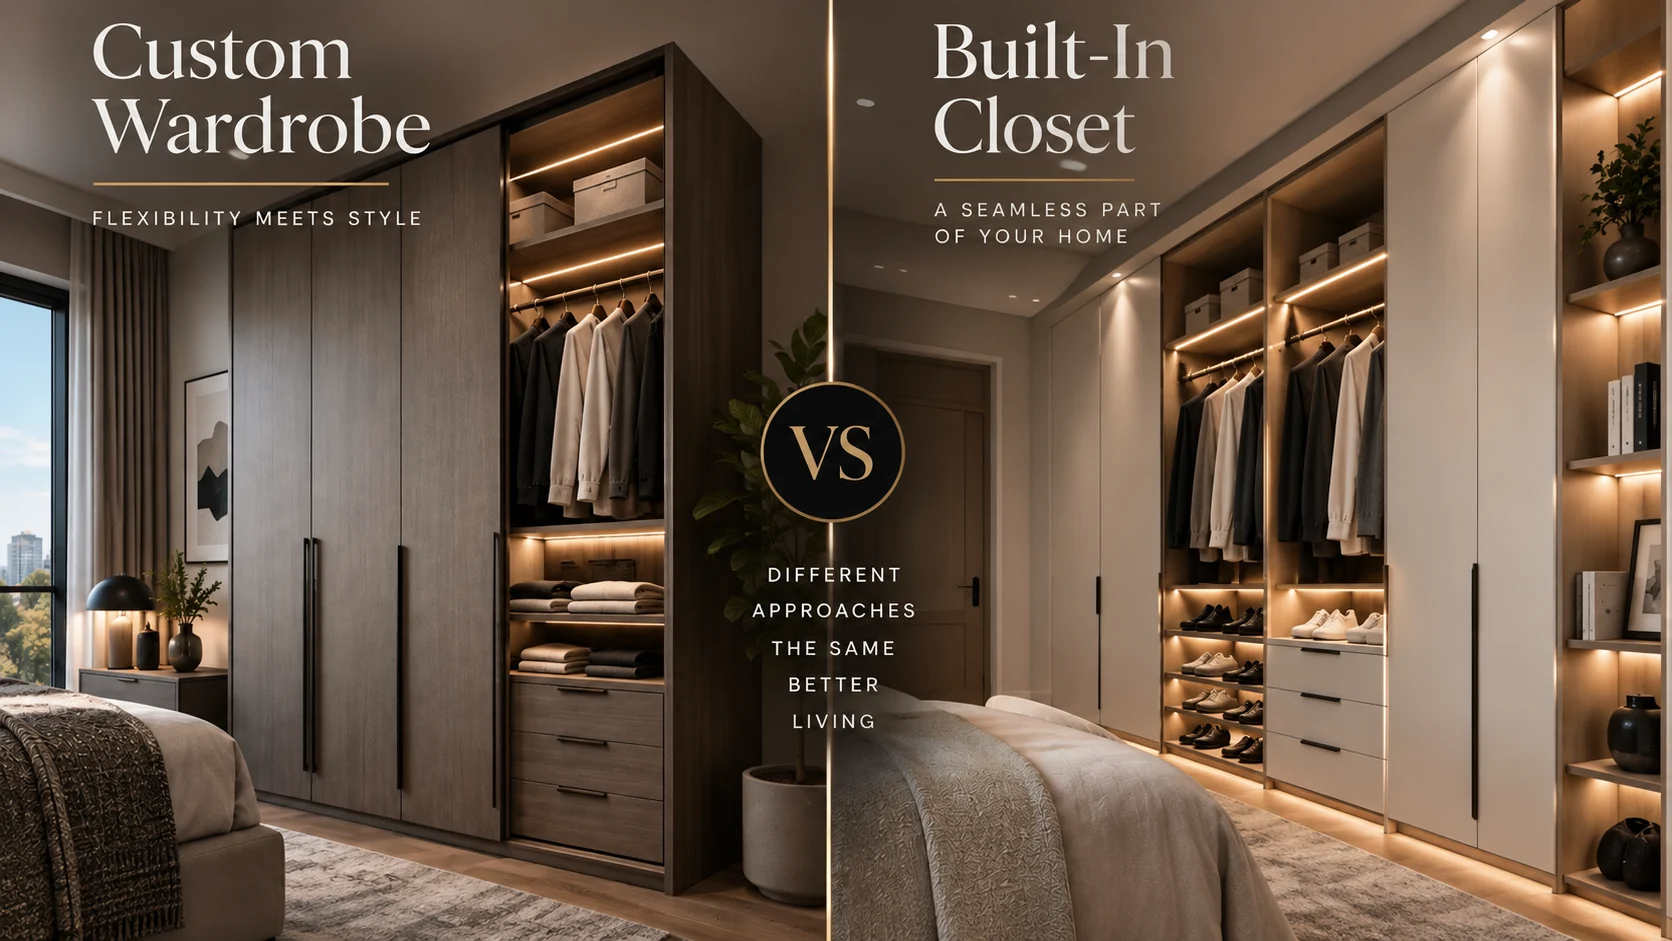
A custom wardrobe is a piece of cabinetry made to your specification that stands in the room. It has its own sides, top and back. Built in a shop, brought in, levelled and usually secured to the wall for safety, it stays a discrete object. It can be moved, reconfigured, taken to another room, or taken with you when you go.
A built-in closet is storage constructed into the room itself. It is fitted wall to wall or into an alcove, scribed to the surfaces around it, and finished with trim so the joint between cabinetry and building disappears. It has no visible sides of its own, often no back, and frequently no top — the wall and ceiling do that work. It becomes part of the property and stays when you leave.
Both can be fully custom. Both can hold the same interior fittings. The word “custom” is not what separates them — integration is.
Two things this article is not about. It is not about walk-in closets, which are rooms rather than units — if that is what you are planning, how to plan a walk-in closet covers the layout geometry and clearances. And it is not a materials guide; the complete guide to custom cabinets and built-in storage covers construction, panel products and hardware in depth, and this article deliberately does not repeat it.
The comparison at a glance
| Question | Custom wardrobe | Built-in closet |
|---|---|---|
| Is it part of the building? | No — furniture | Yes — fixed |
| Does it move with you? | Usually yes | No |
| Storage per square foot of wall | Good | Highest |
| Handles out-of-square walls | Gaps remain | Scribed to fit |
| Uses full ceiling height | Sometimes | Almost always |
| Easy to reconfigure later | Yes | Partly |
| Easy to remove later | Yes | Involves making good |
| Disruption to install | Low | Moderate |
| Integrated lighting | Possible | Straightforward |
| Reads as architecture | No | Yes |
Neither column is the winner. The rest of this guide explains what sits behind each row, because the right answer depends on the room, the walls and how long you intend to stay.
Storage capacity: where the difference is largest
A built-in generally stores more in the same footprint. The gain comes from three places most people never count.
The gaps. A freestanding wardrobe has a carcass side against each end. Where it meets a wall, you lose the thickness of that side plus whatever gap is needed to get the unit into position and level. Between two units you lose two sides. A built-in run has partitions rather than doubled-up sides, and the ends die into the walls, so the same wall length yields more interior.
The top. Freestanding units often stop below the ceiling, either because they are made to a standard height or because a tall unit has to be tilted upright during installation and needs clearance to do it. That leaves a band above that collects dust rather than luggage. A built-in is assembled in place and taken to the ceiling, and that top band is genuinely useful for suitcases and off-season clothing.
The awkward inches. A room with a chimney breast, a bulkhead, a radiator or a wall that runs out of square leaves slivers of space a rectangular object cannot use. A built-in absorbs them with a filler or a shaped panel and keeps the interior square behind it.
The exception worth naming: in a square, true room with a full-height wardrobe run, the difference narrows considerably. The built-in’s advantage grows in proportion to how irregular the room is.
Fit: what happens when walls are not straight
In an older house this is usually where the question answers itself.
Walls in an older house are rarely plumb, corners are rarely ninety degrees, and floors are rarely level. Put a rectangular object against a wall that leans, and you get a tapering gap — wide at the top, tight at the bottom, or the reverse. It is visible, it collects dust, and nothing about the unit can hide it.
A built-in solves this with scribing: a panel is made slightly oversized, the wall’s actual profile is transferred onto it, and the panel is cut to that line so it sits tight against a surface that is not straight. Add a filler strip at the ends and trim at the ceiling, and the cabinetry meets the building with no gap at all. This is ordinary millwork practice, and it is the main reason built-ins look integrated where furniture looks placed.
Freestanding wardrobes can be helped — a filler panel at one end, or a slim trim scribed to the wall, but there is a limit, and the more the room is out of true, the more visible the compromise.
Level floors matter too. A freestanding unit is packed and levelled at the base; a built-in is levelled and then finished with a scribed base or trim so the adjustment does not show.
Flexibility and what happens later
Here the wardrobe wins, and not by a small margin.
A wardrobe can be unfixed from the wall and moved to another room, taken to another house, or sold. If the room’s use changes — a bedroom becomes an office, a child’s room changes shape as they grow — the wardrobe goes where it is still needed. A built-in removed from a wall leaves fixings, unfinished floor and unpainted wall behind it, and making good is real work.
Internally, the two are closer than people assume. Both can have adjustable shelving, and adjustable shelving is what actually accommodates a changing wardrobe. What differs is structural change: moving a partition or altering an opening is a shop operation on a wardrobe and a site operation on a built-in.
Two practical framings:
- If you are likely to move within a few years, a wardrobe is an asset you keep. A built-in is an improvement to the property — worth doing, but you are leaving it behind.
- If you expect to stay, the built-in’s permanence stops being a drawback and becomes the whole point: it is the version that looks like it was always there.
Appearance and design continuity
A wardrobe reads as an object in the room. That can be exactly right: a well-made unit in a real wood or a strong colour can be the thing the room is arranged around, and it keeps the wall line visible, which some rooms need.
A built-in reads as part of the room. Done properly it picks up the building’s own language: trim that matches the existing baseboard and casing, a cornice that continues the ceiling line, doors with the same profile as the room’s doors. The aim is that someone walking in cannot tell whether it came with the house.
Two details do most of that work. Matching the trim to what is already in the room is what makes a built-in belong; a different baseboard profile at the base of a closet is the giveaway. And painting the fronts in the wall colour makes a built-in recede almost completely — useful in a small bedroom, where a contrasting run of cabinetry can dominate.
A wardrobe can also be made to disappear, by finishing it in the wall colour and taking it to the ceiling with a scribed filler, which is effectively borrowing the built-in’s approach, and a reasonable thing to do.
Installation, sequence and disruption
The practical difference comes down to how much of the work happens in the room itself.
A wardrobe is largely built in the shop. On site it is positioned, levelled, secured and adjusted. Access is the thing to check in advance: a tall assembled unit has to get through the door, round the stair, and be tilted upright in a room with a fixed ceiling height. In an older Toronto house with a narrow stair and a turn at the top, that is a real constraint, and it is why units are sometimes made in sections that assemble in the room.
A built-in involves more site work: setting out, fixing to the structure, scribing, fitting fillers, trim and finishing. The parts arrive flat and go together in place, so access is easier, but the room is a work area for longer and there is cutting and finishing in it.
Sequencing differs too, and it matters more than it sounds. A built-in has to be coordinated with the trades around it — anything electrical has to be run before the walls close, and flooring, baseboard and paint all interact with it. A wardrobe is more forgiving, because it arrives into a finished room. If the closet forms part of a wider renovation, what to choose before a renovation starts sets out which decisions are locked by which milestone.
Wardrobe and built-in configurations
Both categories cover several arrangements, and the labels get used loosely. What follows is what each actually means in practice.
Freestanding custom wardrobe
A complete unit with its own sides, top and back, made to your specification. Best where you want the storage to be movable, where the walls are in poor condition, or where you are not in a position to alter the room — a rental, or a house you expect to sell. Trade-off: gaps at the ends and usually a gap at the top.
Built-in wardrobe
The middle ground, and in practice the most common solution in a bedroom: cabinetry fitted to the wall, scribed and trimmed in, but still reading as a wardrobe rather than dissolving into the room. Most of the fit advantage, without committing the whole wall to joinery.
Floor-to-ceiling
Taking the cabinetry to the ceiling rather than stopping short. Almost always worth doing: it converts the dust band into a usable high shelf for luggage and off-season storage, and it makes the run read as architecture instead of furniture. Two practical notes — the top band should be sized to your largest suitcase, and if the ceiling is not level the top needs scribing or a trim to close the line.
Wall-to-wall
Running the full width between two walls. The most storage available from a given wall, and the cleanest look, since there are no ends to resolve. It commits the whole wall, so check what else that wall needs to do — a radiator, a window reveal, a light switch or the swing of the room door can all interrupt it, and those are better designed around than discovered.
Recessed and alcove
Filling an existing recess — beside a chimney breast, in a dormer, or where a previous alteration left a setback. Excellent value, because the space is already there and otherwise does nothing. Alcoves are almost never square, so this is the configuration that most rewards scribing. Check the depth before committing to hanging: a shallow alcove may not take a garment on a hanger front-to-back, which points toward shelving, or toward hanging on a rod that runs along the alcove rather than across it.
Hallway, entry and secondary bedrooms
Outside the primary bedroom the brief changes. A hallway or entry unit is a coat-and-boot problem: shallower depth, hooks as well as hanging, a bench if there is room, and a surface that copes with wet outerwear through a GTA winter. A secondary bedroom or guest room usually needs less hanging and more flexible shelving, and is a strong candidate for a wardrobe precisely because the room’s use is most likely to change. For storage that has to work as both wardrobe and workspace, built-ins and home office covers that overlap.
Doors and opening systems
The door system affects usable storage, room circulation and daily access more than any other single choice you make here. It is decided by the space in front of the unit, not by preference.
Hinged doors
The default, and the best for access: open them and the entire opening is available, with the door interiors usable for mirrors, hooks or shallow racks.
The cost is floor space. A hinged door needs clear swing in front, and in a bedroom that arc frequently collides with the bed, meaning you cannot open the door fully without walking round. Before choosing hinged doors, check the swing against the furniture layout, not the empty room. Narrower doors reduce the arc, at the price of more of them.
Sliding doors
Doors run on tracks and pass in front of each other. They need no clearance in front at all, which is why they are the usual answer in a narrow room or where a bed sits close to the wardrobe. They also handle very wide openings gracefully, where a row of hinged doors would become unwieldy.
The trade-off is real and worth understanding before committing: because the doors overlap, one door’s width of the opening is always covered. You never see the whole interior at once, and the section behind the closed door is reached by sliding the other panel across. For everyday use that is usually fine. It is less good for a shared wardrobe, or when you want to see everything while reorganising. Sliding doors also cannot carry mirrors or racks on their inner faces in the way hinged doors can, and the track becomes a maintenance item that wants keeping clear.
Bi-fold and folding doors
Panels hinged in pairs that fold back and stack at the end of the opening, giving close to full access while projecting only a short fold arc into the room — considerably less than a hinged door’s swing, but not nothing. This is the compromise option, and a sensible one where you want to see the whole opening but do not have room for full swings. More moving parts than either alternative, and alignment is what determines whether they feel good or annoying over time.
Open sections
Leaving part of the run doorless. Cheaper, instantly accessible, visually lighter, and excellent for a hanging section used daily or for shelving that is part of the room’s look. It demands tidiness, and it exposes contents to dust and light, so it suits shoes, folded knitwear and bags better than a dense row of clothing.
A common and effective arrangement is mixed: doors over the bulk of the storage, one open bay for daily items, and a mirror on one door.
Handles, pulls and integrated openings
Handles change the look more than almost any other component and are the cheapest thing to get right, or to regret. Three approaches: surface handles and knobs, which are the strongest style statement; integrated or edge pulls routed into the door, which give a flush, quiet appearance suited to a built-in meant to recede; and push-to-open catches, which remove hardware entirely at the cost of a mechanism and of fingerprints on the fronts.
Whichever you choose, decide it before the doors are made — handle positions are bored in the shop, and hole spacing varies between designs, so a late change is rarely a like-for-like swap.
What goes inside: the same options, different constraints
Interior fittings are not what decides this. Almost anything that goes in one can go in the other: both can carry double-hang and long-hang sections, drawers at any depth, adjustable shelving, shoe storage, pull-out trouser racks, tie and belt racks, lined drawers for watches and jewellery, bag storage, a hamper, and a pull-down wardrobe lift.
What differs is the constraints those fittings run into.
- Depth. Hanging front-to-back needs roughly two feet of interior depth to clear a garment on a hanger. A shallow alcove built-in may not have it, in which case the rod runs along the length of the space rather than across it, or the section becomes shelving. A freestanding wardrobe is usually made deep enough by default.
- Drawers behind doors. A drawer inside a hinged unit needs the door open past ninety degrees before it can extend, which is a swing-clearance question as much as a cabinet one. Behind sliding doors it is worse: the drawer is only reachable when that panel is open. Put drawers in an open bay, or behind the door you open most.
- Anything that slides out. Racks, baskets and hamper frames extend into whatever space is in front of the unit, so they inherit the door system’s limitation as well as the room’s.
- Height. A floor-to-ceiling built-in gets a genuine high band for luggage. A wardrobe stopping below the ceiling does not.
- Wardrobe lifts. A pull-down rod is only worth fitting where there is genuine unreachable height above, so it belongs to full-height units. Two things to confirm with the supplier: the published load rating for the model, and how far the mechanism travels outward when lowered.
Two things are worth planning in either solution because they are commonly forgotten: a section of empty rod for transient garments, and enough adjustability that the interior can be re-proportioned when what you own changes. For how to size hanging sections, set rod heights and allocate storage by garment type, see the walk-in closet planning guide — the interior logic is the same even though the enclosure is not.
Lighting
Integrated lighting is straightforward in a built-in and possible in a wardrobe. The difference is where the supply comes from, and when it has to be decided.
What can be integrated into either: LED strip in a channel under shelves or along the front edge of a hanging section; vertical strips washing the full height of a tall bay; small fittings inside drawers or compartments; a lit mirror; door or motion sensors so the interior lights on opening; and dimming and zoning so the same run can give full light for choosing clothes and a low level otherwise.
Three points that decide whether it works:
- Colour rendering. The interior is where you decide what colour a garment actually is, and cheap light sources render dark tones so poorly that similar shades become impossible to tell apart at arm’s length. Specify a high colour rendering index, and keep the colour temperature identical across every fitting in the run so one bay does not read warmer than the next.
- The supply. A built-in can have a concealed supply run to it before the walls are closed, which is the clean answer. A freestanding wardrobe has to reach a socket, so either it is positioned near one, or a supply is planned to that point in advance. Deciding this after the unit is made is how you end up with a visible cable.
- Where the driver lives. Every LED run needs a driver or transformer somewhere accessible — inside a cabinet, above a bulkhead, behind a removable panel. Sealing it into a permanent void makes a future failure much harder to deal with than it needs to be.
ZaRRuS is not an electrical contractor. Electrical work is carried out by qualified independent licensed and insured trades, engaged and coordinated as part of the project, and their requirements are brought into the design early because they frequently determine what a lighting idea allows. For how electrical contracting is licensed and inspected in Ontario, see how to choose an electrician for your renovation.
Materials and finishes
Both solutions use the same palette. What changes is which criteria matter most, because a wardrobe is seen in the round and a built-in is seen as a wall.
- Melamine — the workhorse interior for both. Because a built-in’s interior is glimpsed rather than displayed, a plain light melamine inside with a considered front is usually the better allocation of budget than a costly interior nobody sees.
- Painted MDF — the material that makes a built-in disappear, because it takes a flat colour cleanly and can be matched to the wall paint. If the plan is for the storage to recede, this is the specification that delivers it.
- Veneer — the consideration here is continuity across width. A built-in spanning a whole wall shows any variation between panels in a single sweep, so grain matching across the run matters far more than it does on a wardrobe read as one object.
- Solid wood — belongs to the wardrobe end of the spectrum, where the piece is meant to be seen as furniture and its ends and top are on show. Less relevant to a built-in, most of whose surfaces are hidden by the building.
- Plywood — worth specifying where a shelf carries genuine weight or where a wall-hung section transfers load into its fixings, which is more often a built-in question than a wardrobe one.
- Glass — fronts that show contents without opening, useful for accessories and bags. Frosted or reeded glass gives the lightness without demanding the interior be immaculate.
- Mirror — earns its place twice over in a bedroom: it is needed anyway for dressing, and it makes a narrow room read wider. On a hinged door it is straightforward; on a sliding door it is common but adds weight the track has to carry, which is a specification point rather than an afterthought.
Selection criteria worth weighing in this order: how visible the surface is, how much it will be touched, whether it needs to match something already in the room, and how long shelves will span before deflection becomes an issue. For a fuller comparison of these materials and how carcasses are constructed, see the cabinets and built-in storage guide.
Designing around real architecture
The most common and most expensive mistake is choosing a solution first, then trying to make the room accept it. Measure and understand the space, then let it tell you which approach fits.
- A standard bedroom wall. The one case where either works well. Decide on flexibility and how long you are staying, not on fit.
- A shallow alcove. Built-in, almost always — a freestanding unit will not fill it cleanly. Check the depth against a hanger before assuming the space can hang clothes.
- An awkward corner. Built-in. A corner is exactly where two rectangular objects interfere and where a fitted solution can turn the geometry into shelving instead of dead space.
- Sloped ceilings. Built-in, decisively. Dormers and upper floors in older houses produce slopes that no standard unit addresses — the answer is full-height storage under the tall side and drawers or shoe shelving running under the low side.
- Low ceilings. Favours a built-in taken right to the ceiling; a wardrobe that stops short makes a low room feel lower by drawing a horizontal line across it.
- Uneven walls. Built-in, for the scribing.
- Narrow rooms. Either, but sliding doors or open sections, because swing clearance is the binding constraint. Consider a shallower run over a longer wall rather than a deep one.
- Small bedrooms. Built-in, floor to ceiling, fronts painted in the wall colour, sliding or bi-fold doors, and a mirror on one panel. That combination stores the most and visually intrudes the least.
- Larger rooms and dressing areas. Once the space is big enough to walk into and move around in, the question stops being wardrobe-versus-built-in and becomes a layout problem — see planning a walk-in closet.
Which should you choose?
Most decisions come down to three questions: how long you are staying, how true the walls are, and how much the storage has to disappear.
Choose a custom wardrobe when
- You expect to move, or the room’s use is likely to change
- You are renting, or cannot make permanent alterations
- The walls are square enough that gaps will not be obvious
- You want the piece to read as furniture and be part of the room’s character
- You want minimal disruption and most of the work done off site
- The storage may need to move to another room later
Choose a built-in closet when
- You are staying, and want the storage to look original to the house
- The walls, corners or ceilings are irregular
- There is an alcove, recess or awkward space already waiting to be used
- You need the maximum storage a given wall can produce
- The room is small and the storage needs to recede
- The closet is part of a wider renovation, so the sequencing is available anyway
- You want integrated lighting with a concealed supply
Consider a hybrid when
A hybrid is often the honest answer, and it is under-used. It means a unit built to wardrobe logic — its own carcass, capable of being removed — installed with built-in detailing: taken to the ceiling, scribed to the walls, fillers at the ends, trim matched to the room.
It suits a room with one irregular wall and one true one; a house you expect to stay in for a while but not permanently; a situation where you want the integrated look without the full site programme; and any case where part of the run may need to change later while the rest stays. You get most of the fit and nearly all of the appearance, and you keep the option of taking it out without making good an entire wall.
Questions to answer before ordering
- How long do you expect to stay in this house?
- Is this room’s use likely to change?
- Are the walls plumb, the corners square, the floor level and the ceiling flat? Check rather than assume.
- What is the ceiling height, and are you taking the storage to it?
- What is the available depth, and does it clear a garment on a hanger?
- Where does the bedroom door swing, and what else lands on that wall — radiator, window reveal, switch, vent?
- How much clearance is there in front, with the furniture in place? This decides the door system.
- What do you own — long-hang, short-hang, folded, shoes, bulk? Count before designing.
- Do you want lighting inside, and where will the supply and driver be?
- Should the unit stand out or disappear?
- Does it need to match existing trim, doors or paint?
- Can the finished piece physically get into the room — door, stair, turn, ceiling height for tilting?
- Where do handles go, and have they been decided before the doors are made?
- If it is a condominium, what does the corporation require before work starts?
Toronto and the GTA
Which solution suits a room has a lot to do with when the house was built.
In Toronto, a great deal of the housing predates fitted storage entirely. Bedrooms in semis, Victorians and wartime houses often have a shallow reach-in or nothing, with walls that are out of plumb, floors that slope and chimney breasts that leave alcoves either side. That combination points strongly to built-ins: the alcoves are free storage, and scribing is the only way cabinetry sits cleanly against walls of that age. Access is the counterweight — a narrow stair with a turn limits what can arrive assembled, which often means a unit made in sections.
In North York, the post-war bungalows and side-splits generally have straighter walls and reasonable bedroom proportions, but small original closets and modest ceiling heights. Floor-to-ceiling is the move here, and the walls are usually true enough that a well-fitted wardrobe performs nearly as well as a built-in.
In Markham, newer housing tends to come with reasonable closets already, so the question is usually whether to improve what exists or replace it. Bedrooms are often large enough that the storage does not need to disappear, which widens the choice, and where a secondary bedroom’s use is expected to change, a wardrobe keeps that option open.
In Etobicoke, the detached stock behaves much like North York’s, but the substantial condominium stock changes the calculation. In a condo, anything fixed to the structure may need the corporation’s approval before work starts, and delivery and elevator access have to be booked, which sometimes makes a sectional or freestanding unit the practical answer regardless of which would fit better. Condo renovation covers how those approvals and logistics work.
One constant across the region: winter means bulky coats and boots for roughly half the year, so whichever solution you choose needs somewhere for the off-season half of the wardrobe to live. You can see the areas covered under service areas, including Toronto, North York, Markham and Etobicoke.
Where this decision usually goes wrong
- Choosing the solution before measuring the room. The architecture should decide, not the preference.
- Assuming the walls are straight. In an older house they are not, and the gap shows.
- Stopping below the ceiling and losing the most useful storage band in the unit.
- Choosing hinged doors without checking the swing against the bed.
- Choosing sliding doors without realising that part of the interior is always covered.
- Putting drawers behind a sliding door, where they can only be reached half the time.
- Leaving lighting until the unit is built, when the supply had to be planned first.
- Building a permanent solution in a room whose use is about to change.
- Not checking access — a finished unit that cannot get up the stairs is a genuine and avoidable problem.
- Mismatched trim on a built-in, which undoes the integration it was chosen for.
How ZaRRuS approaches the choice
The starting point is the room rather than the product: measuring the walls for plumb and square, checking the floor and ceiling, noting what else the wall has to accommodate, and confirming access. Alongside that comes the wardrobe inventory and how long you expect to stay, because those two answers usually settle the question between them.
Where the walls are irregular or an alcove exists, the recommendation is generally a built-in, scribed and trimmed to the room. Where flexibility matters more, or the room’s use is unsettled, a wardrobe — often with built-in detailing, which is the hybrid described above. Door systems are chosen from the clearance actually available with the furniture in place, and lighting requirements are identified early so they reach the electrical trade before the walls close.
Where specialised licensed work is required, it is completed by qualified independent licensed and insured trades, engaged and coordinated as part of the project. This work sits under custom closets and millwork. You can see the standard of finish across completed work under selected work and experience, and our process sets out how a project runs from first conversation to completion.
Frequently asked questions
What is the difference between a custom wardrobe and a built-in closet?
A custom wardrobe is furniture: it has its own sides, top and back, stands in the room, and can be moved, reconfigured or taken with you. A built-in closet is constructed into the room — fitted wall to wall or into an alcove, scribed to the surfaces around it and trimmed in, so it reads as part of the building and stays with the property. Both can be fully custom inside; what separates them is integration, not the level of customisation.
Is a built-in closet better for a small bedroom?
Usually yes. A built-in uses the full wall and full ceiling height, has no end gaps, and can be finished in the wall colour so it visually recedes rather than dominating a small room. Pair it with sliding or bi-fold doors, since swing clearance is the binding constraint in a small bedroom, and put a mirror on one panel to make the room read wider.
Are custom wardrobes easier to change later?
Yes, for structural change. A wardrobe can be unfixed and moved to another room or another house, reconfigured in a shop, or sold. Removing a built-in leaves fixings, unfinished floor and unpainted wall to make good. For internal change the two are similar — adjustable shelving is what lets either adapt to a changing wardrobe, and both can have it.
Do built-in closets use wall space more efficiently?
Generally yes, from three sources: no doubled-up carcass sides or installation gaps at the ends, full use of the height up to the ceiling instead of a dust band, and the ability to absorb irregular inches around chimney breasts, bulkheads and out-of-square corners with fillers. In a genuinely square room with a full-height wardrobe run, the difference narrows considerably — the advantage grows with how irregular the room is.
Can a custom wardrobe include drawers, shoe storage and specialty fittings?
Yes — interior fittings are not what separates the two. A wardrobe can carry double-hang and long-hang sections, drawers at any depth, adjustable shelving, shoe storage, pull-out trouser racks, tie and belt racks, lined drawers for watches and jewellery, a hamper and a pull-down rod. The constraints to watch are depth for hanging, and clearance in front for anything that pulls out — including drawers behind hinged or sliding doors.
Can built-in closets have integrated lighting?
Yes, and it is more straightforward in a built-in because the supply can be run concealed before the walls close. LED strip under shelves or along hanging sections, vertical strips in tall bays, door or motion sensors, dimming and zoning are all available. Specify a high colour rendering index so dark colours stay distinguishable, keep colour temperature consistent, and make sure the driver sits somewhere accessible. Electrical work is carried out by qualified independent licensed trades.
Which works better around uneven or out-of-plumb walls?
A built-in, decisively. Panels are cut slightly oversized and scribed — the wall’s actual profile is transferred onto the panel and cut to that line, so the cabinetry sits tight against a surface that is not straight, with fillers and trim closing the ends and top. A freestanding unit placed against a leaning wall leaves a tapering gap that nothing about the unit can hide. This is the single most common reason built-ins are chosen in older Toronto housing.
Which is easier to design around a bedroom door?
A built-in, because it can be shaped around the obstruction — stepping the depth, stopping the run short, or turning the awkward zone into shallow shelving — while a rectangular wardrobe either fits or does not. The more important question is the door system: if the bedroom door or the bed limits the space in front, sliding or bi-fold doors remove the swing problem, and that decision should be made from the clearance available with the furniture in place, not the empty room.
Can a custom wardrobe be floor-to-ceiling?
Yes, and it is usually worth doing — it converts the dust band above into a usable high shelf for luggage and off-season clothing. Two practical points: an assembled full-height unit needs clearance to be tilted upright in the room, which is why tall units are often made in sections; and if the ceiling is not level, the top needs a scribed panel or trim to close the line. Size the top band to your largest suitcase before the unit is made.
Can a built-in closet use sliding doors?
Yes, and it is a common pairing where clearance is tight, since sliding doors need no space in front and handle wide openings well. Understand the trade-off first: because the panels overlap, one door’s width of the opening is always covered, so you never see the whole interior at once. Avoid putting drawers or pull-outs behind a panel you will not usually have open, and note that sliding doors cannot carry racks on their inner faces the way hinged doors can.
What should be decided before ordering?
Layout and dimensions; whether the unit goes to the ceiling; the door system, chosen from the clearance available with furniture in place; the interior breakdown, based on counting what you own; handles and pulls, since holes are bored in the shop; finish and whether it should match existing trim and paint; lighting and where its supply and driver will be; and access — whether the finished piece can physically reach the room. In a condominium, confirm what the corporation requires before any work starts.
In short
A wardrobe is furniture and a built-in is part of the building, and that one difference drives everything else. Built-ins store more, fit irregular rooms properly because they can be scribed, use the full ceiling height, and look like they were always there. Wardrobes can be moved, reconfigured and taken with you, arrive with less disruption, and keep their value as an object rather than as an improvement to the property.
Let the room decide. Irregular walls, alcoves, sloped or low ceilings and small bedrooms point to a built-in. A likely move, a changing room use or an inability to alter the space points to a wardrobe. When the answer sits between the two, a wardrobe-built unit installed with built-in detailing usually gives you most of both.
Planning bedroom storage in Toronto or the GTA? Request a consultation and we will measure the room and work through the options with you. Our renovation FAQ covers how projects are planned and run.