A walk-in closet is a geometry problem before it is a storage problem. Almost every frustration people have with one — clothes brushing the wall, a drawer that will not open because the opposite shelf is in the way, a light that makes navy look black — traces back to a dimension that was set without asking what it had to accomplish.
This guide works from the garment and the body outward: what each measurement is for, which layouts suit which rooms, how to plan storage around what you actually own, which specialty hardware earns its place, and how to light a room that has no windows and one job.
A note on the numbers. The dimensions here are industry planning conventions used by closet designers and cabinetmakers, drawn from the size of clothing and the reach of the human body. They are not building-code requirements, and nothing in this article should be read as code. Where a project involves structural, electrical or ventilation changes, those are governed by the applicable codes and by the trades qualified to work to them.
Start with what you actually own
The single most useful hour in a closet project is spent counting, not drawing. A layout designed around a wardrobe you do not have produces a closet that is full in the wrong places and empty in the rest.
Count in the five categories that map onto different storage types, because each one consumes space differently:
- Long hang — coats, dresses, robes, full-length garments
- Short hang — shirts, blouses, jackets, folded trousers over a bar
- Folded — knitwear, denim, t-shirts, anything that creases or stretches on a hanger
- Footwear — split into flats, heels, and tall boots, because their heights differ enormously
- Bulk and seasonal — luggage, winter coats in summer, occasion wear, bedding
Turning the count into linear feet
Hanging capacity is measured in linear feet of rod, and the conversion is the part most people skip. As a working figure, hanging garments occupy roughly an inch of rod each, with structured items — suit jackets, winter coats, anything with padding at the shoulder — taking closer to two. Shirts and blouses sit at the lower end; a dense row of coats at the upper.
So forty shirts is somewhere near three and a half feet of rod, and fifteen winter coats is around two and a half feet. Run that arithmetic for each category and you have the real requirement, in the same units the design is drawn in. Then add room to grow — a rod packed to capacity is a rod that creases everything on it and makes the closet unpleasant to use.
The reason this matters: double hanging doubles the rod length available in the same wall length, but only works for short-hang garments. If your count is dominated by long items, a wall of double hang is wasted, and if it is dominated by shirts, a wall of single hang throws away half the volume. The ratio between your categories is what decides the elevation.
Choosing the right layout
The layout is chosen by the room’s width and the position of the door, not by preference. Storage needs a certain depth and people need a certain width to move; those two numbers, set against the room’s dimensions, usually leave only one or two workable arrangements.
Single-wall and straight layouts
Storage along one wall only, with clear floor opposite. This is the right answer in a narrow room, and it is often the right answer in a room that is almost wide enough for two walls but not quite — because a second run that leaves an uncomfortable walkway makes both runs harder to use than a single good one.
Galley, or two facing walls
Storage on two opposite walls with a walkway between. This is the most efficient use of a rectangular room, and it is the layout most walk-ins end up with. The constraint is the sum: two runs of hanging depth plus a walkway wide enough to stand in and open drawers. A room that cannot accommodate that sum comfortably is a single-wall room, and treating it as a galley produces a closet where you cannot open a drawer without stepping into the opposite shelving.
L-shaped
Storage on two adjacent walls. Useful where a door, window or radiator takes out one wall, and useful when you want a natural break between two users or between two garment types. The inside corner is the thing to resolve deliberately — see the corner section below, because an unplanned corner is where a surprising amount of capacity quietly disappears.
U-shaped
Storage on three walls, with the door in the fourth. The highest capacity per square foot of any layout, and the most demanding on width — you need enough clearance to turn and to open drawers on two opposing runs, plus two corners to resolve rather than one.
U-shaped rewards a room with a centred door. With an off-centre door, one leg of the U ends up short and awkward, and an L-shape with a longer, better-proportioned run is often the better closet.
Island layouts and dressing rooms
An island is not a capacity decision; it is a circulation decision. It only works when the room is wide enough to keep a comfortable walkway on every side you need to use, on top of the perimeter storage. Squeezed in, an island turns a good closet into an obstacle course — you cannot open the drawers on one side because you are standing against the shelving behind you.
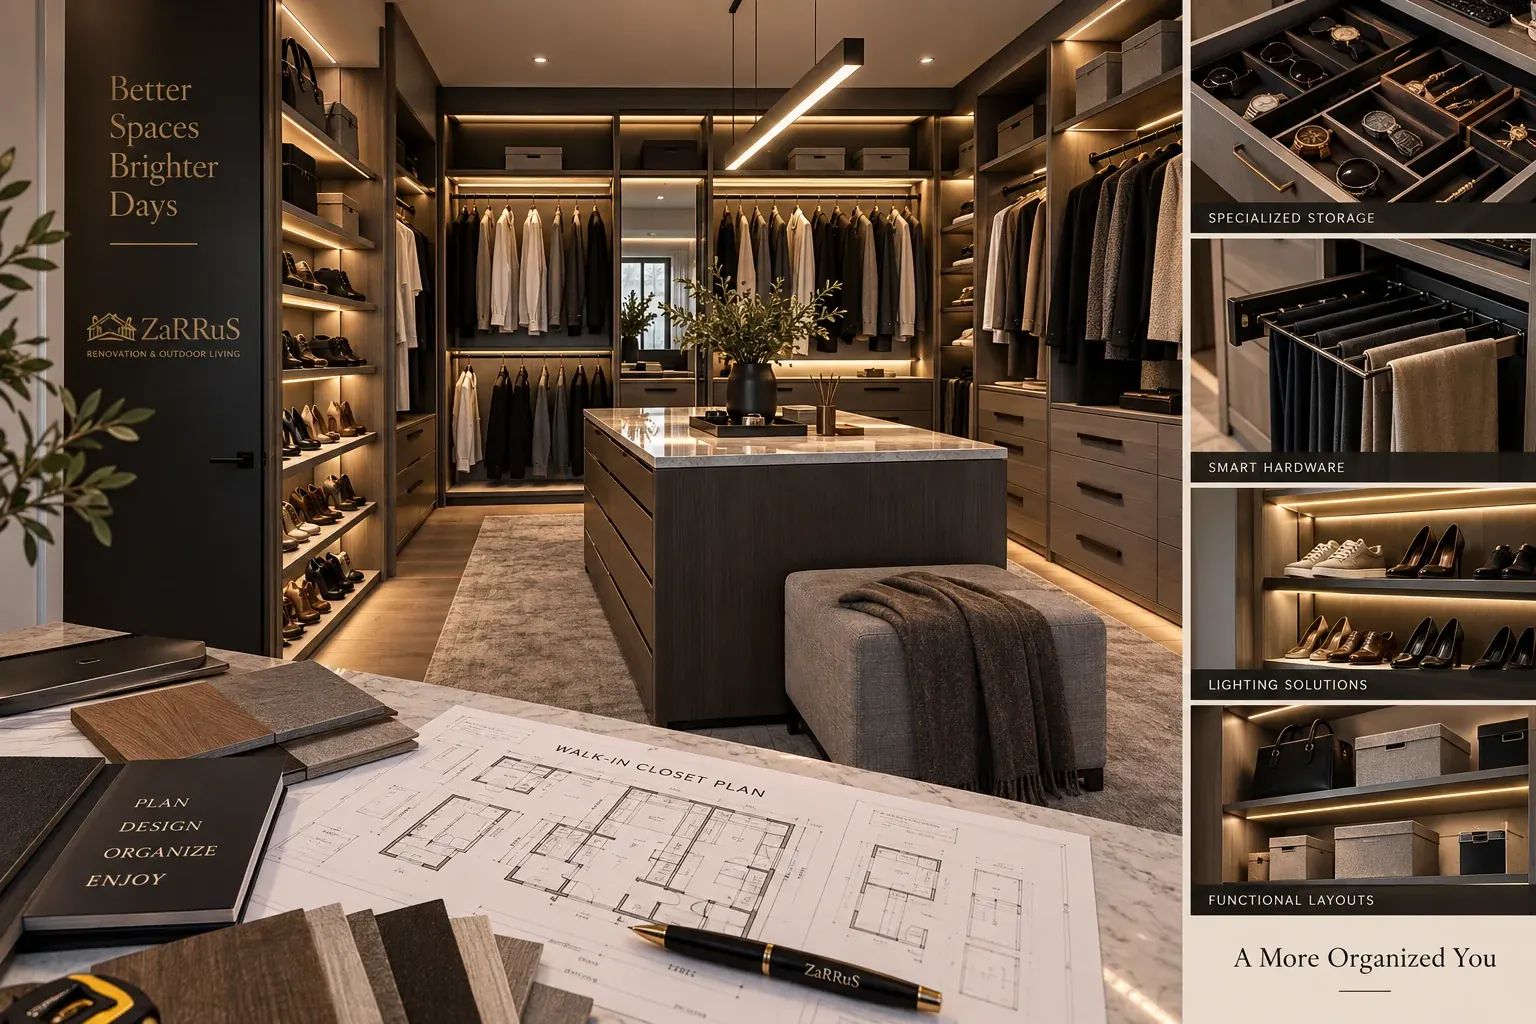
Where the room genuinely allows it, an island is excellent: drawer storage that is otherwise hard to place, a folding surface at working height, and a natural spot for jewellery and accessories in shallow top drawers. In a room that cannot take a full island, a shallow peninsula off one end, or a bench with drawers beneath, delivers much of the benefit without the clearance penalty.
Shared and his-and-hers closets
Two people sharing a closet is a planning problem, not a symmetry problem. The instinct is to split the room down the middle and mirror it. That is usually wrong, because two wardrobes are rarely the same shape: one may be long-hang heavy, the other short-hang and folded heavy, and one may need far more footwear capacity than the other.
Do the inventory count separately for each person, then allocate by requirement rather than by floor area. Give each person a contiguous zone rather than interleaving, so that neither has to reach across the other to get dressed — the real friction in a shared closet is two people occupying the same square metre at the same time on a weekday morning. Where the room allows, put the two zones on opposite walls rather than side by side.
Door placement and swing
The door is often the single most damaging element in a closet plan, and it is frequently the one nobody questions.
An inward-swinging door sterilises the floor area it sweeps and the wall it opens against — that wall cannot take drawers, and often cannot take usable hanging either. Changing the swing to outward, or to a pocket or sliding door, can recover an entire run of storage. Where the door swings into the bedroom instead, check what it hits there before committing.
Sliding and barn doors remove the swing but bring their own constraint: barn-door track needs wall space beside the opening and solid blocking behind the finished wall, which is a decision to make before drywall rather than after. A pocket door removes both problems but has to be framed for at the start.
Difficult corners
Every L and U layout has at least one inside corner, and a corner is where two runs meet at ninety degrees and interfere with each other. Two rods meeting at a corner leave the garments at the junction inaccessible, and two drawer banks meeting at a corner block each other outright.
The workable resolutions, in rough order of how often they are the right answer:
- Stop one run short and run shelving into the corner. Shelves tolerate a deep corner far better than rods or drawers, and the corner becomes useful rather than dead.
- Turn the corner with a rod running the other way, accepting that the last few inches are low-frequency storage — a reasonable place for off-season items.
- Use a purpose-made corner mechanism where the volume genuinely justifies the cost and the complexity.
- Leave it open as a full-height space for long items, a mirror, or a seat.
How much space a walk-in closet needs
The minimum is set by arithmetic: storage depth on each active wall, plus a walkway you can stand and turn in.
Hanging storage needs roughly two feet of depth. A walkway needs at least two feet to pass through and closer to three to stand, turn and open a drawer. So a single-wall closet becomes workable at about four to five feet of room width, and a galley closet with hanging on both sides needs something in the region of six feet before it stops feeling tight. Add an island and you are into eight to ten feet of width, because you now have two walkways rather than one.
Depth — the dimension running away from the door — is governed by how much rod you need rather than by a minimum. A common comfortable walk-in lands somewhere around six and a half to seven feet wide by ten feet long, but that is a description of what is typical, not a target. A long narrow room with a single excellent wall can outperform a square room with a cramped galley.
Two things are worth checking before the layout is fixed: the ceiling height, because it determines whether you get a usable high band above the hanging, and whether there is any ventilation. A closed room full of textiles with no air movement is worth raising with whoever is handling the mechanical work, particularly in a basement or an exterior-wall location.
The dimensions that decide everything
Each of these comes from something physical. Knowing what it is trying to accomplish is what lets you adjust it intelligently when a room does not cooperate.
Hanging depth — about 24 inches
What it is accomplishing: clearing the width of a garment on a hanger so nothing rubs the back wall or catches on the front edge.
A standard hanger is roughly seventeen to nineteen inches wide, and a garment on it sits square to the rod. Twenty-four inches of interior depth clears that comfortably. Twenty inches is workable where space is genuinely tight — coats and structured jackets will be a little compressed, shirts will be fine. Below that, garments foul the front edge every time you slide them.
Related: the rod itself wants to sit around twelve inches from the back wall, which centres the garment in the depth rather than pushing it against the back.
Rod heights — roughly 40 and 80 inches for double hang
What it is accomplishing: fitting two tiers of short-hang garments into one wall without the upper tier being out of reach or the lower tier dragging on the floor.
A shirt or jacket on a hanger occupies somewhere around forty inches from the top of the hook to the hem. Setting the lower rod near forty inches keeps the garment clear of the floor; setting the upper near eighty inches leaves room for the same garment above while staying within reach for most adults. The section as a whole wants roughly eighty-five inches of clear height.
These are starting points, not fixed values. If the people using the closet are shorter or taller than average, move the upper rod — the whole point of custom work is that it is built to its users. If the upper rod has to go higher to fit the elevation, that is a candidate for a pull-down rod rather than a compromise on reach.
Single and long hang
What it is accomplishing: keeping the longest thing you own off the floor. Shirts and jackets on a single rod want a little over forty inches beneath; coats, suits and most dresses around sixty; full-length garments seventy or more. Measure your own longest garment and size the tallest section to it — one gown sets the height of one section, not of the whole closet.
Walkways — 24, 30, 36 inches
What it is accomplishing: room for a body, plus room for whatever swings or slides out into that space.
- About 24 inches — enough to pass along a single run of storage. Adequate for a narrow single-wall closet where you are reaching in rather than standing.
- About 30 inches — enough to stand between two runs, turn, and open a drawer without backing into the shelving behind you. A sensible working minimum for a galley.
- 36 inches or more — comfortable for a U-shape, necessary around an island, and what you want if two people use the closet at the same time or if anyone has mobility considerations.
The walkway is measured between the fronts of the storage, not between the walls — a mistake that costs two feet and is usually discovered on site.
Shelf depth and spacing
What it is accomplishing: holding a folded stack that stays stable and stays visible.
Folded clothing wants roughly twelve to sixteen inches of depth. Deeper shelving does not store more; it stores the same amount with things lost at the back. Where a shelf sits above hanging in a twenty-four-inch-deep section, it will be deeper by default — that is the natural home for bulk and low-frequency items rather than daily knitwear.
Vertical spacing of ten to fourteen inches suits most folded stacks. The important part is that shelves are adjustable. What you own in five years will not match what you own now, and adjustability is the cheapest insurance in the whole closet.
Reach zones — the band between about 30 and 70 inches
What it is accomplishing: putting what you use daily where you can take it without stretching or crouching.
Roughly between hip and eye level is the comfortable zone, and it is where everyday clothing, the most-used drawers and everyday shoes belong. Below that band is good for footwear, deep drawers and laundry. Above it is the high band — the top of the elevation — which is genuinely useful storage for luggage, off-season clothing and occasion wear, and genuinely poor storage for anything you need on a Tuesday.
Clearances: the dimensions that are not about storage
- Drawer extension. A drawer needs its full depth of clear space in front to open. A deep drawer opposite a shallow run is fine; two deep drawer banks facing each other across a narrow walkway are not.
- Rod-to-shelf clearance. An inch or two between the rod and the shelf above, so hangers lift off without catching.
- Door swing. Both the closet door and any hinged cabinet doors inside it. Two hinged doors that meet in a corner will collide unless it is drawn.
- Island clearance. Enough on every side you intend to use — and if the island has drawers, enough for those drawers to extend fully.
- Mirror standing distance. A full-length mirror needs somewhere to stand far enough back to see yourself. A mirror at the end of a narrow closet shows you your shoes.
- Pull-out mechanisms. Trouser racks, shoe pull-outs and hampers all travel into the walkway.
The reliable test at the drawing stage: open everything at once, on paper. If two things collide, the plan is telling you something now rather than after installation.
Planning hanging zones by garment
Group by length first, then by category. Sorting by type alone produces ragged elevations with wasted volume under every short garment; sorting by length produces clean bands, and categories can be arranged within them.
Double hang takes shirts, blouses, folded trousers over a bar, and most jackets. This is where the majority of a typical wardrobe lives and where the capacity gain is largest.
Medium single hang takes suits, most dresses, and coats that are not full length. Suits benefit from a little more rod space per garment than shirts, and from not being compressed — a jacket crushed between neighbours loses its shoulder line.
Long hang takes full-length dresses, gowns and long coats. Most wardrobes need less of this than people allocate. Count honestly; one section is usually enough, and the space saved is better spent on double hang.
Two placement notes worth more than they sound. Put the long-hang section where the floor beneath it is not needed for anything else — often a corner, or beside the door where the swing already limits you. And keep the most-used band, typically the lower rod of a double hang, closest to the door: the closet gets used at speed on weekday mornings, and the geometry should reflect that.
Leave a small section of empty rod. Dry cleaning, a delivery, an outfit set aside for tomorrow — a closet with nowhere to put a transient garment ends up with it hanging on a door.
Folded storage: drawers, shelves, or both
Open shelving shows you everything and demands tidiness; drawers hide everything and forgive it. Most closets want both, and the split is a question of temperament as much as storage.
Knitwear is better folded than hung — a heavy sweater on a hanger stretches at the shoulders — and better on a shelf or in a deep drawer than compressed. Denim and heavier casual clothing stack well on shelves. T-shirts and everyday layers work either way, and drawers keep them out of sight.
Drawer depth is the decision that matters:
- Shallow — accessories, underwear, socks, jewellery, watches, ties, belts. Shallow drawers are the ones that benefit most from dividers, because the contents are small and mixed.
- Medium — folded t-shirts, layers, activewear. The everyday workhorse.
- Deep — knitwear, denim, bulk. Deep drawers are where full extension earns its keep, because without it the back third is effectively a lost shelf.
Put drawers inside the closet rather than keeping a dresser in the bedroom where the closet can absorb it. That is usually the single biggest gain in the bedroom itself.
Accessories and purpose-built drawers
Specialised organisers earn their place where items are small, similar and easily damaged. Everywhere else, a plain drawer and a divider will do.
Where they genuinely help:
- Watches. Individual cushioned recesses stop cases and crystals knocking together. A watch drawer is one of the clearest cases for a purpose-built insert.
- Jewellery. Compartments sized to what they hold, ideally lined, with slots or hooks that keep chains from tangling — the single most common complaint about jewellery storage.
- Sunglasses. Individual recesses, because lenses scratch against each other in a shared compartment.
- Cufflinks and small items. Small fixed compartments, since loose small objects migrate under everything else.
- Ties and pocket squares. Rolled in a divided shallow drawer, or hung on a rack — both work; the drawer is kinder to silk.
- Belts. Rolled in a divided drawer or hung. Hanging avoids a permanent curl in stiffer leather.
Lining matters more than the compartment layout for anything that scratches. A soft lining — felt, velvet or a similar material — is what protects a watch case or a lens, and it is a small addition at the point of specification.
Where a plain drawer is enough: socks, underwear, activewear, anything soft and self-similar. A fixed insert here reduces flexibility for no benefit. And a general caution — fixed compartments are sized to a collection at one moment in time. Removable trays and adjustable dividers keep working when the collection changes; a drawer routed into fixed recesses does not.
Put accessory drawers in the comfortable reach band, near where you dress and near a mirror. They are used at the end of getting dressed, and the layout should follow the sequence.
Shoes
Footwear is the category most often underestimated, because it varies more in size than anything else in the closet. A flat shoe and a knee-high boot are not the same storage problem, and a single shelf spacing applied to both wastes space on one and fails the other.
Plan in three groups. Flats, trainers and low shoes need modest spacing and stack efficiently. Heels need a little more height and are the best candidate for angled shelving, which presents the shoe face-on and makes a row readable at a glance. Tall boots need a dedicated full-height section — either standing on the floor beneath a long-hang run, or on a tall shelf — and they will slump without boot shapers.
Adjustability matters here more than anywhere else in the closet. Shoe collections change composition constantly, and fixed shelving locks in a ratio that will be wrong within a couple of years.
Angled shelves need a lip or rail to stop shoes sliding. Pull-out shoe systems give access to depth that would otherwise be lost at the back of a deep shelf — worth it in a deep run, unnecessary in a shallow one. Everyday shoes belong in the low reach band near the door; occasion shoes can go higher or deeper without complaint.
One practical note for this climate: if boots come into the closet wet or salted in winter, they want a surface that can be wiped rather than an open melamine shelf that will mark.
Bags, luggage and seasonal storage
Handbags hold their shape better standing upright with dividers between them than stacked — shelf dividers, cubbies or vertical separators all work. Structured bags want more room than they look like they need; soft bags can hang on hooks where wall space allows, and everyday bags are better on a hook near the door.
Luggage is the classic high-band item: large, light, and used a few times a year. The top of the elevation is exactly right for it, and planning for it is what stops suitcases living in a spare room. Measure your largest case before setting the high-band shelf height — it is a common oversight, and a shelf two inches too low makes the whole band useless for its main purpose.
Seasonal storage deserves more attention here than in milder places. A GTA wardrobe is effectively two wardrobes — heavy coats, boots and knitwear for roughly half the year, and a much lighter set for the other half. A closet planned only for what is in use today will overflow in November.
Laundry and hampers
Building the hamper into the closet is one of the small decisions that changes daily use, because clothes come off where you undress.
Pull-out hampers keep laundry off the floor, and two or three compartments allow sorting at the point of use rather than at the machine — which is where sorting actually saves time. Removable liners are what make the system usable; a fixed bin you cannot lift out means carrying armfuls downstairs. Ventilation is worth a thought, since a sealed cabinet holding damp gym clothing will smell, and some units are made with perforated backs for exactly this reason. Place it near where you undress rather than where it tucks in neatly on the plan — if it is not on the path, it will not be used.
Specialised closet hardware
The test for any mechanism is whether you can name the specific problem it solves in your closet. Each one adds cost and a moving part that can eventually need adjustment or replacement. Where the problem is real, they are excellent; where it is not, they are decoration.
For how hinges, drawer slides and cabinet construction work in general — side-mount versus undermount, how concealed hinges adjust, how boxes are built — see the complete guide to custom cabinets and built-in storage. What follows is specific to closets.
Pull-down wardrobe lifts
What it is: a rod on a hinged arm that pulls down and forward, bringing a high rod into reach. Where: high ceilings where an upper rod would otherwise be unreachable, or any closet with room for a third tier. Why: it converts dead height into usable hanging, a significant capacity gain in a tall room. What to consider: weight rating first — manufacturers publish capacities for these units, commonly around twenty-five to thirty-five pounds for standard models with heavier-duty versions available, and a rail of winter coats reaches a published limit faster than people expect, so check the figure for the specific unit against what you intend to hang. Then confirm the clearance the arm needs to swing down and forward into the walkway, and the mounting requirements, since these fix to cabinet sides and need sound fixing. A damped return is worth having on a unit used daily.
Valet rods
What it is: a short rod that slides out and retracts flush. Where: beside a mirror or wherever outfits get assembled. Why: it gives a temporary home to tomorrow’s outfit, a garment back from the cleaner, or the shirt you are deciding between — the transient items that otherwise end up on a door or a chair. One of the least expensive additions and among the most used. What to consider: it needs clear space in front to extend, so it belongs where the walkway is generous rather than at the pinch point. In a shared closet, one per user beats a single central rod.
Pull-out trouser racks
What it is: a frame of parallel bars on slides holding trousers full-length. Where: within a tall bank with the height for full-length hanging. Why: it avoids the crease across the knee that a folded bar produces, which matters for tailored trousers. What to consider: it consumes space that could hold a great many folded trousers, so it is justified by the kind you own rather than the number — for denim and casual trousers a shelf or folded bar is genuinely better. Check extension clearance and whether bar spacing suits your garments.
Tie and belt racks
What it is: a pull-out or swing-out rack with pegs or arms. Where: narrow leftover spaces, often the awkward gap at the end of a run. Why: it makes a whole collection visible at once, keeps belts from curling, and puts an otherwise useless gap to work. What to consider: capacity is fixed by the number of pegs, so count first — for a small collection a divided shallow drawer does the same job in less space.
Shoe pull-outs and angled shelving
What it is: shelves on slides, or fixed shelves set at an angle with a retaining rail. Where: deep shoe runs where the back of a fixed shelf is hard to see and harder to reach. Why: a pull-out recovers depth that would otherwise be lost; an angled shelf makes a row readable without pulling anything out. What to consider: angled shelves hold fewer pairs per shelf — you are trading capacity for visibility, so angle the section you choose from daily and keep the rest flat.
Hamper mechanisms
What it is: a pull-out frame carrying one or more removable bags or baskets. Why: laundry is contained, sorted at source and out of sight. What to consider: removable liners, ventilation, and extension clearance in front. Match the number of compartments to how you actually sort — three compartments used as one is wasted cabinet.
Corner and rotating mechanisms
What it is: carousels, swing-out trays and similar units that bring a corner’s contents out to the user. Why: a deep corner is otherwise close to unusable. What to consider: these are among the more expensive and mechanically complex items, and they suit kitchens — where corners hold heavy, awkward objects — better than closets, where shelving into the corner often solves the same problem for far less. Justify it against the simpler alternative first.
Slides, hinges and soft-close in a closet context
Two points that are closet-specific rather than general. Full extension matters most on deep drawers — without it the back third holds things you will forget you own, which in a closet means clothing you stop wearing. And soft-close is worth having on a closet used early in the morning, in a room usually adjoining a bedroom where someone may still be asleep.
Islands, mirrors and dressing areas
A full-length mirror is the one non-negotiable. It needs enough distance to step back from, and it should be lit from the front rather than from behind or directly overhead — overhead-only light casts shadows down the face and body, which is the opposite of what a dressing mirror is for. Where an island exists, a mirror at the end of the room usually has the standing room it needs.
A seat earns its place more often than people expect: putting on boots, fastening shoes, or simply not standing throughout. A bench with drawers or shoe storage beneath adds capacity rather than consuming it.
A folding surface — an island top, a bench, or a pull-out shelf — is where laundry gets put away without being carried to a bed. In a closet with no room for an island, a single pull-out shelf at working height does most of the same work.
An island’s top drawers are the best location in the closet for jewellery and accessories: comfortable working height, good light, close to the mirror.
Lighting a room with no windows
A closet is one of the few rooms where lighting quality has a practical, daily consequence: if the light renders colour badly, you will leave the house in the wrong clothes.
Colour rendering matters more than brightness
Colour Rendering Index describes how accurately a light source shows colour against a reference. In most rooms a mediocre figure is tolerable. In a closet it is not: at lower CRI values, dark colours collapse into each other — navy reads as black, charcoal reads as navy, dark green reads as black. Anyone who has matched a suit under closet light and discovered the mismatch outdoors has met this problem.
Specify a high-CRI source — 90 or above, and higher again if you can. It is the single most valuable lighting decision in the room and usually a modest cost difference.
Colour temperature
Colour temperature sets whether the light reads warm or cool. Very warm sources push everything yellow, which flatters a living room and misleads in a closet. Guidance for dressing spaces generally lands in the neutral range — warmer than an office, cooler than a bedside lamp — with cooler still preferred by people who dress before dawn and want something close to daylight.
Keep the temperature consistent across every fixture in the room. Mixing sources is what makes a closet feel subtly wrong, and it defeats the point of specifying good colour rendering in the first place.
Layers and placement
A closet wants at least two layers. Ambient light from the ceiling covers the room; place fixtures so they illuminate the face of the storage rather than only the middle of the floor, since a central fixture puts your own shadow onto whatever you are reaching for. Task and accent light goes into the cabinetry — LED strip or profile under shelves, along the front edge of hanging sections, and vertically between tall sections where a light strip washes the full height of a run.
Mount strip lighting in a channel with a lens over it rather than sticking bare tape to a shelf. The lens blends the individual diodes into a continuous line instead of a row of dots, and the metal channel carries heat away from the strip — which is the main thing determining how many years it lasts before it dims or fails.
Zones, dimming and sensors
Separate the layers onto separate switching. Full light for choosing an outfit, cabinet lighting alone for a quick grab, and a lower level at night are three different needs, and one switch cannot serve them.
Dimming has to be planned with the fixtures rather than after them: a light being LED does not make it dimmable, integrated fixtures carry drivers built for particular dimming methods, and the dimmer must suit both that method and the load. Confirm compatibility before ordering rather than after the first evening.
Door and motion sensors suit closets well — hands are usually full — but place the sensor where it triggers on entry rather than after two steps, and check whether it can be overridden when you want the light to stay on.
Coordinating the electrical work
Closet lighting sits at the junction of cabinetry and electrical, which is why it is so often left too late. Supply for cabinet lighting, the physical location of drivers and transformers, switch and sensor positions, and any dedicated circuit all have to be settled before the walls close — not when the cabinetry is installed.
ZaRRuS is not an electrical contractor. Electrical work is carried out by qualified independent licensed and insured trades, engaged and coordinated as part of the project. For how electrical contracting is licensed and inspected in Ontario, and what to verify before hiring, see how to choose an electrician for your renovation. For where these decisions fall in the wider build sequence, what to choose before a renovation starts sets out the milestones.
Materials and finishes
Closet interiors are a different problem from kitchen cabinetry: less moisture, heat and abrasion, but far more visible interior surface, because in a closet the inside is the room. In brief, and with the full comparison in the cabinets guide:
- Melamine — a decorated panel product and the most common closet interior. Hard-wearing, easy to clean, wide range of colours and wood-look finishes, and cost-effective for large runs. Edge quality is what separates a good melamine closet from a cheap one; look at how edges are banded.
- MDF and painted MDF — dense and uniform, with no grain to telegraph, which is why it takes paint so well. The right choice for painted shaker fronts and for detailed profiles. Heavier than melamine and less tolerant of standing moisture at cut edges.
- Veneer — real wood over a stable substrate. Gives genuine timber appearance with better dimensional stability than solid wood, and allows grain to be matched across a run, which is very visible on a long closet elevation.
- Solid wood — usually reserved for doors, frames and detail rather than carcasses, since wood moves with humidity and a wide panel is the least stable way to use it.
- Plywood — strong for its weight and holds fixings well, which matters where shelves carry real load or where a wall-hung system transfers weight to fixings.
Three closet-specific notes. Long shelves carrying folded knitwear and books-worth of weight will deflect over time, so shelf thickness, span and support are worth confirming rather than assuming. Interior colour has a real effect: a pale interior makes garments far easier to see, and a very dark interior looks striking and swallows light, which raises the importance of the lighting. And if the closet is below grade or on an exterior wall, raise moisture with whoever is planning the build — see basement renovations in Toronto for how those conditions are assessed.
Designing around the people who use it
Standard dimensions describe an average user. A custom closet has no obligation to serve an average user, and the main advantage of building one is the freedom to ignore the standard where the standard does not fit.
Height. Rod heights and the comfortable reach band shift with the person. For a shorter user, lowering the upper rod, keeping daily items out of the high band, and using pull-down rods turns unreachable storage into usable storage. For a taller user, the whole elevation can move up and gain capacity.
Accessibility and ageing in place. If mobility is a current or likely future consideration, plan wider walkways, generous turning space, and as much storage as possible in the comfortable band. Drawers beat high shelves, because a drawer brings its contents to you. Pull-down rods bring a high rod down. Seating helps with footwear. A closet planned this way is not a compromised closet — it is simply an easier one to use, which everyone benefits from.
Children. A child’s closet works best with a low rod they can reach, the rest of the elevation given to adult-managed storage, and the expectation that it will be rebuilt as they grow. Adjustable systems are what make that a change of shelf position rather than a new closet.
Routine. Someone who dresses for an office has a different closet from someone who dresses for a job site or works at home. Put what you reach for every morning closest to the door, at the easiest height. It sounds obvious and it is the thing most often got wrong.
Common walk-in closet planning mistakes
- Rail and shelf around the perimeter. The default layout, and the one that wastes the most volume — it ignores the fact that most garments are short.
- Designing before counting. The ratio of long-hang to short-hang to folded should drive the elevation, and it cannot until you have the numbers.
- Measuring the walkway between walls instead of between the fronts of the storage.
- Too much long hang. Most people allocate far more than their wardrobe needs.
- An island in a room that cannot take one. A good closet made cramped for a feature.
- Forgetting the door swing — sterilising a wall and a stretch of floor that could have been storage.
- Fixed shelving throughout. Locks in today’s wardrobe permanently.
- One shoe shelf spacing for every shoe. Boots and flats are different problems.
- Leaving lighting to the end, when supply, switching and driver locations all had to be settled before the walls closed.
- Low-CRI light, which makes dark colours indistinguishable.
- No mirror, or a mirror with nowhere to stand back from it.
- No seasonal plan, in a climate that effectively requires two wardrobes.
- Specifying mechanisms for their own sake without naming the problem each one solves.
- Packing the rods to capacity with no room to grow, which creases everything and makes the closet unpleasant.
Walk-in closets across Toronto and the GTA
Housing stock shapes what is possible, and it varies noticeably across the region.
In Toronto, much of the housing predates the walk-in closet as a standard feature. Primary bedrooms in older semis, Victorians and wartime houses were built with a shallow reach-in or nothing at all, so a walk-in usually has to be created — by borrowing from an adjacent bedroom, absorbing a hallway, taking space in a dormer or addition, or reconfiguring the floor. That makes the layout question unusually constrained and unusually rewarding, and it means the closet is rarely a rectangle. Sloped ceilings on upper floors are common and are best handled by putting folded storage and shoes under the low side and hanging under the full height.
In North York, the bungalows and side-splits that dominate much of the area tend to have generously sized primary bedrooms but small original closets. There is often room to take a section of the bedroom for a proper walk-in without touching the structure — one of the more straightforward closet projects in the region.
In Vaughan and Richmond Hill, newer housing generally provides a dedicated walk-in already, frequently with good ceiling height. The work is less about creating space than about making an existing space perform — replacing a builder’s single rail and shelf with a planned elevation, and using the height for a proper high band or a third tier on a pull-down rod.
In Markham, a similar picture, with the added point that larger primary suites are often big enough for an island or a dressing area — making the circulation question the main design decision rather than an afterthought.
Across the region, two constants. Winter drives the seasonal storage load, so plan for bulky coats and boots rather than treating them as an exception. And in a condominium, work affecting anything beyond the unit’s interior finishes generally needs the corporation’s approval before it starts, and delivery and elevator access have to be booked — see condo renovation. You can see the areas covered under service areas, including Toronto, North York, Vaughan, Richmond Hill and Markham.
A practical planning checklist
- Count the wardrobe in five categories and convert hanging into linear feet of rod.
- Measure the longest garment and the largest suitcase.
- Measure the room, including ceiling height, and note every door, window, vent, switch and slope.
- Resolve the door — swing, sliding or pocket — before anything else, since it decides which walls are usable.
- Choose the layout from the room’s width and door position, not from preference.
- Set the walkway first, then give the remaining depth to storage.
- Draw the elevations, assigning bands by garment length and placing daily items in the comfortable reach zone.
- Resolve every corner explicitly.
- Place drawers by depth, with accessories shallow and near the mirror.
- Plan footwear in three height groups, on adjustable shelving.
- Assign the high band to luggage and off-season, checking the shelf height against the largest case.
- Justify each mechanism by naming the problem it solves.
- Plan the lighting — layers, switching, high CRI, consistent colour temperature, sensor positions.
- Confirm electrical requirements with the licensed trade before the walls close.
- Open everything on the drawing — doors, drawers, pull-outs — and check nothing collides.
- Leave room to grow, and keep shelving adjustable.
How ZaRRuS approaches a walk-in closet
Closets are planned from the wardrobe inventory and the room’s geometry rather than from a catalogue of components. The sequence is the one above: count, resolve the door, set the circulation, then design the elevations around what actually has to be stored.
Dimensions are set to the people using the closet rather than to a standard, shelving is specified adjustable wherever it can be, and mechanisms are proposed only where there is a problem to point at. Lighting is treated as part of the design from the start, because its requirements have to reach the electrical trade before the walls close.
Where specialised licensed work is required, it is completed by qualified independent licensed and insured trades, engaged and coordinated as part of the project. This work sits under custom closets and millwork. You can see the standard of finish across completed work under selected work and experience, and how a closet fits into a wider scope under home renovation. Our process sets out how a project runs from first conversation to completion.
Frequently asked questions
How deep does a walk-in closet need to be for hanging?
About 24 inches of interior depth is the comfortable planning figure, because a standard hanger is roughly 17 to 19 inches wide and the garment needs to clear both the back wall and the front edge. Around 20 inches is workable where space is tight — shirts will be fine and coats slightly compressed. Below that, garments catch every time you slide them along the rod.
How wide should the walkway be in a walk-in closet?
Roughly 24 inches lets you pass along a single run. About 30 inches lets you stand between two runs, turn, and open a drawer without backing into the shelving behind you — a sensible minimum for a galley layout. Around 36 inches or more is what you want for a U-shape, around an island, where two people use the closet at once, or where mobility is a consideration. Measure between the fronts of the storage, not between the walls.
How high should closet rods be?
For double hang, the lower rod sits near 40 inches and the upper near 80 inches, which needs roughly 85 inches of clear height. Single hang for shirts and jackets wants a little over 40 inches beneath the rod; coats, suits and most dresses want around 60 inches; full-length garments 70 or more. These are conventions based on garment lengths and average reach — in a custom closet they should be adjusted to the height of the people using it.
How much hanging space do I actually need?
Count your garments and convert to linear feet of rod. As a working figure, hanging garments take roughly an inch of rod each, with structured items like suit jackets and winter coats closer to two. Forty shirts is therefore around three and a half feet of rod. Do this separately for long-hang and short-hang, since the ratio between them decides how much of the closet should be double hang — and add room to grow rather than planning to fill every inch.
Should a walk-in closet have an island?
Only if the room can keep a comfortable walkway on every side you intend to use, on top of the perimeter storage — in practice that means a fairly wide room, since an island creates two walkways instead of one. Where it fits, it adds drawer storage, a folding surface and an ideal spot for accessories. Where it does not, a shallow peninsula off one end or a bench with drawers beneath gives much of the benefit without making the closet hard to move through.
Are pull-down closet rods worth it?
They are, where a room has height that would otherwise be unreachable — they convert dead space into usable hanging. The things to check are the published weight capacity for the specific unit, which is commonly in the region of 25 to 35 pounds for standard models with heavier-duty versions available, the clearance the arm needs to swing down and forward into the walkway, and the mounting requirements. A rail of winter coats reaches a weight limit faster than people expect.
What kind of drawers work best for jewellery and watches?
Shallow drawers with compartments sized to what they hold, and a soft lining such as felt or velvet. Watches want individual cushioned recesses so cases and crystals do not knock together; jewellery wants slots or hooks that stop chains tangling; sunglasses want separate recesses so lenses do not scratch. Place them in the comfortable reach band near the mirror. Removable trays are usually better than fixed routed recesses, because a collection changes and fixed compartments do not.
What lighting works best in a walk-in closet?
Two layers — ambient light from the ceiling positioned to light the face of the storage rather than only the floor, plus LED strip or profile lighting under shelves, along hanging sections and vertically in tall runs. Specify a high colour rendering index, 90 or above, because at lower values navy reads as black and charcoal reads as navy. Keep colour temperature consistent across every fixture, put the layers on separate switching, and plan dimming with the fixtures rather than after them.
What materials are best for a custom closet?
Melamine is the most common closet interior — durable, easy to clean, cost-effective over large runs, with edge banding quality being the main thing to inspect. Painted MDF suits doors and detailed fronts because it has no grain to telegraph. Veneer gives real timber appearance with better stability than solid wood and allows grain matching across a long elevation. Plywood holds fixings well where shelves carry real load. Check shelf thickness and span for long shelves, since deflection over time is the common failure.
How do you plan a small walk-in closet?
Protect the walkway first and give everything else to storage on one wall done properly, rather than squeezing two runs into a room that cannot take them. Use double hang wherever garment lengths allow, take the elevation to the ceiling with a high band for luggage and off-season items, resolve the door — changing an inward swing to sliding or pocket can recover a whole wall — and keep shelving adjustable. A small closet planned around an accurate inventory usually outperforms a larger one that was not.
How should a shared closet be divided?
By requirement rather than by floor area. Count each person’s wardrobe separately, since one may be long-hang heavy and the other short-hang and folded heavy, then allocate accordingly. Give each person a contiguous zone rather than interleaving, ideally on opposite walls, so neither has to reach across the other on a weekday morning. Shared items like luggage and occasion wear belong in the high band or a dedicated section rather than split arbitrarily.
In short
Plan a walk-in closet in this order: count what you own and convert it to linear feet of rod, resolve the door, protect the walkway, then design the elevations around garment lengths with everyday items in the comfortable reach band. The standard dimensions — roughly 24 inches of hanging depth, rods near 40 and 80 inches for double hang, walkways of 24, 30 or 36 inches depending on the layout — all come from the size of clothing and the reach of the body, which is why they can be adjusted intelligently once you know what each one is for.
Keep shelving adjustable, justify every mechanism by naming the problem it solves, plan for a climate that needs two wardrobes a year, and specify lighting that shows colour honestly. A closet that fits the person and the wardrobe will outperform a larger one that fits neither.
Planning a custom closet in Toronto or the GTA? Request a consultation and we will measure the space and work through the layout with you. Our renovation FAQ covers how projects are planned and run.